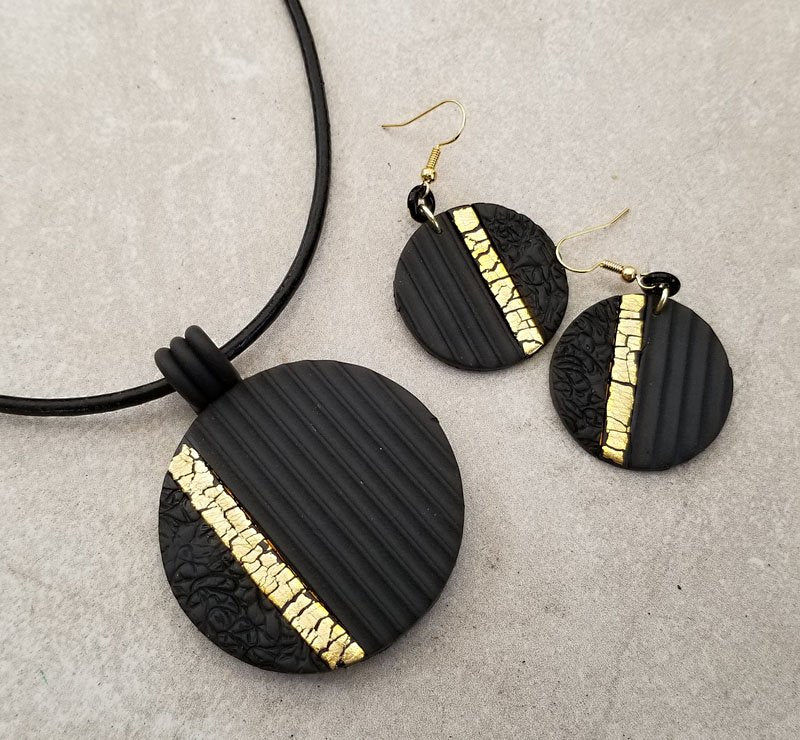
Souffle Matte Black and Foil Jewelry Set
Souffle Matte Black and Foil Jewelry Set
Read More
Matte Black clay and Metallic Foils make a dynamic duo when combined with textures and shapes! A little something sleek and shiny to wear for your holiday festivities!
Design by syndee holt
Read Less
ADDITIONAL SUPPLIES
Items for texture – stamps, or household products like I’ve used – a soap saver sponge and a small piece of shelving paper; gold metallic leaf foil; small spray bottle of water; extruder with 7 circle die (optional); small sharp scissors; needle tool; instant glue; earring findings and necklace of your choice

Project Instructions
- Getting Started:
Start with clean hands, unwrap and knead clay until soft and smooth, or condition by running clay though a Pasta Machine. We recommend using a designated machine for clay purposes only. When working with multiple colors, clean hands with soap and water or baby wipes (we have found that baby wipes work best) before switching colors. Shape clay, pressing pieces firmly together. Wash hands after use.
- Baking:
Sheet out about 1/3 to ½ of the block on conditioned Poppy Seed clay on the #3 or middle setting on your pasta machine. Carefully lay the sheet of clay face down on a sheet of the foil. Use the sharp scissors to help cut away any excess foil and tuck it back into the package. Flip the clay over and lightly rub the metallic foil to make sure that you have full contact with the clay sheet. Set aside.


Sheet out another ½ of the conditioned Poppy Seed clay and texture it with one of your two textures. Remember to spray a light mist of water on either the texture material or the sheet of clay so that the clay won’t stick to the texture! Repeat with the second texture.

Roll out a thin sheet of the remaining Poppy seed that is at least 2x2 inches (this is a backing sheet so about a #4 on the pasta machine). Cut a thin strip of the foiled clay and crackle the texture by lightly pulling on the ends of the strip or by pressing lightly with your finger onto the foil. Place onto the backing sheet. Square up one edge on each of the textures so that you can butt them with no gaps on either side of the foil strip as shown.

I used the largest round cutter to select my design and press firmly into the clay sheets. Set aside this circle of clay.

Cut two earrings as well – you may need to restack/retexture your clay to do so (Souffle is so great and releasing stacked layers super easy!). I used the second to smallest circle cutter. Use your needle tool to put a hole in the top of each of the earrings – remember to reverse the pattern for the second earring!

Create the bail for the pendant by rolling out a thin snake of the remaining Poppy Seed clay or use the extruder. Cut three pieces about 2 inches long. Stroke the pieces together lightly with your fingers. Gently roll up one end as shown - the edge of the looped clay should just touch the "tail" of the clay.


Bake the pendant, earrings and bail as directed in Step 1. It’s important that the bail is standing as shown and not on its side or already attached to the pendant.
After the clay has baked and cooled, apply a light coat of the Sculpey Gloss Glaze to the strip of foiled clay ONLY. Allow to dry. Glue the bail to the back of the pendant and add the jump rings to the earring and the ear wires. NOTE: I also included a 6mm black nylon ring to my jump ring. You can also use a gold jump ring!

Do you have the Sculpey Teardrop cutters as well? You can use your leftover foiled Poppy Seed clay to cut out 2 small circles of the foiled clay. Then use the remaining Poppy Seed clay to cut out 2 of the largest teardrop shapes. Use the needle tool to add holes for hardware and bake. Once the clay is baked, brush a light coat of the Sculpey Gloss glaze to the foiled circles of clay. The glaze can be used to attach small pieces of foil to fill in blank spots as well! Allow the glaze to dry before assembling. I added some chain remnants to the jump ring between the teardrop shape and the circle. (I KNEW I saved those bits of chain for SOMETHING!)


