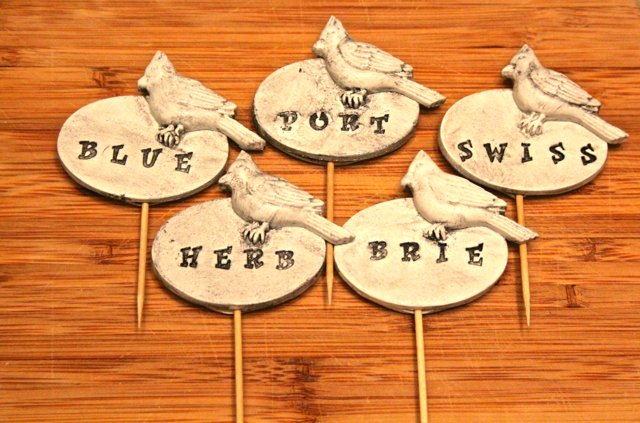
Sculpey Soufflé Party Cheese Markers
Sculpey Soufflé Party Cheese Markers
Read More
These clever cheeses markers will be the talk of your party, especially when you tell everyone that you created them yourself.
Read Less
ADDITIONAL SUPPLIES
Letter stamps
Black Acrylic Paint
Paint brush
Paper towels
Smooth even work surface, like a tile or a sheet of glass
Toothpicks
Decorative mold of your choice – I used the Martha Stewart Frosty Elegance|Letter stamps
Black Acrylic Paint
Paint brush
Paper towels
Smooth even work surface, like a tile or a sheet of glass
Toothpicks
Decorative mold of your choice – I used the Martha Stewart Frosty Elegance

Project Instructions
Getting Started Polymer clay may stain. CLAY MAY DAMAGE UNPROTECTED FURNITURE OR FINISHED SURFACES. DO NOT USE polymer clay on unprotected surfaces. We recommend working on the Sculpey clay mat, wax paper, metal baking sheet, or disposable foil. Start with clean hands and work surface area. Knead clay until soft and smooth. For best results, clean your hands in between colors. Shape clay, pressing pieces together firmly. Bake on oven-proof glass or metal surface at 275°F (130 °C) for 30 minutes per ¼" (6 mm) thickness. For best baking results, use an oven thermometer. DO NOT USE MICROWAVE OVEN. DO NOT EXCEED THE ABOVE TEMPERATURE OR RECOMMENDED BAKING TIME. Wash hands after use. Baking should be completed by an adult. Begin by preheating oven to 275 °F (130 °C). Test temperature with oven thermometer for perfectly cured clay. For best results, condition all clay by working small amounts in your hand until smooth and soft.
After conditioning your clay roll it out at the 2nd thickest setting of your Clay Conditioning Machine. Divide it in two sheets that are large enough to accommodate multiple oval cut outs.

Gather the following supplies: largest oval cutter and word stamps. Cut out an even number of tops and bottoms. Stamp the words into the lower half of the top piece. Bake according to directions above. Remove from oven and allow to cool.

Make a molded embellishment for each of your markers. Condition the clay and press into the mold. Remove the excess clay and then remove from mold. Bake according to thickness. Allow to cool before handling.
Apply a thin line of Liquid Sculpey to the back of the stamped piece and place on top of the back piece. Gently press together. Place a toothpick in-between the layers. Wiggle it around a tiny bit so it can be removed and can be replaced after each use. Smooth our any rough edges.
Apply a thin line of Liquid Sculpey to the back of the molded embellishment and gently press onto the top right corner of the piece. Smooth our any rough edges. Gently place stamped and embellished side up on the baking sheet.

Bake according to directions above and with the toothpick in place Remove from oven and allow to cool.
Remove tooth pick. Brush paint over the entire piece. Use a paper towel to remove the excess. Allow to dry.


