
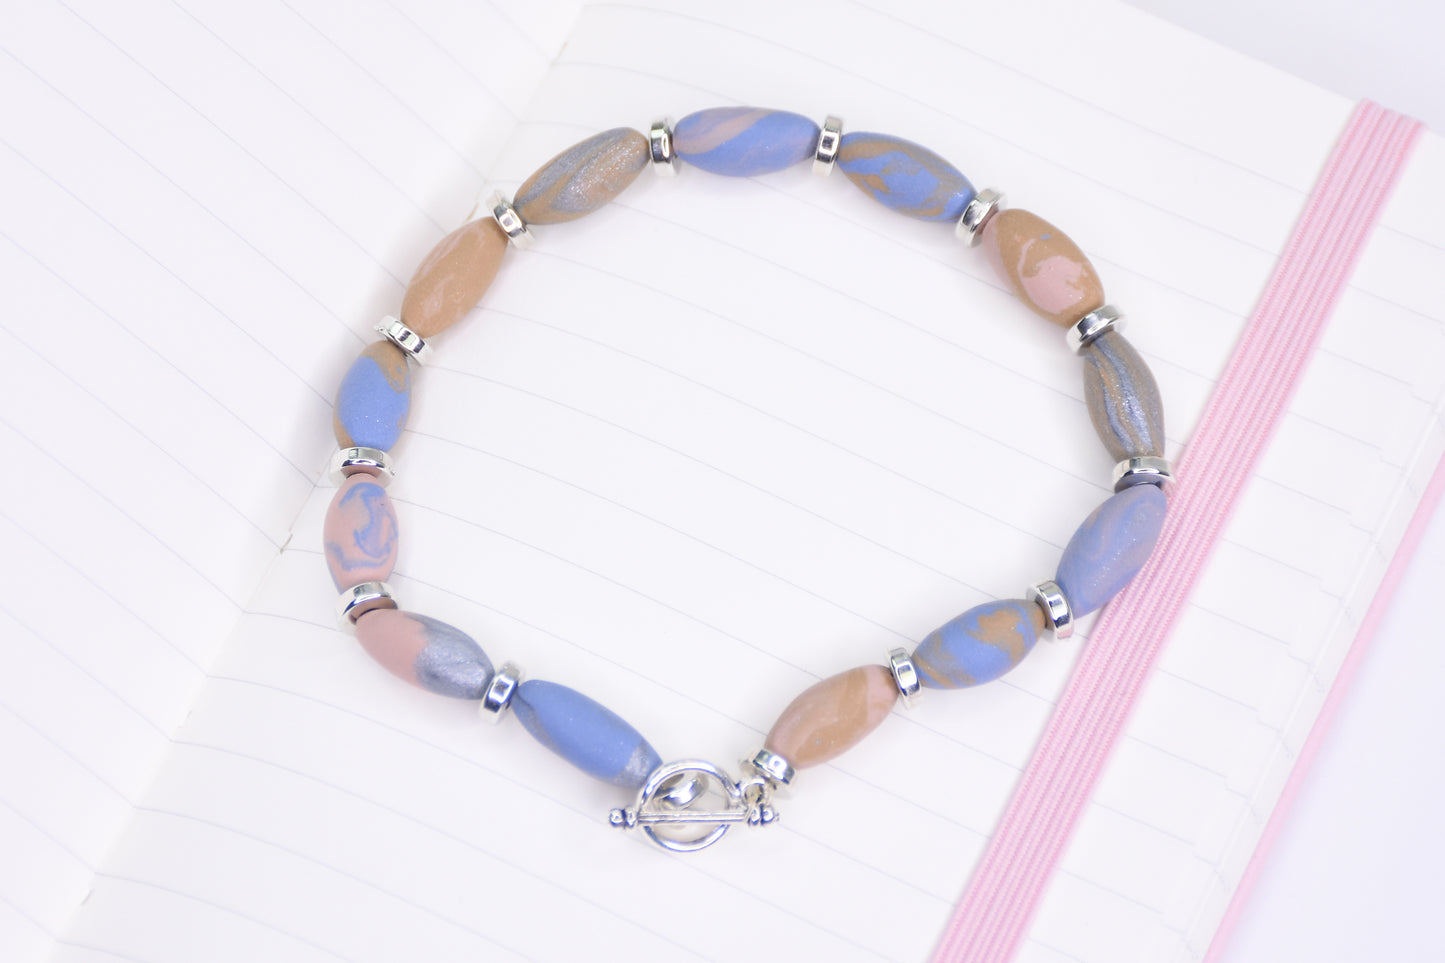
Sculpey Soufflé™ Marbled Bead Bracelet
Sculpey Soufflé™ Marbled Bead Bracelet
Read More
Showcase the delicate charm of the all-new Souffle Almond Rose when creating this unique faux enamel bracelet!
TIME TO COMPLETION: apx 60 minutes
Read Less
ADDITIONAL SUPPLIES
- Ruler
- Scissors
- Elastic string
- Silver spacer beads
- Small circle clay cutter
- Toggle bracelet findings
- Crafters Dremel mini drill
Project Instructions
Step 1
Step 2

Step 3


Step 4

Step 5

Step 6

Step 7

Step 8

Step 9

