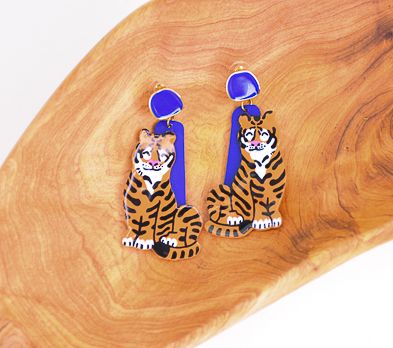
Sculpey Soufflé™ Koi Tiger Earrings
Sculpey Soufflé™ Koi Tiger Earrings
Designed by Lauren Medina
Read More
Read Less
Sculpey Soufflé™ Koi is the perfect base color for these cool tiger earrings. Team the tigers up with a Sculpey Premo™ Ultramarine Blue background. Then use your paint pens to add the tiger striping details.TIME TO COMPLETION: 40 minutes to make 30 minutes to bake
ADDITIONAL SUPPLIES
Printable Tiger Earring Shape Download
- Exacto type blade
- Instant glue
- Posca paint markers in black, white and light pink
- Resin and curing light (optional) OR: Sculpey Satin or Gloss Glaze
- Needle tool for placing assembling holes

Project Instructions
Step 1
- Getting Started:
Start with clean hands, unwrap and knead clay until soft and smooth, or condition by running clay though a Pasta Machine. We recommend using a designated machine for clay purposes only. When working with multiple colors, clean hands with soap and water or baby wipes (we have found that baby wipes work best) before switching colors. Shape clay, pressing pieces firmly together. Wash hands after use.
- Baking (also called Curing):
Step 2
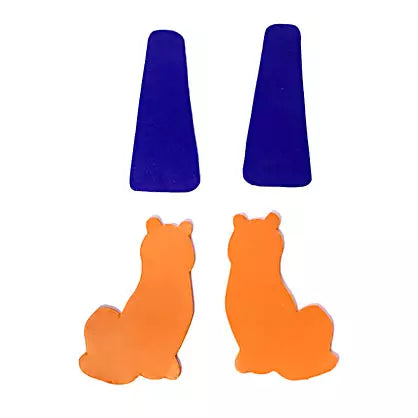
Download the PDF or reference this line drawing for your earring shapes/sizes. Printing on cardstock is best to create your stencil but regular copy paper will work too. Cut out your paper stencil. You should have a tiger body and a tapered rectangular shape with rounded edges both shapes about 2 inches tall.
Step 3
After conditioning, roll out 1/4 bar of Soufflé Koi to about 1/16 inches thick. If using a pasta machine use setting 6 (7 is the thickest setting on my machine). Use a baby wipe to clean off your machine before running the next color through.Adjust your setting to 5 on your pasta machine, roll out enough Ultramarine Blue clay for two thin tapered rectangular shapes.
Using your paper stencils cut out two pairs of tigers and tapered rectangles.
Make sure you flip the stencils over for the second shape so that you mirror the design and they won’t face the same direction.
Place holes for assembling in top center of the purple triangles.

Step 4
Bake your pieces according to the directions in Step 1 above on a tile, index card or silicone mat according to the directions above. Allow the pieces to cool.
Step 5
Apply a thin layer instant glue to the back of the tiger and quickly sandwich the back triangle to the tiger. Remember to make mirrored pieces!
Step 6
After the glue has dried, use a fine tip white, black and pink posca (acrylic) paint marker to draw on your details. Try your best to mirror your designs. Your stripes can look however you’d like - no two tigers are the same after all!Let each color dry before layering another color on top.
I started with the forehead pattern and white around the eyes.
When drawing the chin/chest area you may need to apply 2 coats for an even, bright white coloring. Remember to let the first layer dry before adding the second, it will take a few minutes. It will look a little bit like a white beard, but trust the process!
You’ll end up with 2 adorable tigers.
Artist tip: you can use a hair dryer to speed up the paint pen drying time.

Step 7
(OPTIONAL) Add a thin layer of UV resin to the tigers to give your designs an extra shine and fully protect your hand drawn designs. Fully cure the resin according to the resin directions. You can also use Sculpey Gloss or Satin Glaze instead of resin!
Step 8
Now to assemble your earrings! I’m using blue enamel studs with a loop fused to the back, 4 mm and 7 mm jump rings per pair. Depending what fastening/stud you’re using this may differ.
Step 9
Voilà! You’ve got yourself some adorable statement earrings. Nice work!

