Sculpey Soufflé™ Citron Terrazzo Swinging Earrings
Sculpey Soufflé™ Citron Terrazzo Swinging Earrings
Designed by syndee holt
Read More
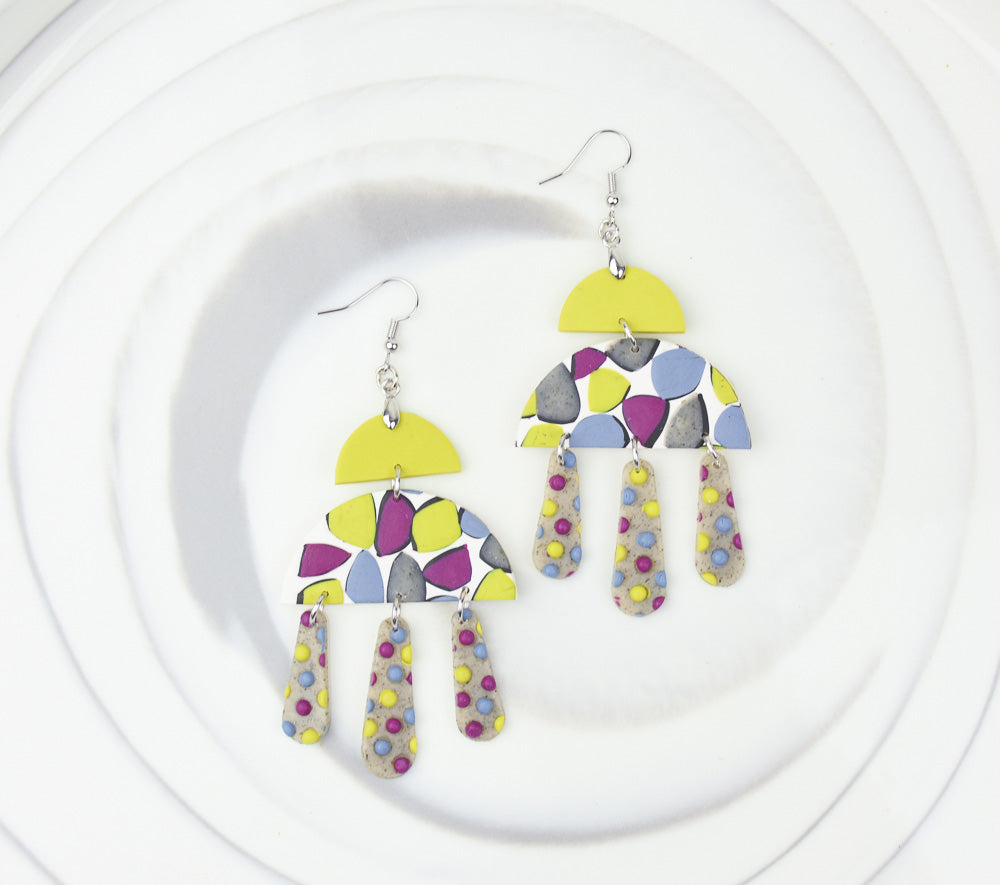
Sculpey Soufflé™ Citron teams up with Soufflé™ Turnip and Bluestone with a hint of texture from Premo™ Gray Granite to create these wonderful swingy tiered earrings.
TIME TO COMPLETION: 45 minutes to make/assemble 30 minutes to bake
Read Less
ADDITIONAL SUPPLIES
- Small cutters for the bottom swings (mine are Leather punch cutters from Amazon)
- 6 mm silver-toned jump rings (8)
- Ear wires in silver-tone (2) (I’m using pinch bail ear wires)
- Coffee tamper or similar slightly rounded tool (small drawer knobs will often work)
- Patty paper or small pieces of smooth paper (2)
- Needle tool, jewelry pliers
- OPTIONAL: Small piece of graphing paper

Project Instructions
- Getting Started:
Start with clean hands, unwrap and knead clay until soft and smooth, or condition by running clay though a Pasta Machine. We recommend using a designated machine for clay purposes only. When working with multiple colors, clean hands with soap and water or baby wipes (we have found that baby wipes work best) before switching colors. Shape clay, pressing pieces firmly together. Wash hands after use.
- Baking:
Sheet or roll out small pieces of Bluestone, Citron, Turnip and Gray Granite on a fairly thin setting (#4 on my Atlas 180). My pieces are about 1x2 inches or a little smaller.
Make a sheet Of Poppy Seed on the same thickness that is about 4x5 inches. Add your colored pieces and trim the Poppy Seed to the size/shape of each color.
Make a sheet Of Poppy Seed on the same thickness that is about 4x5 inches. Add your colored pieces and trim the Poppy Seed to the size/shape of each color.

Sheet out a small piece of Igloo on a medium setting (#3 on my machine) that is just big enough to accommodate the 2-inch round cutter.

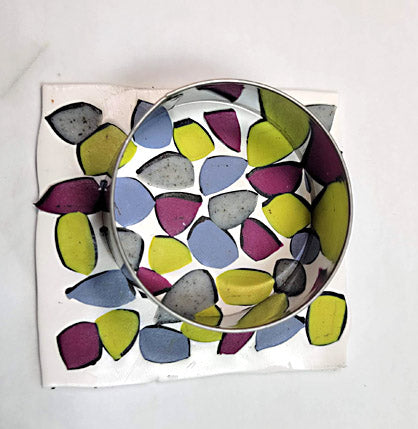
Now the fun begins! Start cutting out very small shapes of the colors and collage them onto the Igloo backing sheet. Make sure to leave some space between each piece so that when we press them into the Igloo sheet they won’t spread and touch each other.

Once your sheet is sufficiently covered, move the sheet onto a small piece of patty paper or clean white paper.

Place another sheet of paper on top and use your rounded tool, like my coffee tamper, to push STRAIGHT DOWN on the clay. Move the tamper after pushing and continue. We don’t want to press down and move while pressing because this will smear our graphic designs we cut!
The pressure will cause that backing sheet of Poppy Seed to come out and provide contrast framing for each of the colors.
The pressure will cause that backing sheet of Poppy Seed to come out and provide contrast framing for each of the colors.

Slowly peel a corner up to check that your pieces are all pushed in and there are no pieces sticking up still. Remove the paper completely.
Isn’t that great how the small pops of contrast from the Poppy Seed really sets off the colors and finishes the edges?
Isn’t that great how the small pops of contrast from the Poppy Seed really sets off the colors and finishes the edges?

Choose your favorite section and cut out your circle. NOTE: You *may* want to slide your blade between the clay sheet and the bottom paper first to loosen the clay sheet before you cut.

I like to use graphing paper to help me find center and cut straight! Cut your circle in half and set aside.

Make a small sheet of Premo Gray Granite on a medium setting. Make small pieces of each of the other 3 colors on same setting.
Use the small Etch n’ Pearl to punch out dots of color and add them to the Gray Granite sheet. Check often to see if you have enough dotted area to use your cutters.
Use the small Etch n’ Pearl to punch out dots of color and add them to the Gray Granite sheet. Check often to see if you have enough dotted area to use your cutters.

Check often to see if you have enough dotted area to use your cutters. I used one larger cutter for the center and 2 smaller of the same shape for the edges. Then I added more pearls to create the pieces for the second earring. Set aside for now.

Sheet out a small piece of the Citron on the medium (#3) setting and use the .75 circle cutter to cut out a circle.
Cut the circle in half as shown. This will be the top portion of the earring assembly.
Cut the circle in half as shown. This will be the top portion of the earring assembly.

Lay your earrings out either on your worksurface or the graphing paper (I strongly recommend that!) and put your holes for hanging. Repeat for both earrings.
Bake as directed in step 1 above and allow to cool.
Bake as directed in step 1 above and allow to cool.

The earring on the right is complete and the earring on the left shows my jump rings and ear wire ready to assemble.

Here is a look at my finished pair of earrings, just waiting to get “swingy” on someone’s ears!!!!


