Skip to product information
1 of 1

Sculpey Soufflé™ Beaded Bow Earrings

Sculpey Soufflé™ Beaded Bow Earrings

Designed by Precious Nunez
Read More
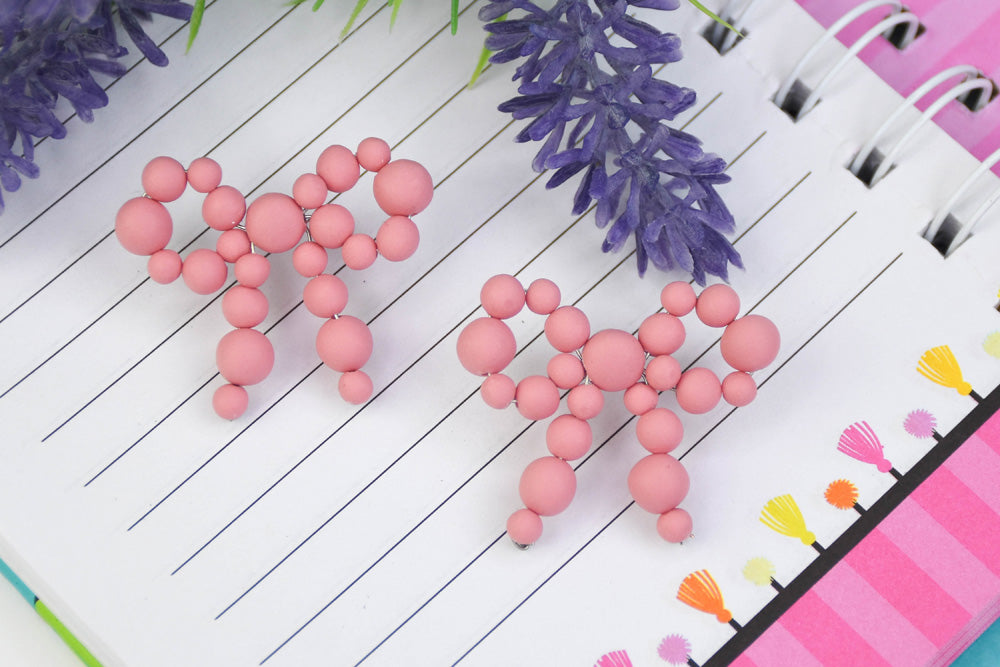
Make these quick, easy, and cute beaded earrings using Sculpey Souffle new French Pink! Here is your new statement piece to make your outfits pop! TIME TO COMPLETION: about 1 hour
Read Less
ADDITIONAL SUPPLIES
  • Silver 24 gauge craft wire
  • Jewelry pliers (round nose/flathead)
  • Wire cutters
  • Super Glue
  • (2) 6mm Earring posts and backings
  • Tiny circle clay cutters


View full details
Project Instructions

Step 1

Getting Started:

Please make sure your work area is covered and you are not working on an unprotected surface. We recommend working on the Sculpey® Oven-Safe Work Mat, wax paper, metal baking sheet, or disposable foil. Uncured clay may damage unprotected furniture or finished surfaces. Be sure to cover your crafting area appropriately.

Start with clean hands, unwrap and knead clay until soft and smooth, or condition by running clay though a Pasta Machine. We recommend using a designated machine for clay purposes only. When working with multiple colors, clean hands with soap and water or baby wipes (we have found that baby wipes work best) before switching colors. Shape clay, pressing pieces firmly together. Wash hands after use.

Baking (also called Curing):

Begin by preheating oven to 275 °F (130 °C). After you are done creating; for best results bake/cure clay on an oven-proof surface such metal, aluminum foil, an index card or the Sculpey® Clay Mat at 275°F (130 °C) for 30 minutes per 1/4" (6
mm) thickness according to package directions. Oven safe glass or ceramic
surfaces are also acceptable for baking/curing; however please note that the
baking/curing times may take longer as the glass or ceramic surfaces take
longer to heat up. For best baking results, use an oven thermometer. DO NOT USE
MICROWAVE OVEN. DO NOT EXCEED THE ABOVE TEMPERATURE OR RECOMMENDED BAKING TIME.

Step 2

Roll 3 slabs of clay on the thickest setting of your clay machine.

Take 3 different-sized small circle clay cutters, these will be your beads. Make
several cutouts as shown in the photo.

Note: I started with 12 of each size but this may vary on the size of beads and the size of earrings being made. You may need to make more beads, keep that in mind.

Step 3

Form the cutouts into balls and slide them onto the skewers in a twisting motion to keep the original ball shape. Reshape any beads that may have lost shape. Keep a 1-inch space between beads on the skewer.

Bake according to Step 1 above.

Step 4

Cut a piece of 7-inch wire. Place beads onto the wire leading with the bead you’re going to have as the middle piece and place various-size beads sporadically through the wire (Mine took 7 beads not counting the center bead).

Step 5

Feed the end of the wire piece you were beading into the center bead, so it comes out the bottom of the opposite end as shown in the picture to replicate the shape of a bow. Use your flathead pliers to help you thread the wire if it becomes too difficult to pull yourself.

Step 6

Repeat Step 5 to form the other side.

Step 7

Bead the bottom wire with a few beads, cut the long excess wire if needed leaving
about a ½ inch of wire. Take your round-nose pliers and create a little loop to
secure the beads in place.

Repeat for the opposite side.

Step 8

Fold the loop onto itself with the flathead pliers and flatten. Flip the loop to the back end of the bead where it will not show.

Step 9

Super glue the earring post to the back of the center bead for each earring and finish with the earring backs.