
Sculpey Premo™ Flower Cane Earrings
Sculpey Premo™ Flower Cane Earrings
Designed by Amy Koranek
Read More
A “Cane” is a two-dimensional image that is built into a three-dimensional log. The log can then be sliced and the slivers applied to almost any project you can imagine. By first making simple canes - Bull’s Eye, Jelly Roll, and Triangle - you can then combine them into a complex cane like a Flower Cane. In this tutorial we will make all three simple canes and then use them to produce the Flower Cane for earrings. COMPLETION TIME:
2 Hours to make, bake, and assemble
Read Less
ADDITIONAL SUPPLIES
- Silver tone ear wires (2 per pair)
- 8 mm Silver tone jump rings (2 per double dangle earrings)
- 6 mm Silver tone jump rings (2 per double dangle earrings)
- 4 mm Silver tone jump rings (2 per double dangle earrings)
- 8 mm Silver tone oval jump rings (2 per teardrop earrings)
- 4 mm Silver tone jump rings (2 per teardrop earrings)
- 6 mm Silver tone jump rings (2 per open circle earrings)
- 4 mm Silver tone jump rings (2 per open circle earrings)
- Flat nose pliers
Project Instructions
- Getting Started:
Start with clean hands, unwrap and knead clay until soft and smooth, or condition by running clay though a Pasta Machine. We recommend using a designated machine for clay purposes only. When working with multiple colors, clean hands with soap and water or baby wipes (we have found that baby wipes work best) before switching colors. Shape clay, pressing pieces firmly together. Wash hands after use.
- Baking (also called Curing):
We will start by making the simple Bull’s Eye Cane which will later be used as the center of the Flower Cane.
From 1/4 bar White make a little sheet 1/8” thick or the thickest setting on the pasta machine.
Then make a little log from 1/4 bar Sunshine. Trim the White sheet so it is as wide as the log.
From 1/4 bar White make a little sheet 1/8” thick or the thickest setting on the pasta machine.
Then make a little log from 1/4 bar Sunshine. Trim the White sheet so it is as wide as the log.

Trim a straight edge across one of the short sides of the sheet. Wrap the log in the sheet. Where the sheet touches itself, trim a straight edge.

Butt the edges of the sheet together and smooth the seam with your fingertips.
Roll the log gently to smooth the outside.
You have now completed a Bull’s Eye Cane. You can continue wrapping the Bull’s Eye one layer at a time to add additional colors if desired. We will stop here with just 2 colors for the purpose of this tutorial.
Roll the log gently to smooth the outside.
You have now completed a Bull’s Eye Cane. You can continue wrapping the Bull’s Eye one layer at a time to add additional colors if desired. We will stop here with just 2 colors for the purpose of this tutorial.

“Reducing” is how we decrease the diameter of the cane and increase the length of the cane at the same time. Reducing allows us to make large canes that can be reduced to smaller identical canes.
Reduce the cane by carefully rolling it on the work surface. Roll the cane carefully until it is 4.5” long.
Reduce the cane by carefully rolling it on the work surface. Roll the cane carefully until it is 4.5” long.

Slice the cane in half with the Clay Blade. Set 1/2 aside for later use.

From one half of the Bull’s Eye Cane in Step 6, reduce this portion to 14” and slice it into 7 equal sections, 2” in length.
NOTE: You may need to reduce to slightly longer than 14” if your ends are not usable, so that you have 7 equal pieces without having to use the wonky ends.
NOTE: You may need to reduce to slightly longer than 14” if your ends are not usable, so that you have 7 equal pieces without having to use the wonky ends.
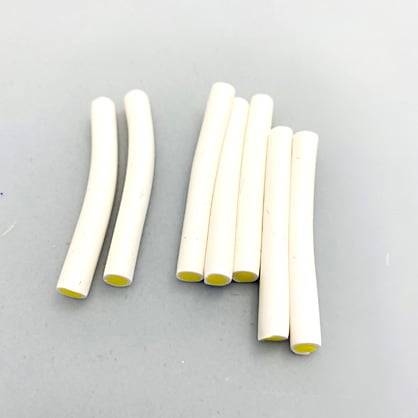
Bundle the canes together as shown. Push them together carefully so that they come into contact with each other

Carefully roll the cane on the work surface to smooth the outsides.
Technically, you have now made a Flower Cane with just two colors.
Set this aside for later use as the center of our multi-color Flower Cane.
Technically, you have now made a Flower Cane with just two colors.
Set this aside for later use as the center of our multi-color Flower Cane.

Now we will make a Jelly Roll Cane and use it to create petals for our Flower Cane.
NOTE: In this written tutorial, I am using three colors to create the Jelly Roll Cane. In the video tutorial, I used only the Lavender and the Purple to create a two-color Jelly Roll Cane. Either one is perfectly fine for the building of the Flower Cane. After I made the three-color version, I felt that the Light Pink was not very visible, so I eliminated it from the video tutorial.
Sheet 1/4 bar Light Pink, 1/4 bar Lavender, and 1/4 bar Purple to 1/8” thick or the thickest setting on the pasta machine. You will want each sheet to be similar in shape and size.

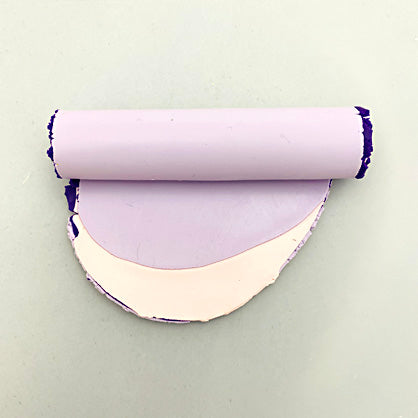
Layer the colors with the Purple in the middle.

Roll the colors to press them together.
 x
xSheet the three stacked colors together through the pasta machine on the thickest setting, feeding the short edge into the machine first to create a long thin sheet and to make sure the colors are bonded together.
Fold this long sheet in half lengthwise.
Fold this long sheet in half lengthwise.

Roll over the folded edge of the long sheet to bond both halves together.

Turn the sheet 1/4 turn (narrow side)and roll it up starting with the previously folded edge.
Trim the uneven edge of the sheet straight before sealing it to the edge of the cane.
You have now created a Jelly Roll Cane.
Now we will change it to a Petal shape.
Start by reducing the cane to 10” long.
You have now created a Jelly Roll Cane.
Now we will change it to a Petal shape.
Start by reducing the cane to 10” long.

Flatten the edge of the cane along the seam with fingertip pressure to make it more oval in shape.

Divide the flattened cane into four pieces about 2” long or as long as the center of the Flower Cane we made in Step 9.

Cut each of the four pieces from Step 18 lengthwise, creating eight pieces that are flat on one side and rounded on the tops, like little arches. When you cut this way, you are slicing with the stripes inside the Jelly Roll.

Reduce the center cane we made from Step 9 to about 1/4” in diameter and 8” long. Cut the cane into four equal sections about 2” long.
Bundle them together as shown.
Bundle them together as shown.

Roll gently to create a new Speckle Cane about 2” long. If you want to use some of this cane for the Double Dangle Earring Design, then make it a little longer than 2” so that you have extra.
Slice off the extra and set it aside for finishing later.
Slice off the extra and set it aside for finishing later.

Stand the petal canes up around the center cane.

If the bases of your petals are too wide, you can shave them off at an angle so they sit more closely together around the center as you can see in Photo 22.

We will next work on the filler needed to place in between the petals to help them hold their shape.
Reduce the 1/2 piece we set aside in Step 6 to 1/4” in diameter. You may need to reduce more depending on the size of your Flower Cane, but 1/4” is a good place to start.
Reduce the 1/2 piece we set aside in Step 6 to 1/4” in diameter. You may need to reduce more depending on the size of your Flower Cane, but 1/4” is a good place to start.

Pinch the side of this Bull’s Eye Cane all along one side so that the cane changes from a circle shape to a teardrop shape.

The size of the teardrop needs to be small enough to tuck it into the spaces between the petals.
You can make it as small as needed by carefully stretching it.
Divide the teardrop shaped cane into eight equal sections.
You can make it as small as needed by carefully stretching it.
Divide the teardrop shaped cane into eight equal sections.

Push the teardrop shapes in between the petals.

If the teardrops are sticking out from the petals, you can shave away the excess clay so that the cane remains round in shape.

The Flower Cane is now built and ready to be reduced.

Carefully reduce the cane by rolling it on the work surface.
Reducing canes takes practice and you will find the method that works best for you. But begin by starting in the middle and rolling outward toward the ends applying even pressure as you roll.
Reducing canes takes practice and you will find the method that works best for you. But begin by starting in the middle and rolling outward toward the ends applying even pressure as you roll.
 photo shows reducing the cane
Reduce the cane to around 1/2” in diameter.

Carefully slice the cane in half to reveal the flower in the center.
If you like you can keep some of the cane at 1/2” in diameter and you can reduce some of it even smaller depending on your needs for your finished projects.
If you like you can keep some of the cane at 1/2” in diameter and you can reduce some of it even smaller depending on your needs for your finished projects.

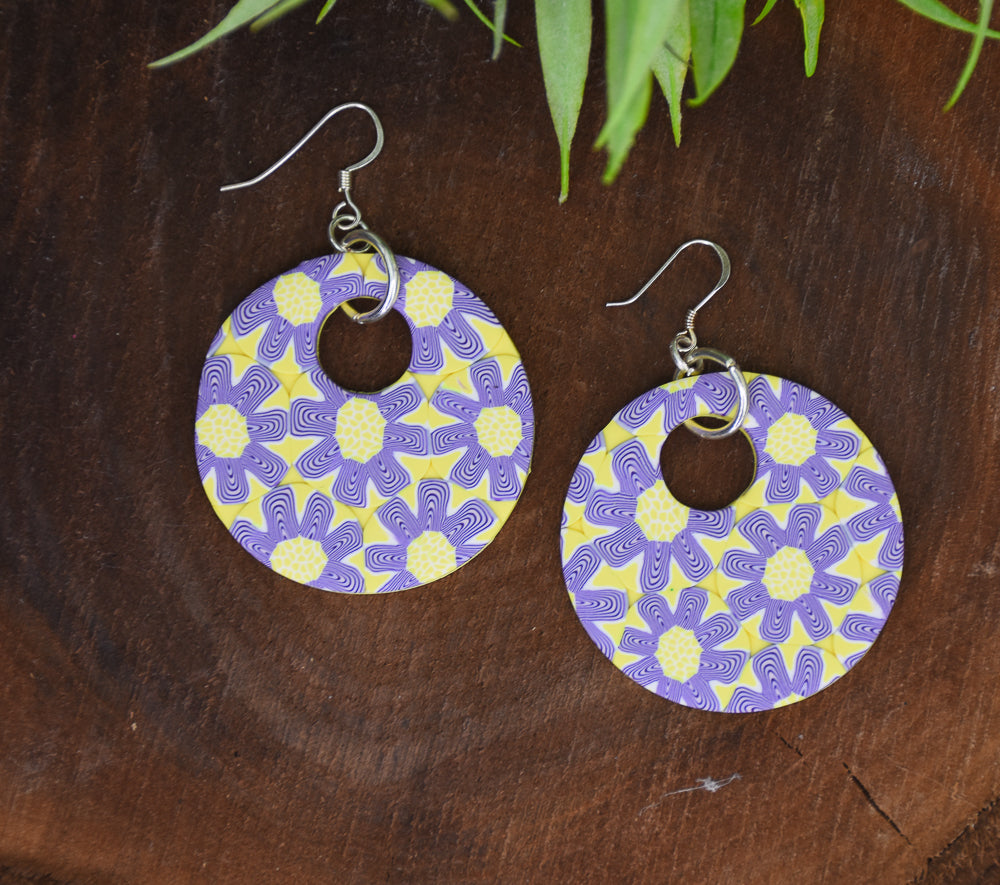
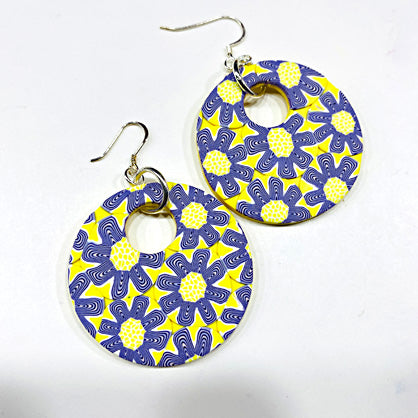
For the Open Circle style earrings, sheet 1/4 bar Sunshine on the thickest setting on the pasta machine.

Cut very thin slices of the Flower Cane and lay them sides touching on the sheet to create a wallpaper.
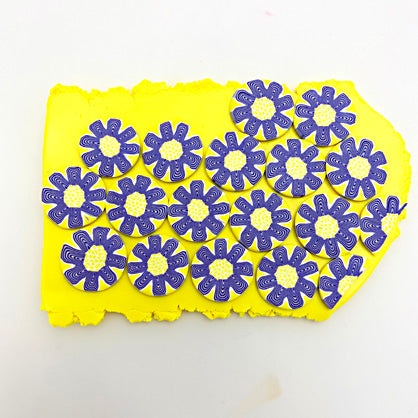
Carefully roll over the wallpaper background to seal all the slices together and attach them to the backing.

Cut out 2” circles using the circle cutters. Remove an off-center circle with a 1/2” circle cutter.
Use your needle tool to make the holes for hanging.
Bake/cure the circles following the baking instructions for Sculpey Premo™ and allow to cool completely before handling.
Use your needle tool to make the holes for hanging.
Bake/cure the circles following the baking instructions for Sculpey Premo™ and allow to cool completely before handling.

To assemble, use flat nose pliers to open the large jump rings. Add a smaller jump ring to the large one as well as the open circle clay shape. Use flat nose pliers to close the jump ring.
Use flat nose pliers to add ear wires to the small jump ring.
Use flat nose pliers to add ear wires to the small jump ring.
You can also use very thin slices of the Flower Cane to cover irregular shapes.
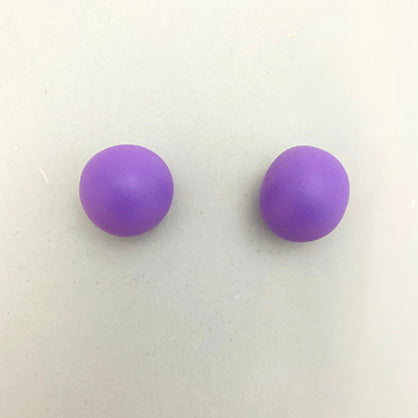
Combine the scraps from previous steps to make a new color.

Use equal amounts of the new color to make 3/4” balls.
Shape the equal sized balls into thick teardrops.

Flatten the teardrops with your fingertips making irregular teardrops.

Add thin Flower Cane slices to the top of the teardrop shapes.

Smooth the cane slices to the background color and push them around the edges of the shapes smoothly.

Layout the earrings as you want them to finish. Poke holes as needed in the tips of the teardrops for later assembly.
Bake/cure the teardrops following the baking instructions for Sculpey Premo™ and allow to cool completely before handling.
Bake/cure the teardrops following the baking instructions for Sculpey Premo™ and allow to cool completely before handling.

Use flat nose pliers to attach the oval jump rings to the small jump rings and the clay piece.

Use flat nose pliers to add ear wires.

For the Double Dangle style, I used some of the left-over cane I had from making the center pieces for the Flower Cane as the top button. And two slices of Flower Cane as shown here.

Layout your earring design and poke holes as needed for jump ring assembly.
Bake/cure the clay pieces following the baking instructions for Sculpey Premo™. Allow to cool completely before handling.
Bake/cure the clay pieces following the baking instructions for Sculpey Premo™. Allow to cool completely before handling.

Use flat nose pliers to assembly the earrings with jump rings as shown.

Use flat nose pliers to add ear wires.
