Skip to product information
1 of 1

Sculpey Premo™ Corkscrew Earrings

Sculpey Premo™ Corkscrew Earrings

Designed by Amy Koranek
Read More
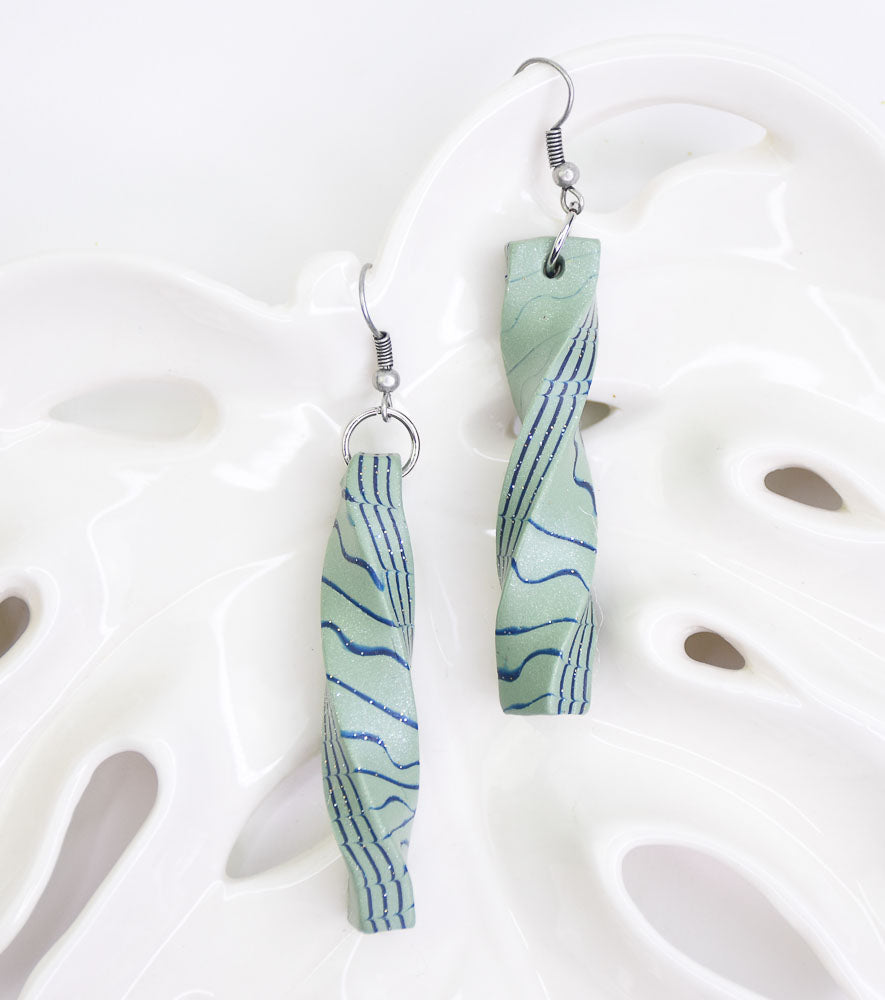
Glittering twists of color elegantly set these earrings off from the norm. These earrings will go from jeans to cocktail attire with no problem. Perfect to pack for a vacation! TIME TO COMPLETION: 60 Minutes to make, bake, and assemble
Read Less
ADDITIONAL SUPPLIES
  • 8 mm Silver tone jump rings (2)
  • Silver tone ear wires (2)
  • Flat nose pliers
View full details
Project Instructions

Step 1

Getting Started:

Please make sure your work area is covered and you are not working on an unprotected surface. We recommend working on the Sculpey® Oven Safe Work Mat, wax paper, metal baking sheet, or disposable foil. Uncured clay may damage unprotected furniture or finished surfaces. Be sure to cover your crafting area appropriately.

Start with clean hands, unwrap and knead clay until soft and smooth, or condition by running clay though a Pasta Machine. We recommend using a designated machine for clay purposes only. When working with multiple colors, clean hands with soap and water or baby wipes (we have found that baby wipes work best) before switching colors. Shape clay, pressing pieces firmly together.  Wash hands after use.

Baking:

Begin by preheating oven to 275 °F (130 °C). After you are done creating; for best results bake clay on an oven-proof surface such as metal, aluminum foil, an index card or the Sculpey® Oven Safe Work Mat at 275°F (130 °C) for 30 minutes per ¼" (6 mm) of thickness according to package directions. Oven safe glass or ceramic surfaces are also acceptable for baking; however please note that the baking times may take longer as the glass or ceramic surfaces take longer to heat up. For best baking results, use an oven thermometer. DO NOT USE MICROWAVE OVEN. DO NOT EXCEED THE ABOVE TEMPERATURE OR RECOMMENDED BAKING TIME.

Step 2

Sheet Sage Pearl to the thickest setting on the pasta machine or 1/8” thick with an
Acrylic Clay Roller.

Sheet Galaxy Glitter to the fourth thickest setting on the pasta machine or 1/16”
thick with an Acrylic Clay Roller.

You will need approximately one 2” square of each color.

Step 3

Layer the Galaxy Glitter on top of the Sage Pearl. Use the roller to seal them
together and to press out air bubbles. Tip: when doing a simple Mokume Gane
technique like this one, it’s good to put the darkest color on top because this
is the color that will be carried through the design and will show up the best
in small details.

Step 4

Use the roller to press the sheets together and to extend them to about double in length.

Step 5

Cut the new sheet in half and layer it as shown creating a striped slab. Roll over it
to seal the slab.

Step 6

Cut the striped slab in half and stack it one more time. Roll the slab gently to seal
it.

Step 7

You should now have a slab that is about 1” wide and 2”-3” long.

Step 8

Use the Wavy Blade to cut the slab into a few random sections. Bending the blade for some of the section cuts will add interest.

Step 9

Push the sections back together like a puzzle.

Step 10

Use the Flexible Blade to cut sections between the original Wavy cuts.

Step 11

Push the sections back together like a puzzle. Make sure all the little pieces fit and
sides are touching.

Step 12

Use hand pressure from the sides of the slab to push all the cuts back together.

Step 13

Roll the slab to heal the cuts. Once the surface of the slab is level, the rolling is
complete. Do not thin the slab at this point.

Step 14

Flip the slab over and roll the back side as well just to make sure it’s level.

Step 15

Time to shave off the top layer to see the pattern. This will work best if you
carefully roll the slab one more time, Galaxy Glitter side up, to the work
surface to stick it down.

Use the Flexible Blade to shave thin layers of clay off parallel to the slab.

Step 16

Here’s an intermediate view of the pattern as it’s revealed from the thin layer
removal.

Step 17

Keep removing thin layers to reveal the entire pattern.

Step 18

Next use the Rigid Blade to cut the shape of the earrings. My earring shapes are 5/16” wide x 2” long.

Grab the ends of the long rectangle with fingertips and gently twist to create the
corkscrew shape. This is a view of one twisted and one not yet twisted.

Step 19

Twist both rectangles and match the number of twists. I twisted mine in opposite
directions to create a mirror image set.

Step 20

Pinch the tops of the shapes to barely thin them. Poke a hole through this area with the Blunt Point Tool for earring assembly.

Place the pieces on baking batting or polyester batting to cradle their odd shapes
and keep them from touching the baking surface.

Bake following the baking instructions for Sculpey Premo™.

Step 21

Allow to cool completely before handling.

Step 22

Here’s the layout for the earrings.

Step 23

Assemble using flat nose pliers to open and close jump rings.