
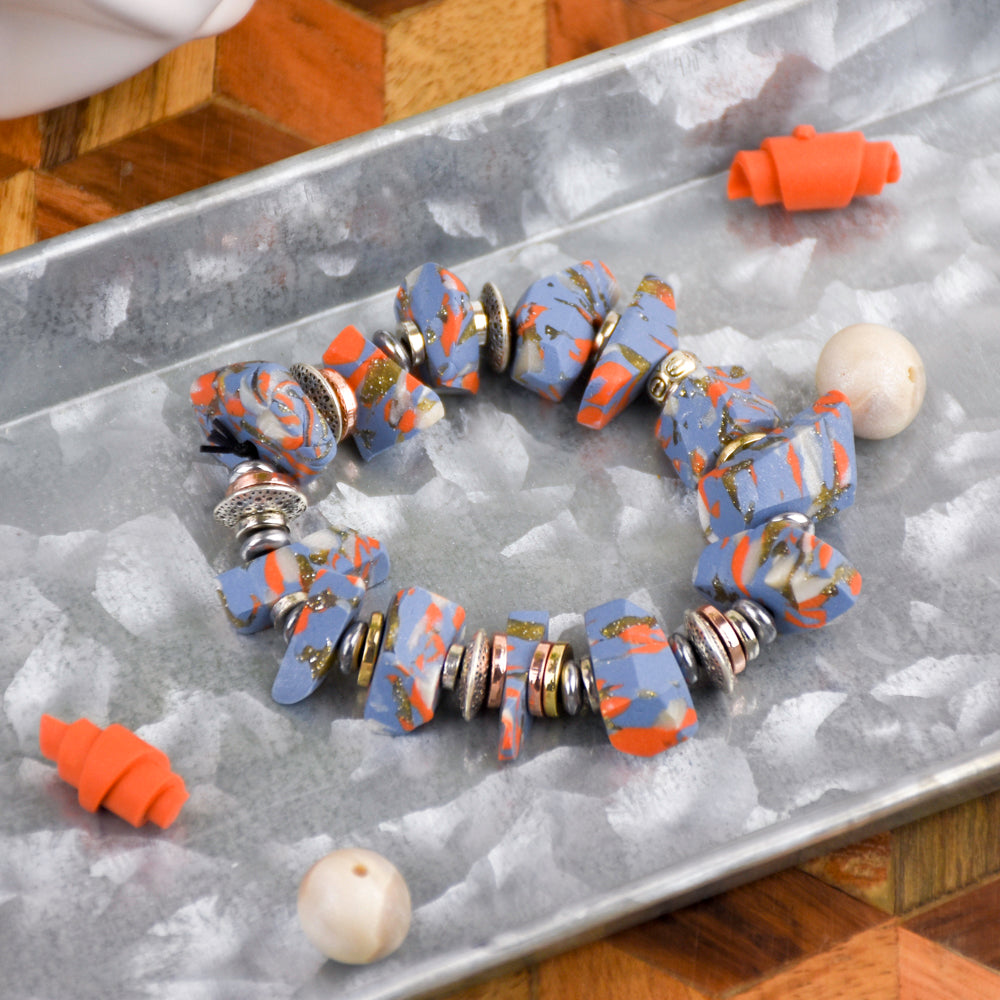
Sculpey Premo™ and Sculpey Soufflé™ Faux Stone Bracelet
Sculpey Premo™ and Sculpey Soufflé™ Faux Stone Bracelet
Read More
Combine glittering Premo colors with organic Souffle colors to create these unique faux stones. Add some cool metal finish beads mingle with your new faux stones.
TIME TO COMPLETION:
90 Minutes to make, bake, and assemble
Read Less
ADDITIONAL SUPPLIES
- 18” Black gossamer floss or
- 9” Black stretch elastic
- Beading needle
- Scissors
- Metal spacer beads mixture – 33 total of different sizes
Project Instructions
Step 1
Step 2

Step 3

Step 4

Step 5


Step 6

Step 7

Step 8

Step 9
