
Sculpey III® Pastel Gradient Space Earrings
Sculpey III® Pastel Gradient Space Earrings
Designed by Precious Nunez
Read More
Read Less
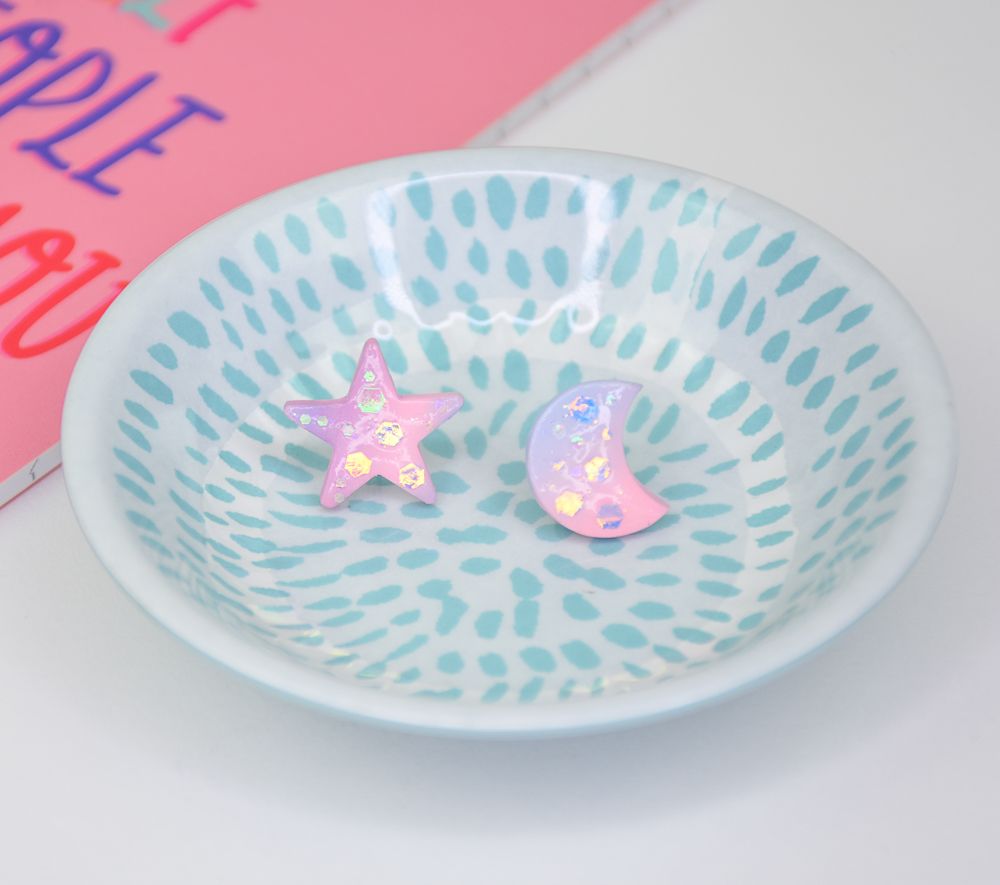
These pastel gradient space earrings are a fun yet simple way to make your very own pair of cute earrings with a touch of iridescent shimmer and a few Sculpey colors! Practice making cool gradients with this awesome project! Time to complete:Sculpting time approximately 20 minutes, 15 minutes to bake
ADDITIONAL SUPPLIES
- Toothpick
- Iridescent glitter in either Gold, silver, or opal
- Small star and moon cutters
- Super Glue
- 2 Flat earring backings
Project Instructions
Step 1
- Getting Started:
Start with clean hands, unwrap and knead clay until soft and smooth, or condition by running clay though a Pasta Machine. We recommend using a designated machine for clay purposes only. When working with multiple colors, clean hands with soap and water or baby wipes (we have found that baby wipes work best) before switching colors. Shape clay, pressing pieces firmly together. Wash hands after use.
- Baking (also called Curing):
Step 2
Roll out three balls of pink, purple, and blue.To make these colors I mixed bits of colored clay large amounts of white clay in a ratio 3:1 to get a pastel tone. Red + Blue = Purple, Red + White = Pink

Step 3
Shape each ball into chunky raindrops and place each of them facing opposite ends (bottom/top/bottom) as shown in the image. Slightly press them down so they stick together.
Step 4
Set your clay machine to the thickest setting and place the clay in vertically. Your clay should appear close to the image shown after the first roll.
Step 5
Fold the bottom half of the clay sheet vertically onto itself and continue to roll through the pasta machine till you reach the desired effect. Always fold/roll the clay sheet vertically.
Step 6
After continuous passes through the clay machine, your sheet should look something like this. Feel free to smooth out any rough edges or textures that may have transferred through the process.
Step 7
Cut out a star and a moon with your clay cutters onto the sheet, the best area to cut is where multiple colors are blending to catch a nice gradient in your piece. Bake according to Step 1.
Step 8
After baking, glaze each piece with a thin layer of glaze and quicky place your glitter onto the cut outs. If you are using chunky glitter like I have, slightly dip your toothpick in glaze and place glitters onto each cut out surface. Once dried, place more glaze over the piece to seal in the glitter.
Step 9
Flip them over and super glue the earring backing onto the star and moon.
Step 10
Here's a look at my completed earrings!