Skip to product information
1 of 1

Sculpey III® Christmas Terrarium Ornament

Sculpey III® Christmas Terrarium Ornament

Designed by Amy Koranek
Read More
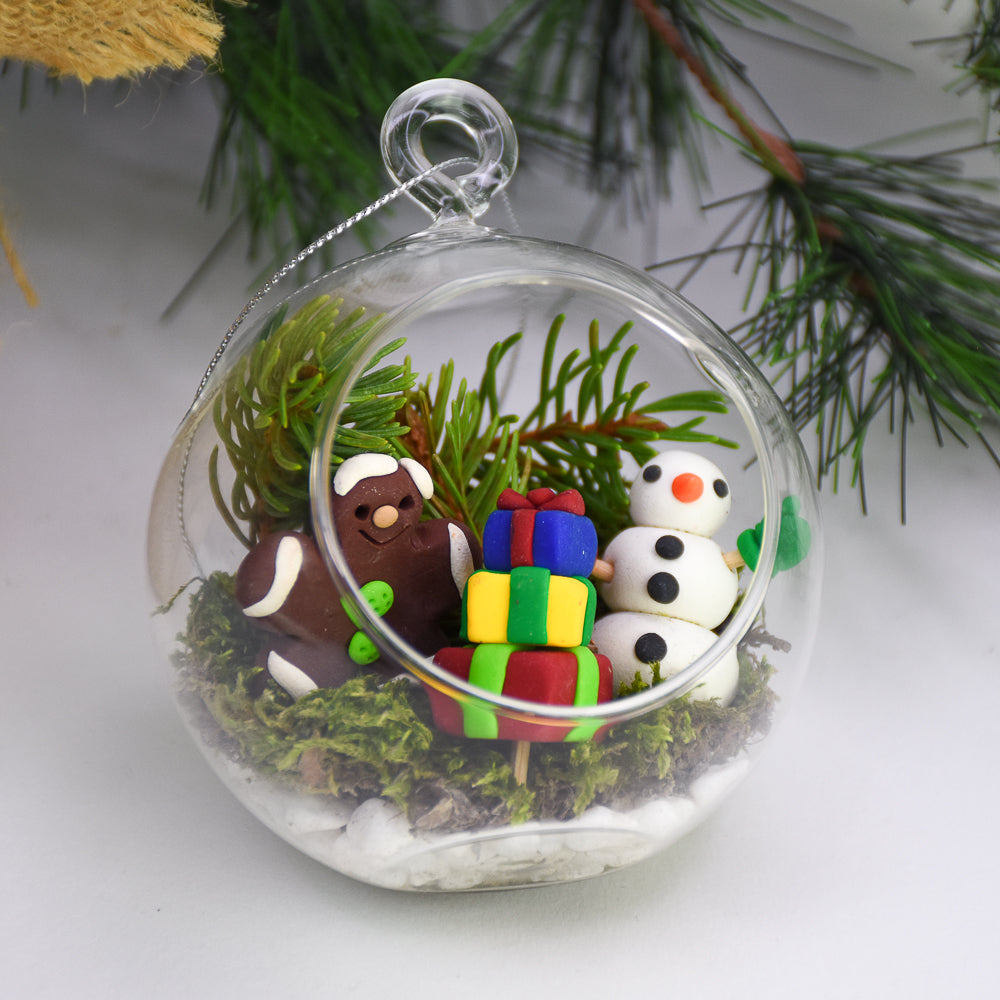
How fun is this little holiday ornament? Create your own little holiday scene in a short afternoon! TIME TO COMPLETION: 90 Minutes to make, bake, and assemble
Read Less
ADDITIONAL SUPPLIES
  • Toothpicks (4)
  • Wire cutters
  • Terrarium ornament kit - mine included a glass ball, hanging cord, rocks, red moss, little Santa, jingle bell and tiny pine cone
View full details
Project Instructions

Step 1

Getting Started:

Please make sure your work area is covered and you are not working on an unprotected surface. We recommend working on the Sculpey® Oven
Safe Work Mat, wax paper, metal baking sheet, or disposable foil. Uncured
clay may damage unprotected furniture or finished surfaces.
Be sure to
cover your crafting area appropriately.

Start with clean hands, unwrap and knead clay until soft and smooth, or condition by running clay though a Pasta Machine. We recommend using a designated machine for clay purposes only. When working with multiple colors, clean hands with soap and water or baby wipes (we have found that baby wipes work best) before switching colors. Shape clay, pressing pieces firmly together.  Wash hands
after use.

Baking:

Begin by preheating oven to 275 °F (130 °C). After you are done creating; for best results bake clay on an oven-proof surface such as metal, aluminum foil, an index card or the Sculpey® Oven Safe Work Mat at 275°F (130 °C) for 15 minutes per ¼" (6 mm) of thickness according to package directions. Oven safe glass or ceramic
surfaces are also acceptable for baking; however please note that the baking
times may take longer as the glass or ceramic surfaces take longer to heat up. For
best baking results, use an oven thermometer. DO NOT USE MICROWAVE OVEN. DO NOT EXCEED THE ABOVE TEMPERATURE OR RECOMMENDED BAKING TIME.

Step 2

Here’s a look at what came in the terrarium kit that I used. I used only the glass ball, hanging cord, white rocks, jingle bell, and tiny pine cone.

Step 3

I filled the bottom of the terrarium ornament just to level with the white rocks. This gave me an idea of how much room I would have for my decorative elements.

Step 4

Next I took a field trip! I found some little pine swags that look like trees in the back.

Step 5

I also harvested some moss from under a tree and placed it on top of the rocks. The little pine swags and moss will stay green for a while with a spritz of water every few days. You can always change these natural elements out as you wish. You could try an air plant too!

Step 6

Let’s make a little snowman for our terrarium. From 1/8 bar (these are 1 ounce bars) create a small, medium, and a large ball.

Step 7

Cut a toothpick that will go through the balls but not poke out the top. The toothpick will add support and also give you an anchor to poke into the moss for standing. I cut the toothpick with wire cutters.

Step 8

Push the balls together and push the toothpick up through them.

Step 9

Poke a hole in the face with the Blunt Point Tool. Make a carrot shape for the nose.

Step 10

Add the nose to the hole. Add Black coal eyes and buttons.

Step 11

Cut the tips off of another toothpick. Push into the sides of the snowman body so they are just long enough to hold on the mittens.

A mitten consists of two round bits of clay and a small teardrop of clay

Step 12

Add mittens to the toothpicks. Set the snowman aside for baking later.

Step 13

The Red gift box is 1/8 bar of Red clay. Make a cube shape. Flatten Granny Smith with the Roller to make ribbons.

Step 14

Wrap the ribbons around the package but don’t put any on the bottom so the package will sit flat.

Step 15

Make a smaller (1/16 bar) Yellow package, and an every smaller (1/32 bar) Blue package. Make ribbons for each one. For the Yellow wrap in Emerald Green ribbon and for the Blue wrap in Red ribbon.

Step 16

Stack the packages up on a trimmed toothpick.

Step 17

Next lets make a gingerbread man. From 1/8 bar Chocolate make five equal sized teardrops. Place them together with the points in the center.

Step 18

Flatten the teardrops with the Roller.

Step 19

Use the Blunt Point Tool to add more details where the teardrops meet.

Step 20

Add White frosting to the arms, legs, and hair. Add a tan nose. Add Granny Smith buttons. Add a smile and eyes with the tools. Trim a toothpick and push it upward into the body for support.

Bake the snowman, presents, and gingerbread man following the baking instructions for Sculpey III®.

Step 21

Allow to cool completely before placing them in your terrarium. Use tweezers to push the toothpicks down into the moss. Add in the tiny pine cone. Add the jingle bell to the hanging cord before attaching it to the glass ornament.