Skip to product information
1 of 1

Sculpey Bake Shop® Rainbow Coil Pots

Sculpey Bake Shop® Rainbow Coil Pots

Designed by Amy Koranek
Read More
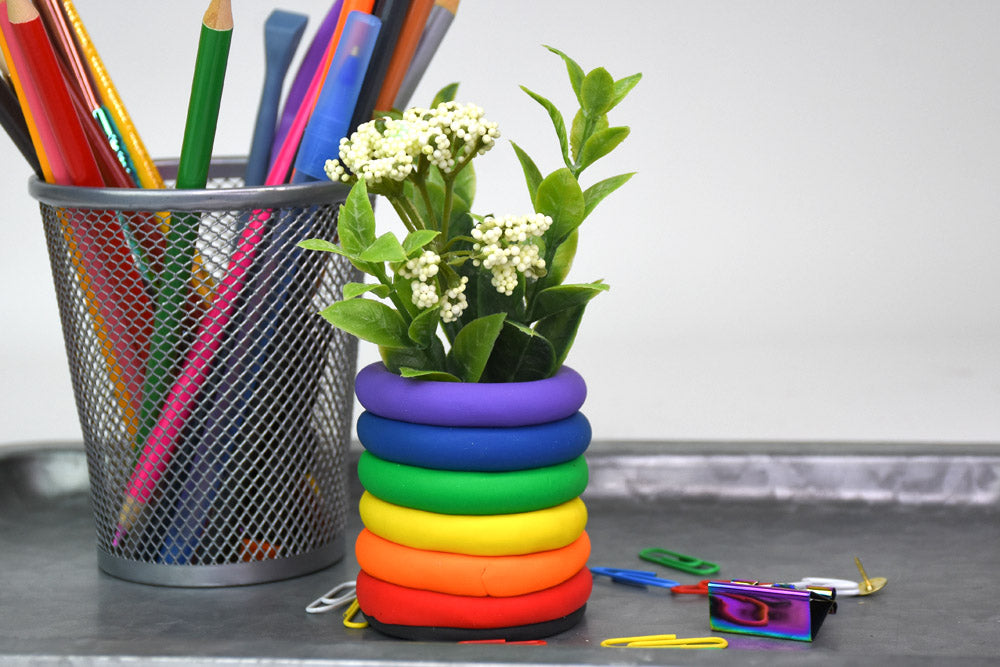
Combine Art and Science with this project that uses all the colors of the rainbow to create this gorgeous little pencil cup. COMPLETION TIME: 95 Minutes to make and bake.
Read Less
ADDITIONAL SUPPLIES
  • Ruler
  • 24 Index cards - 1 per student

NOTE: 

You will need 1/2 Ounce per student per color. A class of 24 students will require (6)  2 oz. bars of each color:

Have students write their name on the top corner of a 3” x 5” index card. The index card will make the pieces easy to move and keep organized with student’s name. The index card can also be placed in the oven for baking.

View full details
Project Instructions

Step 1

Getting Started:

Please make sure your work area is covered and you are not working on an unprotected surface. We recommend working on the Sculpey® Oven
Safe Work Mat, wax paper, metal baking sheet, or disposable foil. Uncured
clay may damage unprotected furniture or finished surfaces.
Be sure to
cover your crafting area appropriately.

Start with clean hands, unwrap and knead clay until soft and smooth, or condition by running clay though a Pasta Machine. We recommend using a designated machine for clay purposes only. When working with multiple colors, clean hands with soap and water or baby wipes (we have found that baby wipes work best) before switching colors. Shape clay, pressing pieces firmly together.  Wash hands
after use.

Baking (also called Curing):

Begin by preheating oven to 275 °F (130 °C). After you are done creating; for best results bake clay on an oven-proof surface such as metal, aluminum foil, an index card or the Sculpey® Oven Safe Work Mat at 275°F (130 °C) for 15 minutes per ¼" (6 mm) of thickness according to package directions. Oven safe glass or ceramic surfaces are also acceptable for baking; however please note that the baking times may take longer as the glass or ceramic surfaces take longer to heat up. For best baking results, use an oven thermometer. DO NOT USE MICROWAVE OVEN. DO NOT EXCEED THE ABOVE TEMPERATURE OR RECOMMENDED BAKING TIME.

Step 2

Flatten 1/2 bar (1/2 ounce) Black into a thick disc about 2.25” inches in diameter with the White Plastic Roller. Place the Black disc in the center of the index card with students name. This index card will make the piece easy to move around and will act as the work surface for constructing the coil pot.

Step 3

East student will need 1/2 bar (1/2 ounce) of each color Red, Orange, Yellow, Green, Blue, and Purple. Roll each color into a rope 5.5” long.

Step 4

Place the Red rope on top of the Black disc as shown. Butt the ends to each other as shown. Apply light pressure with your hand to help the Red coil stick to the Black base.

Step 5

Smooth the Red seam with your fingertips.

Step 6

Repeat with each color rope. Place the Orange on top of the Red and smooth the seam with your fingertips. Each time you add a rope, apply light pressure to the top of the coil so that the coil connects to the color beneath it.

Step 7

Add the Yellow on top of the Orange, press lightly, and smooth the seam.

Step 8

Add the Green on top of the Yellow, press lightly, and smooth the seam.

Step 9

Add the Blue on top of the Green, press lightly, and smooth the seam.

Step 10

Add the Purple on top of the Blue, press lightly, and smooth the seam.

Step 11

Place the finished coil pot on the index card on a baking sheet. Several pots can be baked at once. Conserve room on the baking tray by overlapping edges of the index cards. Bake the coil pots for 15 minutes at 275F in a pre-heated oven.

Allow to cool completely before handling.