Skip to product information
1 of 1

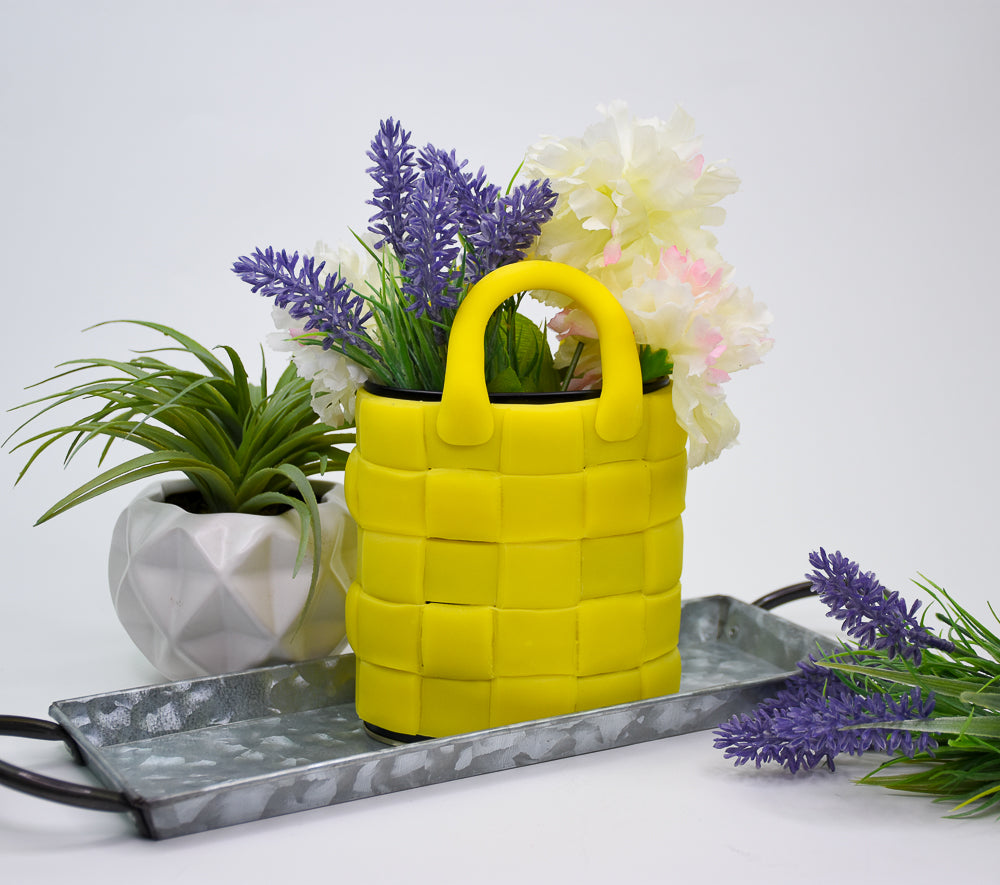
Sculpey Air-Dry™ Porcelain Tinted Basketweave Purse Planter

Sculpey Air-Dry™ Porcelain Tinted Basketweave Purse Planter

Designed by Amy Koranek
Read More
Team up our Sculpey Air-Dry™ Porcelain with our new color dyes to create this colorful woven basket. TIME TO COMPLETION: 1 Hour plus drying time - recommended that you let the project dry overnight before using. DESIGNED BY AMY KORANEK
Read Less
ADDITIONAL SUPPLIES
  • Empty and clean metal tin
  • Empty bathroom tissue cardboard tube
  • Awl
  • Hammer
  • Ruler
  • Disposable gloves
View full details
Project Instructions

Step 1

Getting Started with Sculpey Air-Dry™ :

Please make sure your work area is covered. We recommend working on the Sculpey® Oven-Safe Work Mat, wax paper, or disposable foil. Start with clean hands, unwrap and knead clay until soft and smooth. 
Wash hands after use. Wrap any extra clay in then wrapper and then put in an airtight container.

Step 2

Here’s a look at the empty tin and empty tissue roll that I’m using to support the structure of the purse planter. If you want to use the finished piece as a planter, you may want to puncture holes in the bottom of the tin for drainage with an awl and hammer.

Step 3

 This tutorial will require the entire package of Sculpey® Air-Dry™ Porcelain clay. It will be easiest if you start with 1/2 package, tint the clay, then tint the second half as needed. That way if your tin is not as large as mine, you haven’t wasted the clay until you really need it. My tin is about 5” tall, 4” wide, and 2” deep at the widest point.

Start with 1/2 bar of the clay and tint more clay as
needed.

Step 4

Roll the clay out into a thick sheet around 3/16” to 1/4” thick.

Add 6 dots of the Yellow Color Tint.

Step 5

Roll the sheet up with the dots inside. Make sure that you have your disposable gloves on as well.

Step 6

Knead and mix the tint all throughout the clay, then roll it out into another sheet.

Add six more dots.

Step 7

Knead and mix the tint all throughout the clay, then roll it out into another sheet.

Add three more dots or to your liking for the depth of color. I used 15 yellow dots for each 1/2 package of clay.

Step 8

Knead and mix the tint all throughout the clay, then roll it out into another sheet. This sheet should be 1/8” thick at the most.

Step 9

Use a Clay Blade to cut equal width strips about 1” wide.

Step 10

Starting at the bottom of the can, press a strip all the way around the bottom and trim the ends to meet at the back.

Step 11

Place another strip all the way around the top and trim the ends to meet at the back.

Use a ruler to place another strip all the way around the middle and trim the ends to meet at the back.

Step 12

Cut more strips as needed and position the next strips a strip width apart vertically on the form.

Let the strips droop to touch the can as they overlap the first set of strips.

Step 13

Fill in the horizontal rows again with more strips. I’m not actually basket weaving the strips under and over each other. I’m just using the layers to help the strips look like weaving.

Step 14

Add single squares overlapping where the weave looks less thick.

Step 15

Use the Flat Spade Tool to help tuck and bevel the strips and squares so they look like they are being woven between each other.

Step 16

Here’s a look at my vessel as the strips are all in place.

Step 17

Create two logs of the tinted clay that are 3/8” thick and 6” long.

These will be the handles

Step 18

Balance the cardboard tube across the center of the vessel.

Flatten the ends of the clay handles and press them to the sides of the vessel with the tube supporting them. If you need to, you can add a little smear of water to help adhere the handles to the vessel.

Step 19

Allow the vessel to air dry for at least 24 hours before removing the supporting cardboard tube. The tin inside will remain in the clay vessel to protect the clay from dampness or dirt.