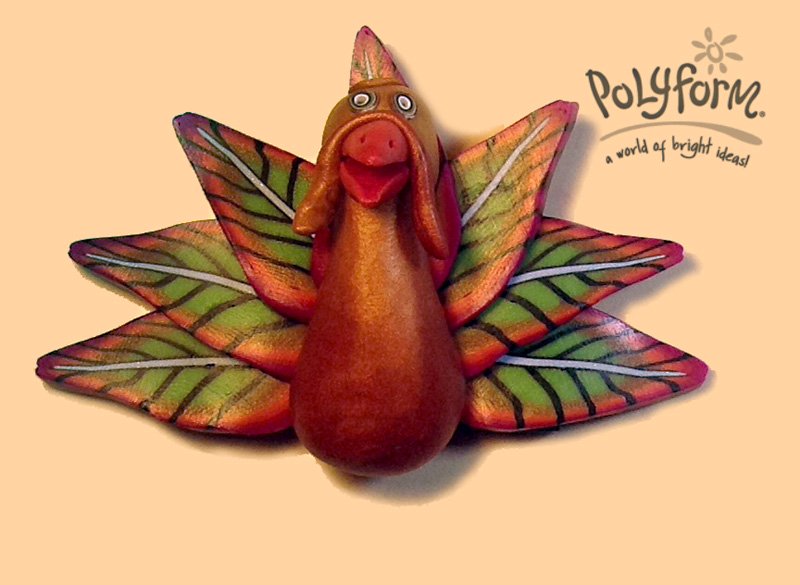
Premo! Turkey Magnet
Premo! Turkey Magnet
Read More
Before you wrestle to get that 20 pound turkey in the oven, play with this little beauty of a bird first! Or forego the kitchen duties all together, play clay all day and go to a restaurant for dinner! These can easily be adapted to create napkin rings for that special dinner as well!
Design by Mary Anne Loveless
Mary Anne says, "I used to work in a poultry processing factory, so I guess it was only a matter of time before I tried a making turkey out of clay!"
NOTE: If you are unsure how to create a Skinner Blend, see our tutorial at: https://www.sculpey.com/products/how-to-create-a-skinner-blend/
Read Less
ADDITIONAL SUPPLIES
Small magnets, epoxy or instant glue|Small magnets, epoxy or instant glue

Project Instructions
Getting StartedPolymer clay may stain. CLAY MAY DAMAGE UNPROTECTED FURNITURE OR FINISHED SURFACES. DO NOT USE polymer clay on unprotected surfaces. We recommend working on the Sculpey clay mat, wax paper, metal baking sheet, or disposable foil. Start with clean hands and work surface area. Knead clay until soft and smooth. For best results, clean your hands in between colors. Shape clay, pressing pieces together firmly. Bake on oven-proof glass or metal surface at 275°F (130 °C) for 30 minutes per ¼" (6 mm) thickness. For best baking results, use an oven thermometer. DO NOT USE MICROWAVE OVEN. DO NOT EXCEED THE ABOVE TEMPERATURE OR RECOMMENDED BAKING TIME. Wash hands after use. Baking should be completed by an adult.Begin by preheating oven to 275 °F (130 °C). Test temperature with oven thermometer for perfectly cured clay. For best results, condition all clay by running it through the Clay Conditioning Machine for several passes on the widest setting. Fold the clay in half after each pass and insert the fold side into the rollers first.
Condition and roll out some dark brown clay on the thickest setting of your pasta machine. With an inch and a half inch circle cutter, cut one circle. With your blade, cut the circle in half. Reserve one half for later.
Make a leaf cane, or in this case, a feather cane. I make a sloppy Skinner blend of Fuchsia, Orange, Bright Gold, and Bright Green Pearl, then roll it up with the green inside. Cut horizontal slices in the clay, laying down thin (8) black strips. PUt the round cane back together. Then cut down the middle at an angle and turn one half around. Create and position the middle of the leaf by adding a light blue strip, sandwiched between two thin layers of black. Let the cane rest.


PInch the cane into a leaf shape as shown. Cut 5-7 medium thick, even slices of the feather cane. Starting at the bottom of the half circle, attach the feathers. Keep the feathers even and symmetrical, ending with the middle feather, which should be perpendicular to the bottom of the half-circle.

With the other half-circle, form a ball. Wrap the ball with a thin layer of a Gold-to-Alizarin Crimson Hue Skinner blend. Roll into a ball, then shape it into the body of the turkey, as shown. The gold part will be the head.


To make the beak, form a small cone with orange clay. Slice it almost all the way through the middle and attach to the head. Add two little holes with a piercing tool for nostrils, if that is indeed what they are :) Use another small strip of the gold-to-alizarin blend to form a waddle. Attach it above the beak. Use two tiny bullseye cane slices for eyes, and a skinny little curlicue on top

Now attach the body to the tail feather structure. Bake according to the manufacturer's recommendations. After it has baked, attach a magnet to the back, near the top of the turkey,using a two-part epoxy. You may want to make a dozen of them for napkin rings on your Thanksgiving Day table.

