
Premo Sweet Illuminated Gingerbread House Scene
Premo Sweet Illuminated Gingerbread House Scene
Read More
Create a Sweet Illuminated Gingerbread house scene that you can decorate how you wish. Make multiple versions to showcase along your dessert table this Christmas or just make one that can be displayed under a glass dome.
Swirly Designs by Lianne and Paul Stoddard
Read Less
ADDITIONAL SUPPLIES
ceramic tile

Project Instructions
- Getting Started:
Start with clean hands, unwrap and knead clay until soft and smooth, or condition by running clay though a Pasta Machine. We recommend using a designated machine for clay purposes only. When working with multiple colors, clean hands with soap and water or baby wipes (we have found that baby wipes work best) before switching colors. Shape clay, pressing pieces firmly together. Wash hands after use.
- Baking:
Making the Gingerbread House & Tree templateWe created a template for the Gingerbread house and tree for you to print and cut out to use for this project or if you can design your own…just make sure you build it big enough to fit over your battery operated tea light candle. Once you have your template printed and cut out set aside.

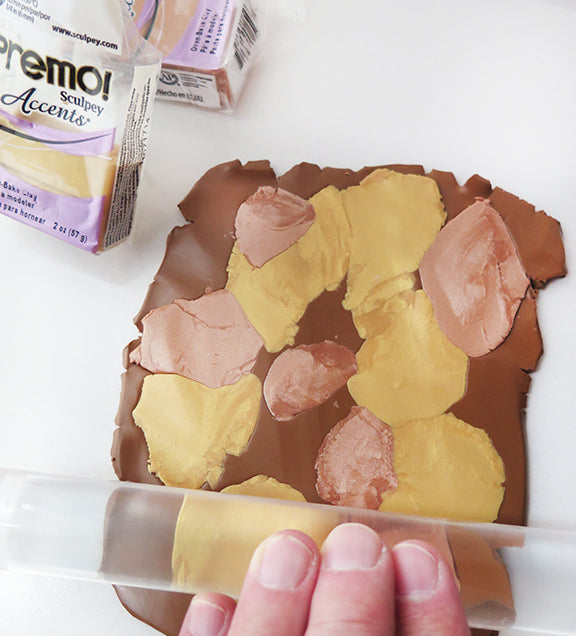
Mixing your gingerbread color clayMix Raw Sienna, a ½ package of the 18K gold clay and ½ package of the Copper. Flatten it out and run it through the machine until it is welled blended.
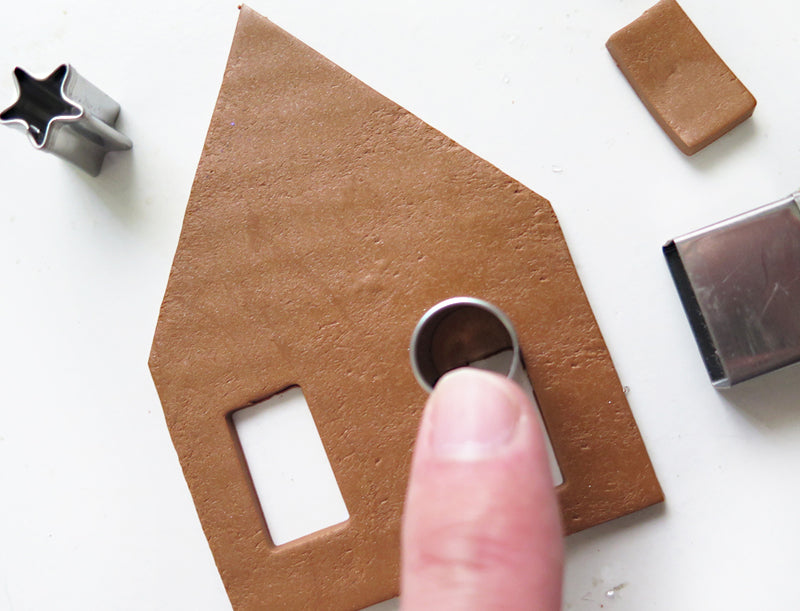
Cutting out the houseRun clay through the clay-conditioning machine on the #1 setting, then lay the front, back, left and right house templates onto the flattened piece of clay use the super slicer cut two each of the shapes. Take another piece of the gingerbread clay and run it through the clay-conditioning machine on the #3 setting and cut out two roof shapes. Place your pieces on a ceramic tile (you should have 8 pieces in all: 2 fronts, 2 sides and 2 roof pieces)

Adding some textureUse a hard sponge or a old paint/tooth brush and create “cookie” texture on the pieces.

Cutting out windows and doors cutting Use mini shape cutters and an xacto knife to cut out windows and doors on the pieces. You should have at least two windows on each side. With the extra gingerbread clay from the cutters, you can add any 3D clay embellishments to the house sides, like window boxes, gingerbread person, snowman and roof over the door

Add Liquid ClayOnce you have all your windows and doors cut out of the clay, take the liquid Sculpey bakeable medium in CLEAR and add a few drops in the negative spaces (windows, doors etc). * The less liquid clay you add the more transparent it will be once baked. Take a toothpick and spread your liquid clay making sure it fills in around the edges.

Embellishing the liquid clayWhat is great about using this liquid clay is that you can add items to the liquid clay before baking. (see sample images) You can add mini micro beads, glitter- and you can paint a scene too

Adding shingles to the roofTake another pieces of the gingerbread clay and run it through the clay-conditioning machine on the #6 setting. Take a mini cutter rain drop shape and start punching out the shingles and lay them down over both roof panels. Start from the bottom and work up. It’s ok if a few pieces hang over the sides and bottom, only slice off pieces that hang over the top part of the roof.

Place your roof pieces on the ceramic tile and bake in the oven according to the instructions in Step 1
Constructing the HouseOnce cool, remove your pieces and start building your house.