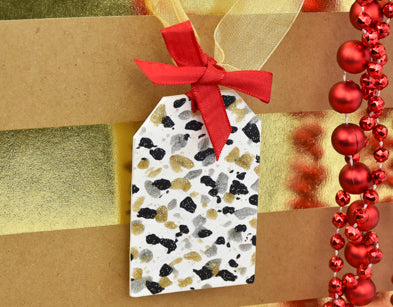
Premo Sculpey® Classic Gift Tag
Premo Sculpey® Classic Gift Tag
Designed by Amy Koranek
Read More
Read Less
Updated colors in a classic terrazzo flecked design make super simple gift tags.
COMPLETION TIME:45 Minutes to make and bake.
ADDITIONAL SUPPLIES
- 3” x 2” Paper template for tag shape
- Plastic drinking straw
- 12” Ribbon
- Scissors

Project Instructions
- Getting Started:
Start with clean hands, unwrap and knead clay until soft and smooth, or condition by running clay though a Pasta Machine. We recommend using a designated machine for clay purposes only. When working with multiple colors, clean hands with soap and water or baby wipes (we have found that baby wipes work best) before switching colors. Shape clay, pressing pieces firmly together. Wash hands after use.
- Baking:
Use the Acrylic Clay Roller to flatten 1/2 bar of conditioned White Premo into a little sheet. The sheet should be 1/8” or thinner.

For the speckle pattern we will use about 1/16 bar of each White Gold Glitter, Yellow Gold Glitter, and Twinkle Twinkle. To create the speckles, pinch little random bits of White Gold Glitter from the edge of the bar and press them onto the White sheet. The more random the sizes and shapes are, the better it will look.

Next pinch off bits of Yellow Gold Glitter from the edge of the bar and press them randomly onto the White sheet.

Next pinch off bits of Twinkle Twinkle and add those to the sheet.

Roll over the sheet with the Acrylic Clay Roller to help the bits imbed into the clay and be level on the surface.

Trim the basic shape of the tag out by cutting a 3” x 2” rectangle.

Use the Super Slicer to clip the two corners on one of the short ends.

Push the end of a plastic straw into the clay cutting out a neat hole.

Bake the tag following the baking instructions for Premo. When it is completely cool, add the ribbon and trim the ends.


