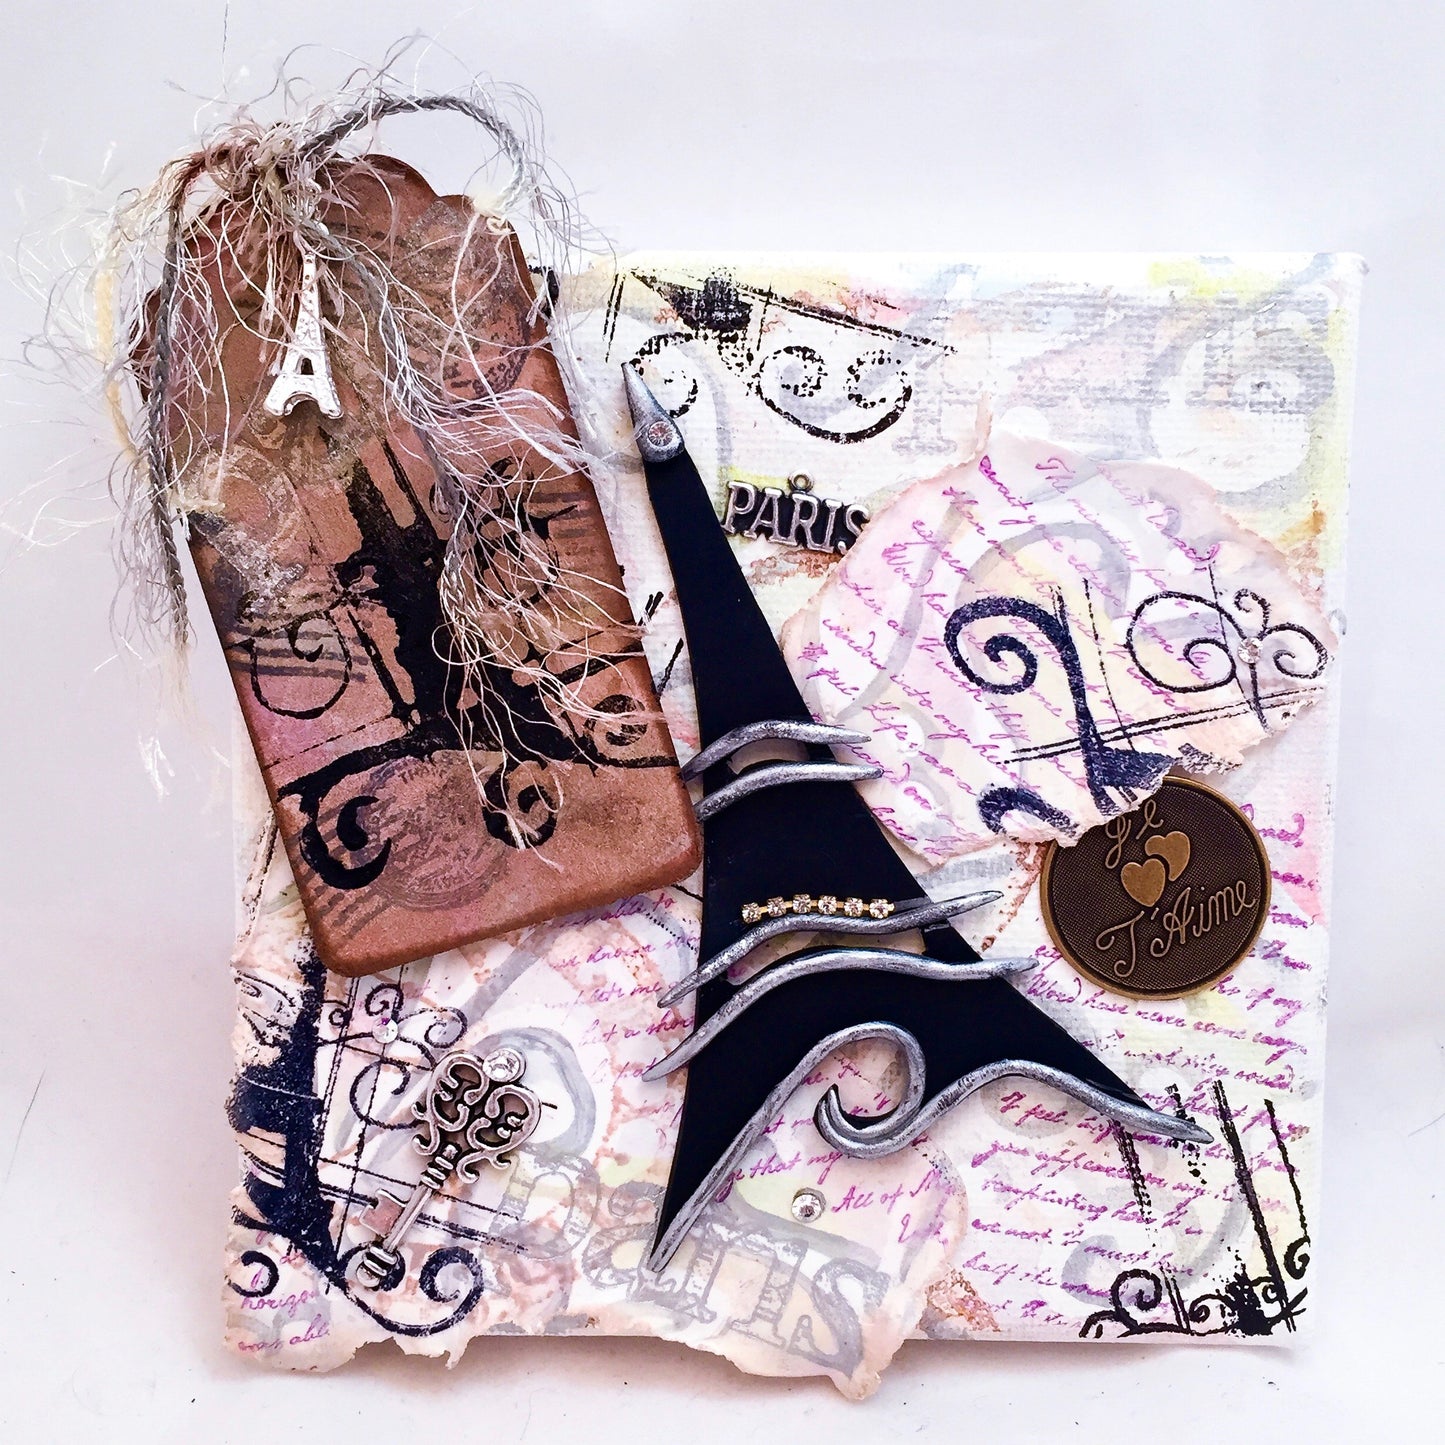
Premo! Paris-Themed Mixed Media Collaged Canvas
Premo! Paris-Themed Mixed Media Collaged Canvas
Read More
For this technique to work properly, whatever you do to your CLAY SURFACE, you will duplicate on your canvas. This will make a matched/patterned background.
Design by Katie Oskin http://KatersAcres.com
Read Less
ADDITIONAL SUPPLIES
6x6 painters canvas, Elmer’s glue or masking fluid, variety of ink pads, Eiffel Tower Stamp, Metal charms in a “Paris” theme, One large 2” kraft tag (optional)|6x6 painters canvas, Elmer’s glue or masking fluid, variety of ink pads, Eiffel Tower Stamp, Metal charms in a “Paris” theme, One large 2” kraft tag (optional)

Project Instructions
Getting StartedPolymer clay may stain. CLAY MAY DAMAGE UNPROTECTED FURNITURE OR FINISHED SURFACES. DO NOT USE polymer clay on unprotected surfaces. We recommend working on the Sculpey clay mat, wax paper, metal baking sheet, or disposable foil. Start with clean hands and work surface area. Knead clay until soft and smooth. For best results, clean your hands in between colors. Shape clay, pressing pieces together firmly. Bake on oven-proof glass or metal surface at 275°F (130 °C) for 30 minutes per ¼" (6 mm) thickness. For best baking results, use an oven thermometer. DO NOT USE MICROWAVE OVEN. DO NOT EXCEED THE ABOVE TEMPERATURE OR RECOMMENDED BAKING TIME. Wash hands after use. Baking should be completed by an adult.Begin by preheating oven to 275 °F (130 °C). Test temperature with oven thermometer for perfectly cured clay. For best results, condition all clay by running it through the Clay Conditioning Machine for several passes on the widest setting. Fold the clay in half after each pass and insert the fold side into the rollers first.
Using white washable school glue (like Elmer’s) draw a design on both the clay surface and the canvas surface. If you are using masking fluid, this will be a faster technique. Let dry completely on both surfaces (about one-three hours).

Select the conditioned Black clay and roll it through your pasta machine on the 4th largest setting. Use your clay blade to cut out an “artsy” Eiffel Tower shape. Accent the clay shape with addition snakes of black clay if you choose.

Begin to collage the background: Place a small amount of ink on your work surface. Use a small brush to “outline” your masked design on both the clay(shown) and the canvas.

Use stamp pads to add inks to your design by “pouncing” them on the surface of the clay. NOTE: Your mask MUST be dry in order to do this. Repeat the same process on your canvas.

Remove the Mask: Use a needle tool to gently remove the mask from the surface of the clay. Remove the mask from the canvas. NOTE: Be very careful (if you have used washable glue) removing the mask from the canvas that you do not tear the canvas underneath. If it is too hard to remove, use a heat gun to soften it and use a baby wipe to wipe it away, keeping away from the inked areas.

Add Stamps: Use ink pads and add ink to stamps. Use the inked stamp to decorate your clay sheet and your canvas. REMEMBER: Whatever you do to your clay sheet, you want to do to the canvas, this way they will match. I like using word stamps, flourishes, and postage symbols. Vary the inks, design and placement on the surface of your clay.

Add a Final Stamped Flourish: Whatever theme you have chosen, add a matching stamp to the collaged clay sheet. I like to use black ink for this final stamp so it stands out. Because my theme was “Paris” I chose a large Eiffel Tower stamp, but you can choose whatever stamp matches your theme. Remember, use the same stamp at least once on your canvas.

Tear Your Clay Sheet: Yes, you read that correctly … tear your clay sheet. Tear pieces you like (be sure you have all sizes from large, medium, and small) that look interesting to you. You will NOT do this to your canvas.

Add Shading: Use a brown ink pad (I chose chalk ink for a softer effect) to accent the edges of your torn sheet so the sheet resembles old worn paper. You will NOT do this to your canvas.

Assemblage: Gather all those meals, beads, and other mixed media items we talked about here, plus your main clay image (in this case my large eiffel tower), and your town clay sheets and being to assemble them onto your canvas. Add Bake & Bond to the back of each of your pieces so they will “hold”and “grab” the canvas when you bake it.

Bake Your Collage: Follow the directions outlined in Step One. Allow the canvas to cool after baking.
Make Additional Elements: If you feel your canvas is missing something (mine was missing something in the upper right corner), make a few additional elements. I chose to use the same inks and stamps to make a big tag for the corner of my mixed media canvas. You can add charms, additional polymer sculpted pieces, metals, yarn, and much more to complete the look.

Add any additional items to your canvas after baking (in my case I added a giant tag). Pat yourself on the back - you did it! A gorgeous mixed media canvas!


