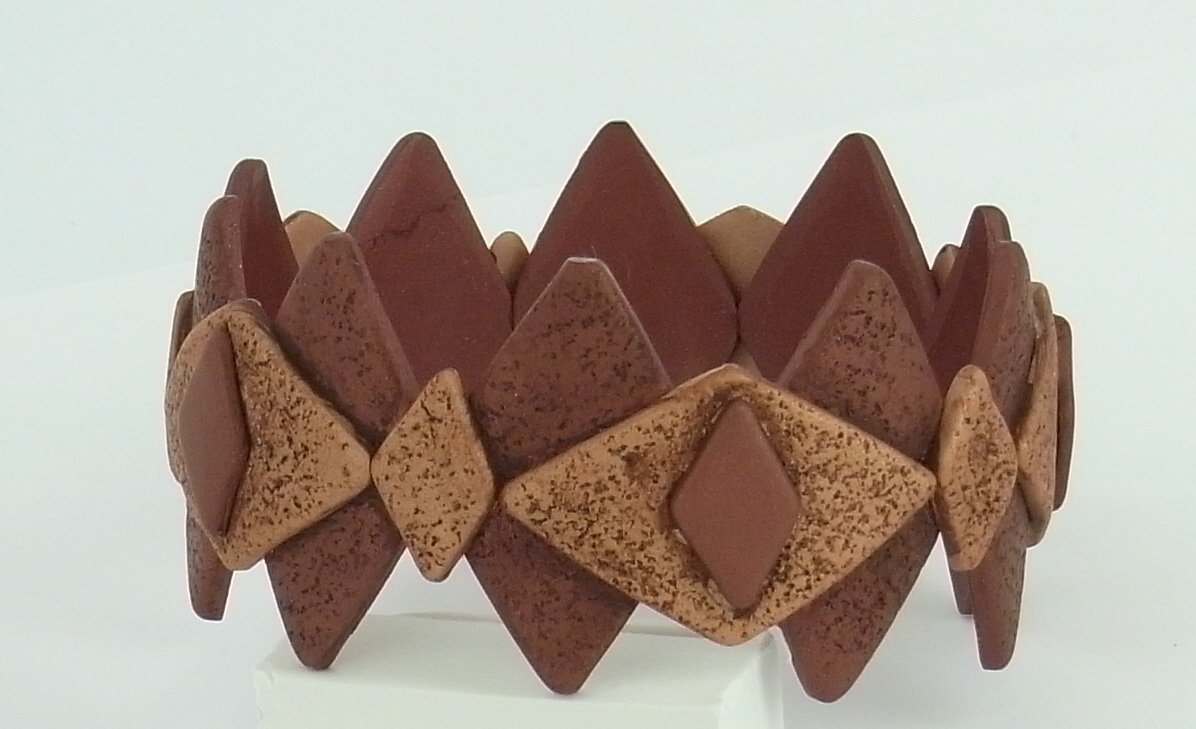
premo! Diamond Cutter Bracelet
premo! Diamond Cutter Bracelet
Read More
Diamond CUTTERS are a girl's best friend! Check out this amazing bracelet.
Read Less
ADDITIONAL SUPPLIES
• Plastic Wrap
• Brown acrylic paint
• Thick craft paper
• Tape
• 36 grit sand paper
• Paint Brush
• Paper Towels|• Plastic Wrap
• Brown acrylic paint
• Thick craft paper
• Tape
• 36 grit sand paper
• Paint Brush
• Paper Towels

Project Instructions
Getting Started
Polymer clay may stain. CLAY MAY DAMAGE UNPROTECTED FURNITURE OR FINISHED SURFACES. DO NOT USE polymer clay on unprotected surfaces. We recommend working on the Sculpey clay mat, wax paper, metal baking sheet, or disposable foil. Start with clean hands and work surface area. Knead clay until soft and smooth. For best results, clean your hands in between colors. Shape clay, pressing pieces together firmly. Bake on oven-proof glass or metal surface at 275°F (130 °C) for 30 minutes per ¼" (6 mm) thickness. For best baking results, use an oven thermometer. DO NOT USE MICROWAVE OVEN. DO NOT EXCEED THE ABOVE TEMPERATURE OR RECOMMENDED BAKING TIME. Wash hands after use. Baking should be completed by an adult.Begin by preheating oven to 275 °F (130 °C). Test temperature with oven thermometer for perfectly cured clay. For best results, condition all clay by running it through the Clay Conditioning Machine for several passes on the widest setting. Fold the clay in half after each pass and insert the fold side into the rollers first.
Polymer clay may stain. CLAY MAY DAMAGE UNPROTECTED FURNITURE OR FINISHED SURFACES. DO NOT USE polymer clay on unprotected surfaces. We recommend working on the Sculpey clay mat, wax paper, metal baking sheet, or disposable foil. Start with clean hands and work surface area. Knead clay until soft and smooth. For best results, clean your hands in between colors. Shape clay, pressing pieces together firmly. Bake on oven-proof glass or metal surface at 275°F (130 °C) for 30 minutes per ¼" (6 mm) thickness. For best baking results, use an oven thermometer. DO NOT USE MICROWAVE OVEN. DO NOT EXCEED THE ABOVE TEMPERATURE OR RECOMMENDED BAKING TIME. Wash hands after use. Baking should be completed by an adult.Begin by preheating oven to 275 °F (130 °C). Test temperature with oven thermometer for perfectly cured clay. For best results, condition all clay by running it through the Clay Conditioning Machine for several passes on the widest setting. Fold the clay in half after each pass and insert the fold side into the rollers first.
Cut a 9.25” L x2” rectangle out of the craft paper and tape together, ending with a 9” circumference.
Roll out some Bronze clay on the #1 setting on the clay conditioning machine. Texturize with sand paper, cover with saran wrap and cut out ten, 1” diamond shapes.

Make another sheet of Bronze clay on the # 3 setting on the clay conditioning machine, cover with saran wrap and cut out five mini diamonds from the Mini Cutters set.

Roll out some Copper clay on the #2 setting on the clay conditioning machine. Texturize with sand paper, cover with saran wrap and cut out five, 1” diamond shapes and five mini diamonds.

Assemble: Place the large Bronze diamonds next to one another. Then place the Copper diamonds on top of them, as seen in example. Then press the mini bronze shapes onto the larger Copper diamond shapes. When assembled, gentle remove from work surface and wrap around paper form. Secure ends, by pressing clay together. Bake according to the directions above and let cool.

Remove from form and antique with paint, by brushing the paint onto the bangle and gently removing it with a paper towel.


