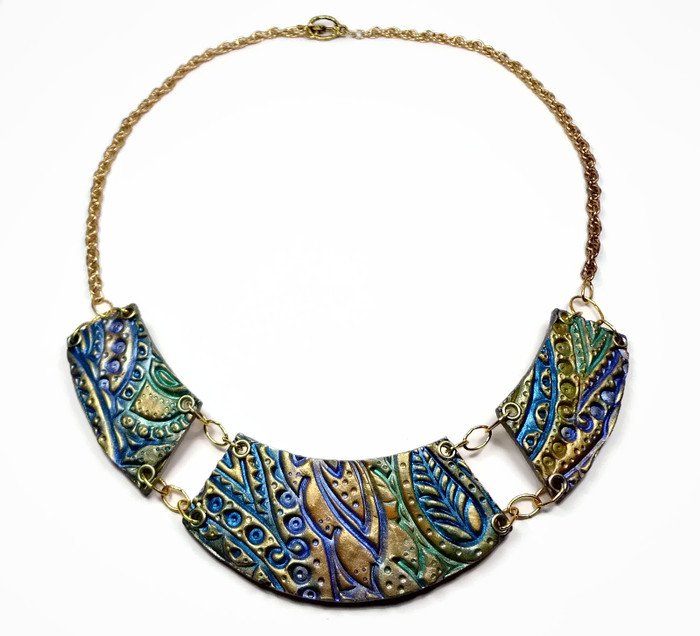
Sculpey Premo™ Textured 3 Segment Necklace
Sculpey Premo™ Textured 3 Segment Necklace
Read More
Read Less
Add elegance to your wardrobe with this stylish statement necklace! Design by: Sherri Kellberg
ADDITIONAL SUPPLIES
- Folk Art Metallic acrylic paint, blue, teal and peridot
- Small paintbrush
- 12 Grommets
- 2 Texture sheets
- Package of oval jump rings
- Gold Leaf pen
- Chain and clasp
- 2 Sheets cardstock
- Ruler
- Coffee stirer
- Round plastic lid

Project Instructions
Do not use unbaked clay on unprotected furniture or finished surfaces. Start with clean hands and work surface area. Good work surfaces include wax paper, metal baking sheet, or disposable foil. Knead clay until soft and smooth. For best results, clean your hands in between colors. Shape clay, pressing pieces together firmly. Bake on oven-proof glass or metal surface at 275 °F (130 °C) for 30 minutes per 1/4" (6 mm) thickness. For best baking results, use an oven thermometer. DO NOT USE MICROWAVE OVEN. DO NOT EXCEED THE ABOVE TEMPERATURE OR RECOMMENDED BAKING TIME. Wash hands after use. Baking should be completed by an adult. Begin by preheating oven to 275 °F (130 °C). Test temperature with oven thermometer for perfectly cured clay. For best results, condition all clay by running it through the clay dedicated pasta machine several passes on the widest setting. Fold the clay in half after each pass and insert the fold side into the rollers first.
Condition the block of Gold clay on the #1 setting of the clay conditioning machine, divide it in half.
Make a template for the necklace using a piece of card stock. Cut the center section approximately 1 1/4" high x 2 1/4" at the top edge, then 3 1/4" along the bottom edge. I used a round plastic lid as a ruler to make the curves.

Select a texture sheet with an all-over medium-small pattern. Dust it with cornstarch as a release agent.

Take one half of the conditioned Gold clay and lay it on the texture sheet, run it though on the #1 setting of the clay conditioning machine.

Use the other section of clay for the back side of the necklace. Use a bumpy/pebbled texture sheet for this side, running it through on the #3 setting.

Now that you have completed the front and back sections, use the Liquid Sculpey to adhere them together. Use your finger to spread the liquid to the edges. This adds flexibility and strength to the completed necklace.

Make 12 holes for the grommets using the plastic coffee stirrer.

Add a few drops of Liquid Sculpey around the holes, then place the grommets in.

Take a sheet of card stock and cut one of the long sides into a semi-circle. Pinch the opposite side in the middle and tape it. This will make a gently curved surface to bake the necklace pieces on. Bake as directed on clay package.

Paint the necklace sections, making sure to get the paint in all the deep crevices. Wipe off any excess with a microfiber cloth.

Apply Gold Leaf pen to raised areas to add highlights.

Add the jump rings and connect the 3 sections, add chain and closure.


