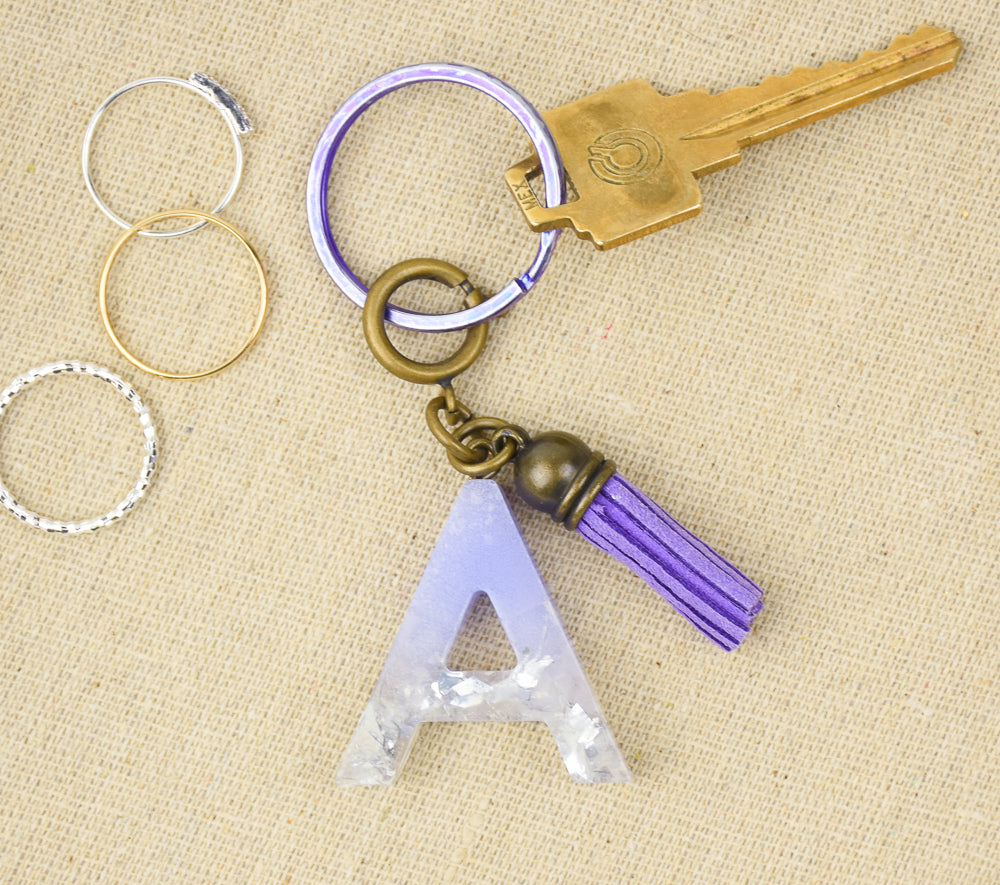
Liquid Sculpey® Alphabet Keychain
Liquid Sculpey® Alphabet Keychain
Designed by Amy Koranek
Read More
Everyone loves a new keychain! The combination of Liquid Sculpey® Translucent Lavender and Clear with a little extra bling from glitter is perfect for this project. TIME TO COMPLETE:
45 Minutes to make, bake, and assemble
Read Less
ADDITIONAL SUPPLIES
- Paper towel
- Silicone alphabet letter mold
- Large flake foil glitter -or-
- Glitter
- Silicone cupcake liners for mixing Liquid Sculpey®
- Screw in eye hook
- Small coordinating tassel
- 6 mm Jump ring
- 8 mm Spring closure ring
- Split key ring
- Flat nose pliers

Project Instructions
- Getting Started with Liquid Sculpey®:
-
Baking:
- It is important to use oven thermometer when you bake the liquids so that you can ensure your oven is at the correct temperature.
- Do not microwave the liquids. They must be baked in a Preheated oven at 275 ºF (130 ºC) for liquid colors and 300 ºF (149 ºC) for Clear – Do not exceed baking temperatures.
- If your piece is less than 1/4” bake for 15 minutes. For thicker pieces that are 1/4” or above bake for 30 minutes.
- If your liquid project has become yellowed or discolored in the oven, when you remake it, tent it by placing either – folding an index card in half and placing your project under it by using aluminum foil over your project.
Here’s a tip for baking perfectly in silicone molds. Dampen a dish towel with water and wring out as much of the water as you can. Fold the damp towel so that the molds can sit level on top of it. The damp towel will slow down the curing process so that the LS will cure evenly throughout and avoid warping.
When color blocking in the mold, add each color slowly and only add like color on top of like color so that the colors do not mix into each other.
Add the Clear Liquid Sculpey® and the Translucent Lavender Liquid Sculpey® (LS) directly to the mold, color blocking the letter as desired. Only fill the letter to halfway. Add the glitter or foil to just the Clear LS area. Then layer more of each color of LS to fill to level.
For the letter A, I color blocked the Lavender on the top only and the Clear with foil on the bottom only.

In this example of the letter E, I color blocked top and bottom with Lavender and Clear with glitter inclusion through the middle. After the glitter or foil is added, top each color area up to level. Once the mold is filled to level, tap the mold several times on the work surface to release air bubbles. Then bake following the baking instructions for Liquid Sculpey®.

After baking, allow the mold to cool completely before removing the pieces by gently flexing the mold. You can see here that the glitter and the foil give completely different looks to the baked pieces.

Here is the layout for the “A” keychain design.

To use a screw-in style eye hook, first poke a pilot hole with the tip of the Needle Tool.

Then use flat nose pliers to push and turn the threaded screw-in eye hook into the pilot hole.

Use flat nose pliers to assembly the jump ring to the eye hook and the key ring, adding a tassel if you like.


