Sculpey Bake Shop® Earth Layers Bead Set
Sculpey Bake Shop® Earth Layers Bead Set
Designed by Sculpey Teacher Ambassador, Katherine Steiner
Read More
Teach your students about the earths core layers using Sculpey Bake Shop® to create beads that can be strung for a keychain, necklace, or anything your students wish!
TIME TO COMPLETION: 45 minutes
Read Less
ADDITIONAL SUPPLIES
- Aluminum Foil (for baking)
- Toaster oven or full-size home oven (for baking)
- Skewers, toothpicks, or spaghetti

Project Instructions
Getting Started with Sculpey Bake Shop® clays:
• Bake at 250 °F (121 °C), 20 minutes per 1/4 inch (6 mm) thickness.
• DO NOT MICROWAVE.
• DO NOT EXCEED THE ABOVE TEMPERATURE OR RECOMMENDED BAKING TIME.
Please make sure your work area is covered and you are not working on an unprotected surface. We recommend working on the Sculpey Tools™ Oven-Safe Work Mat, wax paper, metal baking sheet, or disposable foil. Uncured clay may damage unprotected furniture or finished surfaces. Be sure to cover your crafting area appropriately.
Break up the clay bricks, with a knife or other tool, into 20 pieces each.
Each student should receive: 4 pieces of orange, 3 pieces of red, 2 pieces of white, 5 pieces of brown, 1 piece of green, and 1 piece of blue.
Each student should receive: 4 pieces of orange, 3 pieces of red, 2 pieces of white, 5 pieces of brown, 1 piece of green, and 1 piece of blue.

The Inner Core:>/b>
Use one-and-a-half pieces of both red and orange. Mix together to make a new color and form into a ball
Use one-and-a-half pieces of both red and orange. Mix together to make a new color and form into a ball

The Outer Core:
Use 2 pieces of orange, and about a half a piece of red.
Mix together until one solid color, and form into a sphere.
Use 2 pieces of orange, and about a half a piece of red.
Mix together until one solid color, and form into a sphere.

The Mantle:
Mix 2 pieces of brown clay with 1 piece of white clay and mix together until you get a lighter brown color. Form into a ball
Mix 2 pieces of brown clay with 1 piece of white clay and mix together until you get a lighter brown color. Form into a ball

Upper Mantle:
Form three pieces of brown clay into a ball
Form three pieces of brown clay into a ball

The Crust:
Use one piece of green, blue, and white. Shape each into a snake.
Use one piece of green, blue, and white. Shape each into a snake.

The Crust:
Twist the three crust snakes together until the colors marble and form into a ball
Twist the three crust snakes together until the colors marble and form into a ball

Make a hole in each ball, using a toothpick (or skewer, spaghetti, whatever’s on hand).
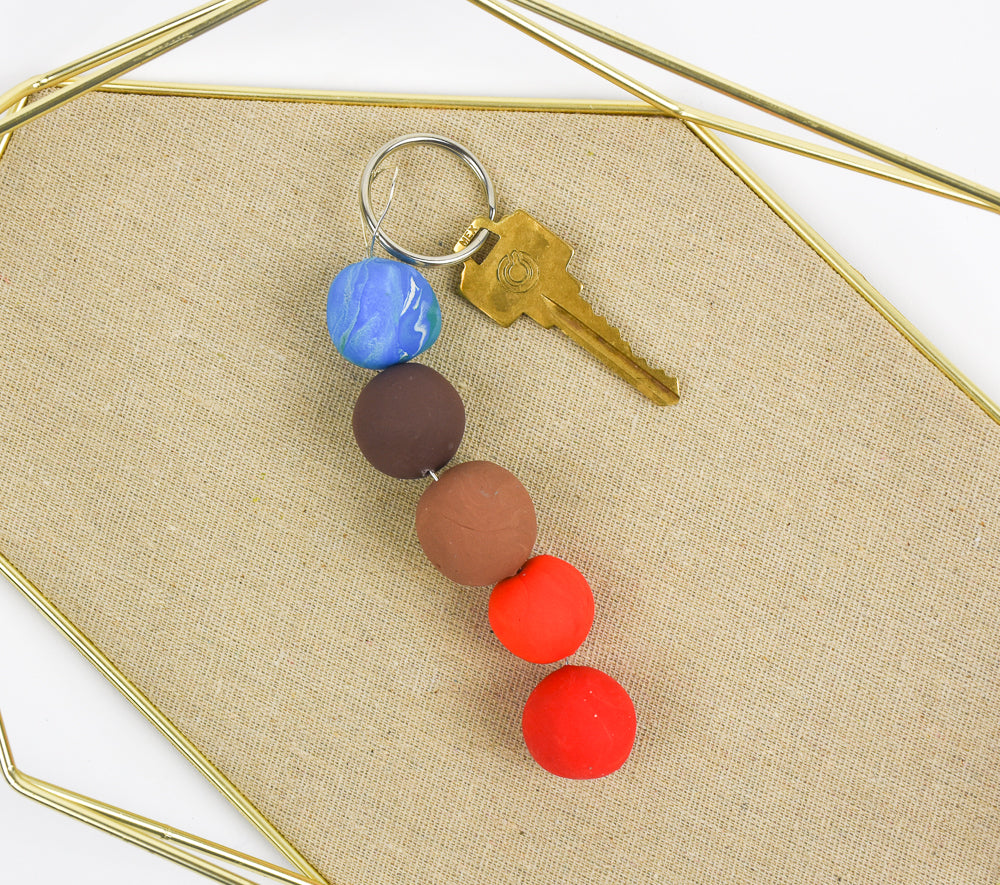
Image (top to bottom): Crust, Upper Mantle, Mantle, Outer Core, Inner Core
Image (top to bottom): Crust, Upper Mantle, Mantle, Outer Core, Inner Core

Create a baking rack by rolling up the ends of a large sheet of aluminum foil to create a support to keep the clay off the tray (to avoid flat spots).
Bake at 275F for 15 minutes.
Let cool before removing spaghetti/skewers/toothpicks from the clay.
Bake at 275F for 15 minutes.
Let cool before removing spaghetti/skewers/toothpicks from the clay.

Beads are now ready for stringing! They can be made into a keychain, bracelet, necklace, or anything you can think of.
String in the order shown (Red for the core, orange for the outer core, light brown for the mantle, brown for the upper mantle, and then blue/green/white swirl for the crust)
String in the order shown (Red for the core, orange for the outer core, light brown for the mantle, brown for the upper mantle, and then blue/green/white swirl for the crust)
