Skip to product information
1 of 1

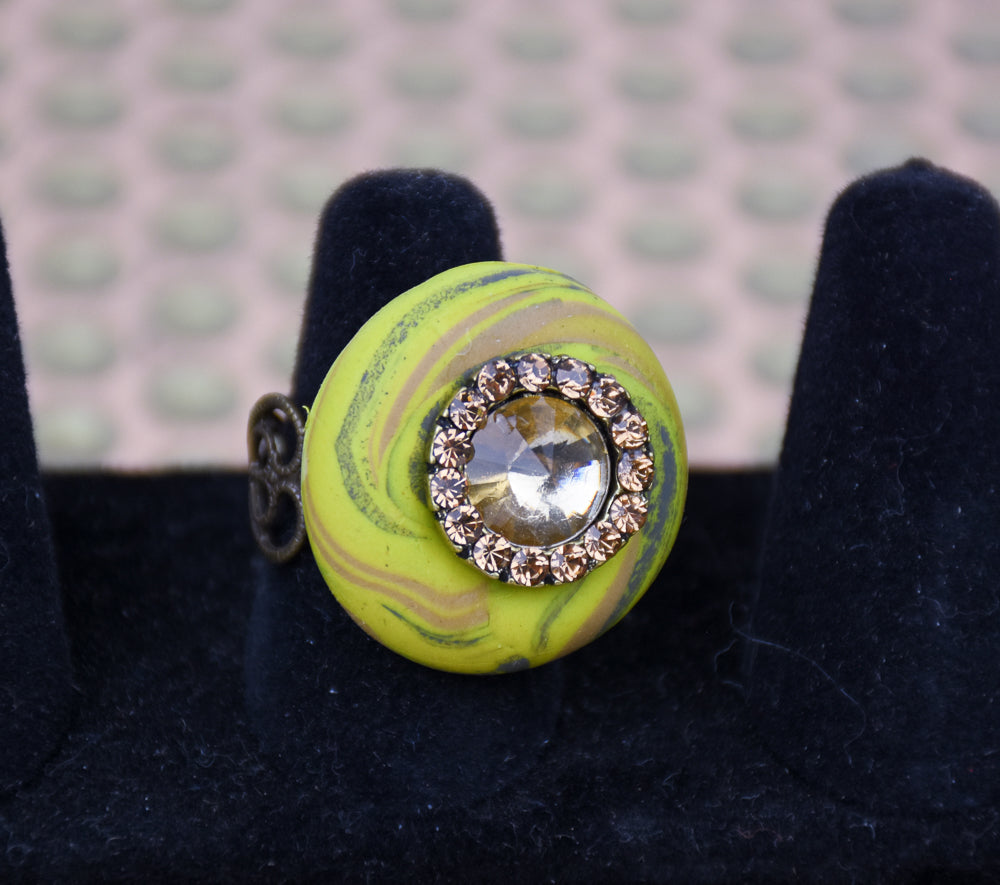
Sculpey Soufflé™ Citron Sparkling Cocktail Ring

Sculpey Soufflé™ Citron Sparkling Cocktail Ring

Read More
Soufflé Citron teams up with Soufflé Latte, a little acrylic paint and a sparkling button to create this one-of-kind cocktail ring! TIME TO COMPLETION: 30 minutes to make, 30 minutes to bake Designed by syndee holt
Read Less
ADDITIONAL SUPPLIES
  • Dark gray chalk paint and small brush
  • Metal ring finding (I chose this filigree finding from Fire Mountain Gems so that the clay and Liquid Clay could have holes to “grab” through the metal)
  • Fancy post button (I have a collection of these!)
  • Small spray bottle of water
  • Glue of your choice to attach the button
View full details
Project Instructions

Step 1

Please make sure your work area is covered and you are not working on an unprotected surface. We recommend working on the Sculpey® Oven-Safe Work Mat, wax paper, metal baking sheet, or disposable foil. Uncured clay may damage unprotected furniture or finished surfaces. Be sure to cover your crafting area appropriately.

Start with clean hands, unwrap and knead clay until soft and smooth, or condition by running clay though a Pasta Machine. We recommend using a designated machine for clay purposes only. When working with multiple colors, clean hands with soap and water or baby wipes (we have found that baby wipes work best) before switching colors. Shape clay, pressing pieces firmly together. Wash hands after use.

Baking:

Begin by preheating oven to 275 °F (130 °C). After you are done creating; for best results bake clay on an oven-proof surface such metal, aluminum foil, an index card or the Sculpey® Clay Mat at 275°F (130 °C) for 30 minutes per 1/4" (6 mm)
thickness according to package directions. Oven safe glass or ceramic surfaces
are also acceptable for baking; however please note that the baking times may
take longer as the glass or ceramic surfaces take longer to heat up. For best
baking results, use an oven thermometer. DO NOT USE MICROWAVE OVEN. DO NOT EXCEED THE ABOVE TEMPERATURE OR RECOMMENDED BAKING TIME.

Step 2

Sheet about 1/3 block of the conditioned Citron clay out on the widest setting on your clay conditioning machine or use your acrylic roller to roll it to about 1/8 inch.

Trim off a small piece and cover it with a layer of the dark gray chalk paint. Set aside to dry.

Step 3

Cut the rest of the Citron into strips and then small pieces. 

Add a small bit of the Latte clay as well.

Step 4

Cut strips of the painted clay and then chop into the mix.  The paint can still even be a little wet!

Step 5

Smoosh all the pieces together and roll into a loose ball shape.

Step 6

Roll the ball out on your work surface into a short coil and twist the ends of the coil to twist the colors.  The coil should be about 3/8 inch in diameter.

Step 7

Lightly spray the largest “donut” shape in the mold and wrap a piece of the coil into the mold, trimming off excess length.  Press firmly into the mold.

Step 8

While the mold is on your work surface, trim the excess clay from the CENTER out to one side.  Then repeat on the other side.  Once the excess clay is removed, just pop the clay from the mold.

Step 9

I added a small piece of clay under the molded clay and press it gently to the ring finding.  Then I added a couple of drops of Sculpey Oven Bake Adhesive to the top
of the finding and spread it through the finding to the clay. 

Bake the ring according to the directions in Step 1 above.  I baked mine in a metal circle cutter that the ring finding just fit in!

Step 10

Here is a look at the back of the ring after baking – nice and secure and clean looking!

Step 11

After a LONG session of trying all my different collected buttons on the ring, I FINALLY decided to use this golden taupe faux gem button.  I glued it into place with a jewelry glue and allowed it to dry overnight still in the circle cutter for support.

Step 12

Here is a look at the top of the finished ring!  Who would guess that was a button?