Skip to product information
1 of 1

Sculpey Soufflé™ Embossed Teardrop Pendant

Sculpey Soufflé™ Embossed Teardrop Pendant

Designed by Amy Koranek
Read More
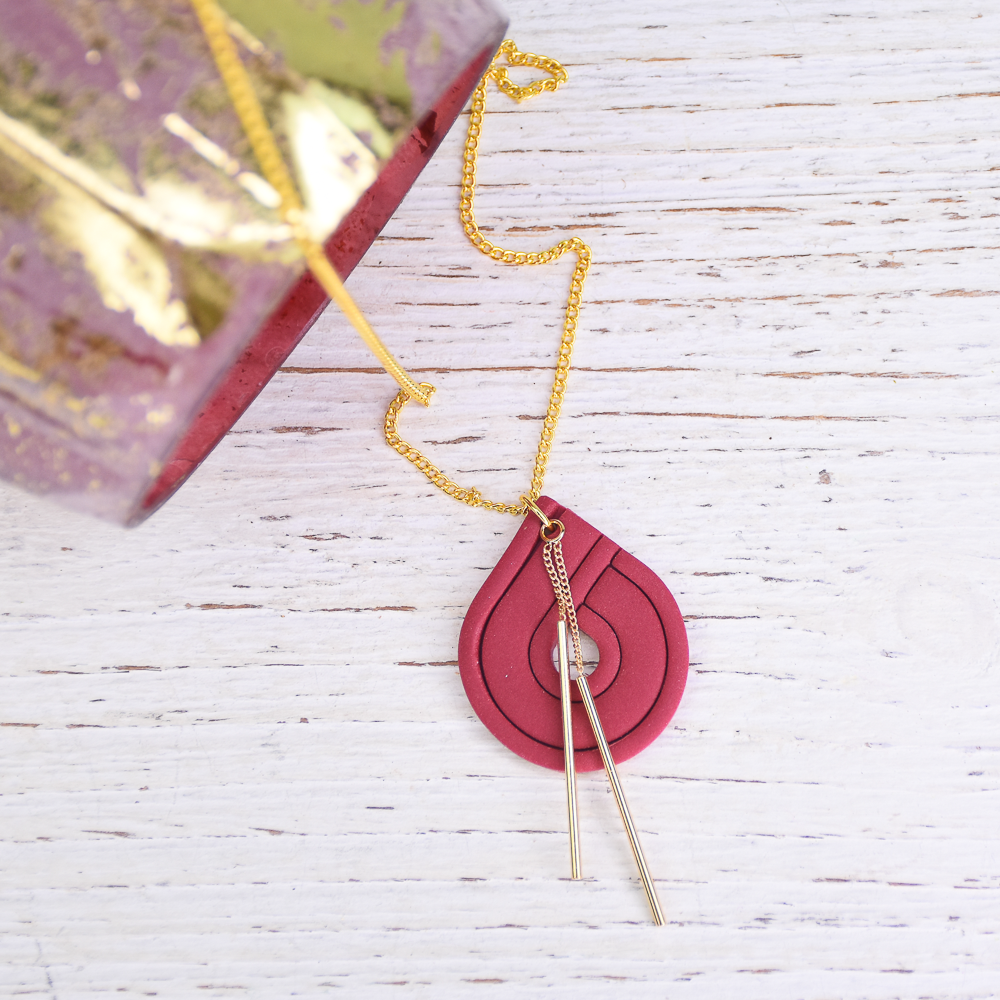
Team up your favorite Souffle color with this super cool cutter and add a splash of gold with some chain work to create this dramatic pendant in a snap! TIME TO COMPLETION: 45 Minutes to make, bake, and assemble
Read Less
ADDITIONAL SUPPLIES
  • Corn starch
  • Paintbrush
  • 24” Gold tone necklace chain with clasp
  • 6 mm Gold tone jump ring
  • Double bar chain dangle
  • Flat nose pliers
View full details
Project Instructions

Step 1

Getting Started:

Please make sure your work area is covered and you are not
working on an unprotected surface. We recommend working on the Sculpey® Oven Safe Work Mat, wax paper, metal baking sheet, or disposable foil. Uncured
clay may damage unprotected furniture or finished surfaces.
Be sure to
cover your crafting area appropriately.

 Start with clean hands, unwrap and knead clay until soft and smooth, or condition by running clay though a Pasta Machine. We recommend using a designated machine for clay purposes only. When working with multiple colors, clean hands with soap and water or baby wipes (we have found that baby wipes work best) before switching colors. Shape clay, pressing pieces firmly together.  Wash hands
after use.  

Baking:

Begin by preheating oven to 275 °F (130 °C). After you are done creating; for best results bake clay on an oven-proof surface such as metal, aluminum foil, an index card or the Sculpey® Oven Safe Work Mat at 275°F (130 °C) for 30 minutes per ¼" (6 mm) of thickness according to package directions. Oven safe glass or ceramic
surfaces are also acceptable for baking; however please note that the baking
times may take longer as the glass or ceramic surfaces take longer to heat up. For
best baking results, use an oven thermometer. DO NOT USE MICROWAVE OVEN. DO NOT EXCEED THE ABOVE TEMPERATURE OR RECOMMENDED BAKING TIME.

Step 2

Roll 1/4 bar Cabernet to a sheet 1/8” thick with the Acrylic Clay Roller.

Smooth corn starch over the surface with fingertips to act as a release between the clay and the cutter.

Step 3

Dab the cutting edge of the Embossed Teardrop Cutter in corn starch as well.

Step 4

Cut out the teardrop shape.

Step 5

Layout the pieces for the necklace design.

Step 6

Poke a hole in the top of the teardrop shape with the Blunt Point Tool.

Bake the teardrop following the baking instructions for Sculpey Soufflé™.

Allow to cool completely before handling.

Step 7

Assemble as shown using flat nose pliers to open and close the jump ring.