Sculpey Premo™ Pastel Heishi Bracelets
Sculpey Premo™ Pastel Heishi Bracelets
Designed by Precious Nunez
Read More
Read Less
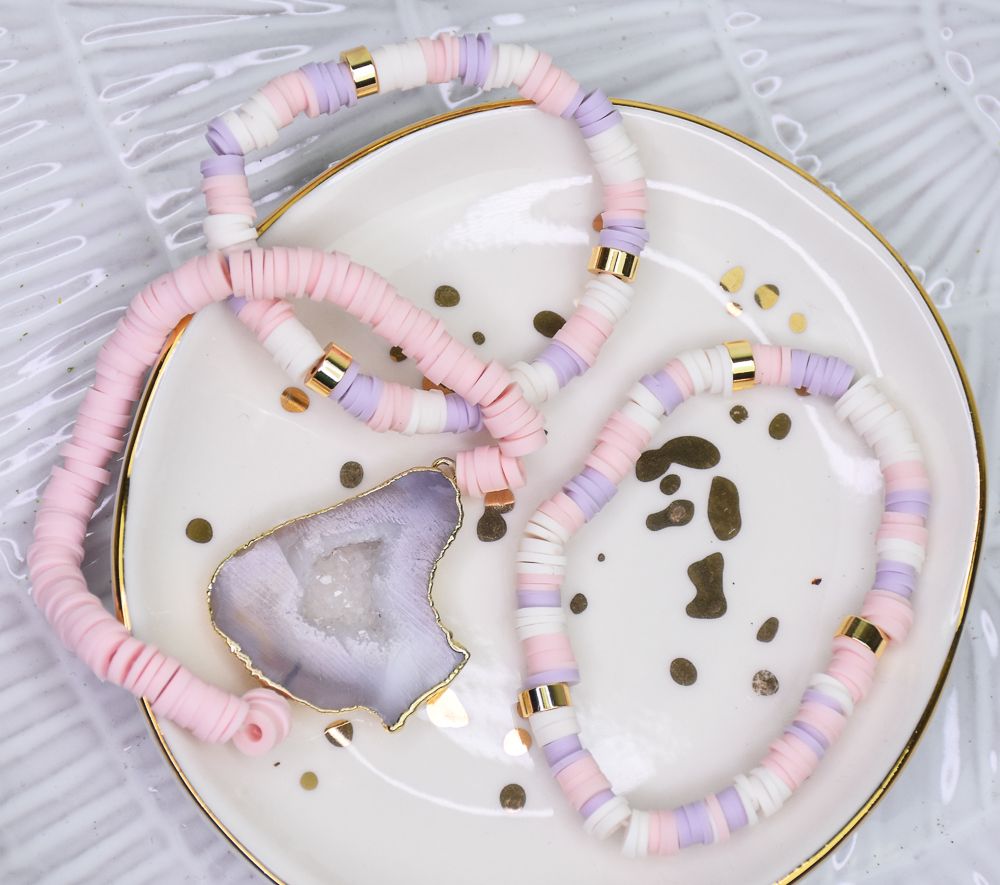
Make these super cute and simple heishi bracelets for everyday wear, perfect for friendship bracelets and gifts to friends! TIME TO COMPLETION: Approximately 1 hour to make, bake and build the bracelets
ADDITIONAL SUPPLIES
- Tape
- Scissors
- Elastic cord
- Druzy stone connector
- Gold metal spacer beads
- 25 mm metal/aluminum knitting needle (size 0)

Project Instructions
Step 1
- Getting Started:
Start with clean hands, unwrap and knead clay until soft and smooth, or condition by running clay though a Pasta Machine. We recommend using a designated machine for clay purposes only. When working with multiple colors, clean hands with soap and water or baby wipes (we have found that baby wipes work best) before switching colors. Shape clay, pressing pieces firmly together. Wash hands after use.
- Baking (also called Curing):
Step 2
Roll each color of clay through the pasta machine one at a time. Trim a rectangular piece of clay and lay across the knitting needles till it overlaps.Trim off excess flap.

Step 3
Roll clay to stretch it across the needle as it gets thinner and covers more surface. Repeat these steps for all colors of clay. Make 3-4 longs for each color, more if needed.
Step 4
Bake according to Step 1.
Step 5
Remove the clay from the needle by twisting and pulling to slide it off. Cut thin slices of the clay to create heishi beads, repeat this with each color.**TIP: For easier cutting, warm clay logs in the oven for 1-2 minutes**

Step 6
Take some elastic cord and cut three strips about a foot long for each bracelet. Tie one side of the string to your work surface for easy stringing process. For the first bracelet, string only pink beads. Make sure to leave the beads a little shorter distance since the stone connector is wide.
Step 7
String your Druzy stone connector to an end of the bracelet using a basic knot, re-knot this about 2-3 times to get a tight knot.
Step 8
Take the end cord off the tape and connect it around to the other connector. Tie a few knots tightly to make a strong hold.
Step 9
Repeat Step 6 to string your beads for the last two bracelets. For these two, string all three colors sporadically occasionally using the gold metal beads as an accent.
Step 10
Repeat Step 8 to finish the bracelets.