Skip to product information
1 of 1

Sculpey Premo™ Faux Embroidery Earrings

Sculpey Premo™ Faux Embroidery Earrings

Designed by Amy Koranek
Read More
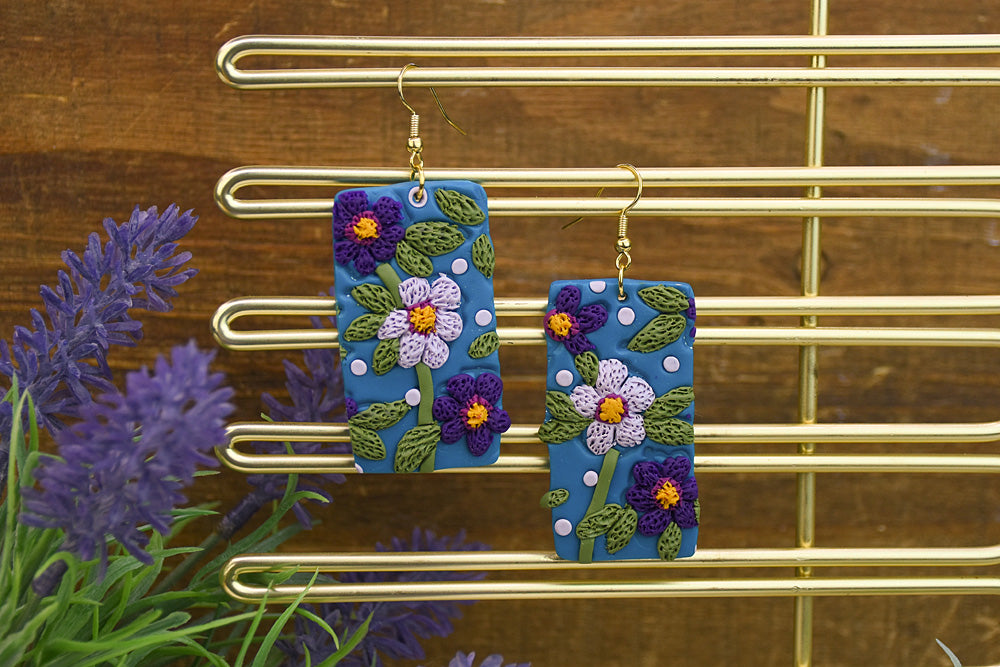
This gorgeous project utilizes a faux embroidery technique and a wonderful color palette to create these showstopper earrings. TIME TO COMPLETION: 90 MINUTES
Read Less
ADDITIONAL SUPPLIES
  • Rubber texture sheet with floral pattern
  • Gold tone ear wires (2)
  • 4 mm Gold tone jump rings (2)
  • Flat nose pliers
View full details
Project Instructions

Step 1

Getting Started:

Please make sure your work area is covered and you are not working on an unprotected surface. We recommend working on the Sculpey® Oven Safe Work Mat, wax paper, metal baking sheet, or disposable foil. Uncured clay may damage unprotected furniture or finished surfaces. Be sure to cover your crafting area appropriately.

Start with clean hands, unwrap and knead clay until soft and smooth, or condition by running clay though a Pasta Machine. We recommend using a designated machine for clay purposes only. When working with multiple colors, clean hands with soap and water or baby wipes (we have found that baby wipes work best) before switching colors. Shape clay, pressing pieces firmly together.  Wash hands after use.

 Baking (also called Curing):

Begin by preheating oven to 275 °F (130 °C). After you are done creating; for best results bake clay on an oven-proof surface such as metal, aluminum foil, an index card or the Sculpey® Oven Safe Work Mat at 275°F (130 °C) for 30 minutes per ¼" (6 mm) of thickness according to package directions.


Oven safe glass or ceramic surfaces are also acceptable for baking; however
please note that the baking times may take longer as the glass or ceramic
surfaces take longer to heat up. For best baking results, use an oven
thermometer. DO NOT USE MICROWAVE OVEN. DO NOT EXCEED THE ABOVE TEMPERATURE OR RECOMMENDED BAKING TIME.

Step 2

Sheet or roll 1/2 bar Premo™ Teal to a sheet that will accommodate the 2” Square Cutter. If you use a pasta machine, sheet on the thickest setting or about 1/8” thick.
Then roll it with the Clay Roller to make sure wave lines from the pasta
machine are removed.

Step 3

Use a rubber stamp or texture sheet of your choosing to impress a deep texture into the Teal.

Apply hard hand pressure in the center of the texture (face down) in the clay working from the center outward. Then roll with the Clay Roller to make sure it’s
really deep.

A good texture to use for this is one with deeply defined lines and plenty of negative space around the lines, like my sample.

Step 4

Since we only need to create a slab that is large enough for one pair of earrings, go
ahead and use the 2” Square Cutter to cut out the shape. Set the scraps aside
for future projects.

Step 5

Roll very thin pieces of Spanish Olive - 1/16” thick or thinner. Apply a few strips
to make stem designs in the pattern. These will end up in the background.

Step 6

Roll tiny teardrop shapes of Purple Premo™ place these in the textured design.

Step 7

Repeat Step 6 with Lavender Premo™. Place petals directly on top of the stems where needed.

Step 8

Add little balls of Turnip Soufflé to the center of each flower.

Step 9

Flatten the centers in place with the Ball End Tool.

Step 10

Seat little balls of Mustard Premo™ into the centers of each flower.

Step 11

Roll rice shapes with fingertips from Spanish Olive. Place these in the design where
leaves are indicated. You can add more as needed in random places as well.

Step 12

Next, take your time and stipple all the elements with the Needle Tool. The more
stippling, the more it will look like embroidery.

Step 13

Add tiny balls of Lavender Premo™ to the background as desired. I left the stems and the background dots unstippled for a difference in texture.

Step 14

Use the side of the 2” Square Cutter to divide the entire piece in half for two
earrings. This will create naturally rounded corners.

Step 15

Use the side of the 2” Square Cutter to remove the excess from the other piece as well. Use fingertips to smooth edges as needed.

Step 16

Use the Blunt Point Tool to poke holes as needed for earring assembly.

Bake the clay pieces following the baking instructions for Sculpey Premo™.

Allow to cool completely before handling.

Step 17

Use flat nose pliers to open and close jump rings connecting the clay art to the ear
wires.