Skip to product information
1 of 1

Sculpey III® Sprinkle Cake BFF Necklace Charm

Sculpey III® Sprinkle Cake BFF Necklace Charm

Designed by Lynniepopsicle
Read More
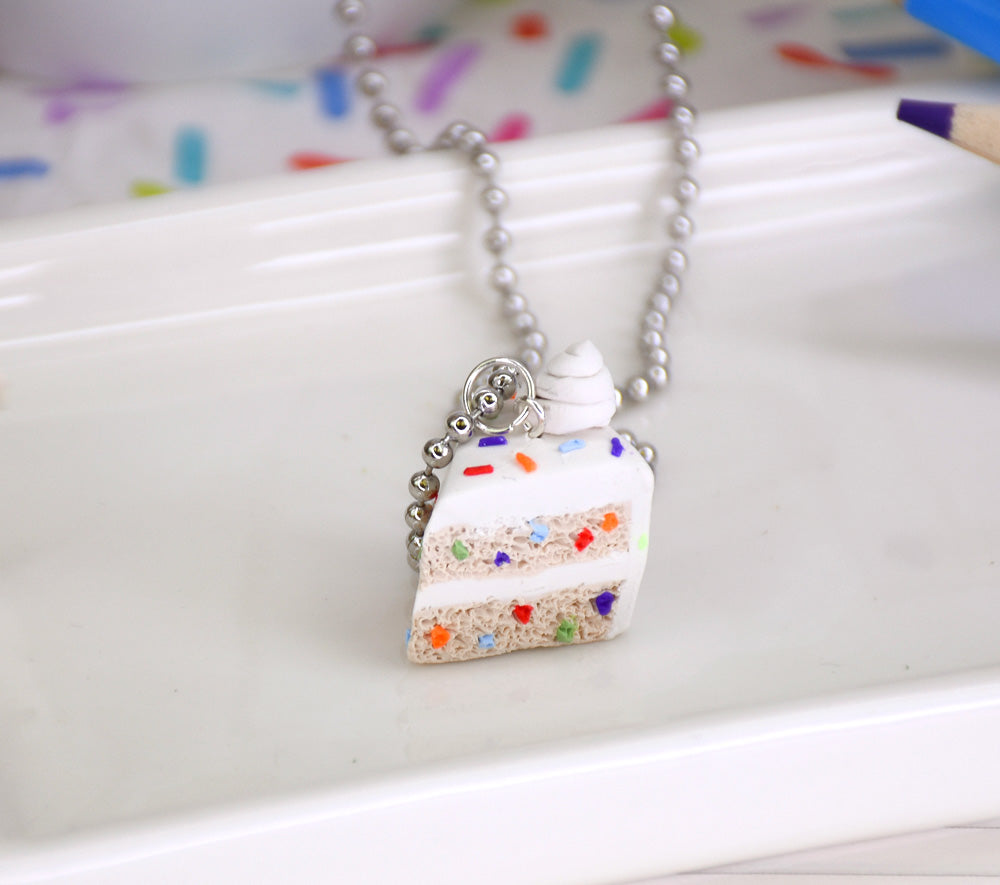
Create a rainbow sprinkle slice of cake using the below clays and adding an eyepin and ball chain to turn it into a BFF necklace charm.
Read Less
ADDITIONAL SUPPLIES
  • 1 eyepin
  • 1 ball chain
View full details
Project Instructions

Getting Started:

Please make sure your work area is covered and you are not working on an unprotected surface. We recommend working on the Sculpey® Work ‘n
Bake Clay Mat, wax paper, metal baking sheet, or disposable foil. Uncured
clay may damage unprotected furniture or finished surfaces.
Be sure to
cover your crafting area appropriately.

Start with clean hands, unwrap and knead clay until soft and smooth, or condition by running clay though a Pasta Machine. We recommend using a designated machine for clay purposes only. When working with multiple colors, clean hands with soap and water or baby wipes (we have found that baby wipes work best) before switching colors. Shape clay, pressing pieces firmly together.  Wash hands after use.

Baking:

Begin
by preheating oven to 275 F (130 C). After you are done creating; for best
results bake clay on an oven-proof surface such metal, aluminium foil, an index
card or the Sculpey® Clay at 275 F (130 C) for 15 min. per 1/4” (6 mm) thickness according to package directions.  Oven safe glass or ceramic surfaces are also acceptable for baking; however please note that the baking times may take longer as the glass or ceramic surfaces take longer to heat up.  For best baking results, use an oven thermometer. DO NOT USE MICROWAVE OVEN. DO NOT EXCEED THE ABOVE TEMPERATURE OR RECOMMENDED BAKING TIME.

Step 2

Condition a ½-inch ball white and ¼-inch tan clay by rolling it between your hands – it has to become soft like playdough. Form a large ball of white clay (1-inch) and
a medium ball of tan clay (1/2-inch)

Step 3

You can now start rolling the white clay with your rolling tool to make it flat – to create an even surface you can use two popsicle sticks on either side (if you’ve got any). Smooth the clay between your fingers to get rid of any lines.

Step 4

Cut out 2 circles of white clay about 1-inch diameter and 1/8inch thick (use a circular cutter if you have got one to make sure every circle is the same size) – if not just use your cutting tool.

Step 5

Roll out your tan clay. With your cutting tool cut out two circles about 1-inch diameter and ¼-inch thick.

Step 6

Roll out a strip of white clay and cut it roughly to the height of the cake. It has to go all round the cake so make sure it is long enough.

Place the edge of your cake at one edge of the strip to measure the height and trim the strip so it is just the same height as the cake. Trim the end of the white strip to square it off.

Step 7

Apply the white strip all round your cake.

Blend the clay with your fingers so it is smooth all over the cake and you don’t see any joint lines anymore.

Step 8

Cut the cake in half with your cutting tool or a sharp blade (ask an adult to help) and admire the layering inside!

Step 9

Cut a slice of cake with your cutting tool or a sharp blade (ask an adult to help) - you can decide how thick/thin you want it! I tend to make six slices out of a cake.

Step 10

Texture each layer of tan clay using either a toothpick or a needle tool to make it look like cake dough.

Step 11

Add an eye pin to each slice of cake

Step 12

Roll out very thin strip of red, orange, green, purple, blue clay and cut them into 1/16 in strips to make the sprinkles

Step 13

Add the sprinkles to the cake dough (push them down using your needle tool to give them texture) and to the top and side of the cake (push them down gently to make them stick)

Step 14

Form a tiny pyramid of white clay and wrap a thin strip of white clay around it for the icing decoration, and place on top of the cake.

Step 15

You are all done! Bake for 275 F (130 C) for 15 min. per 1/4”

You can repeat the same process for each slice of cake and share it with all your BFFs!