Skip to product information
1 of 1

Sculpey III® Puzzle Cord Organizer

Sculpey III® Puzzle Cord Organizer

Designed by Amy Koranek
Read More
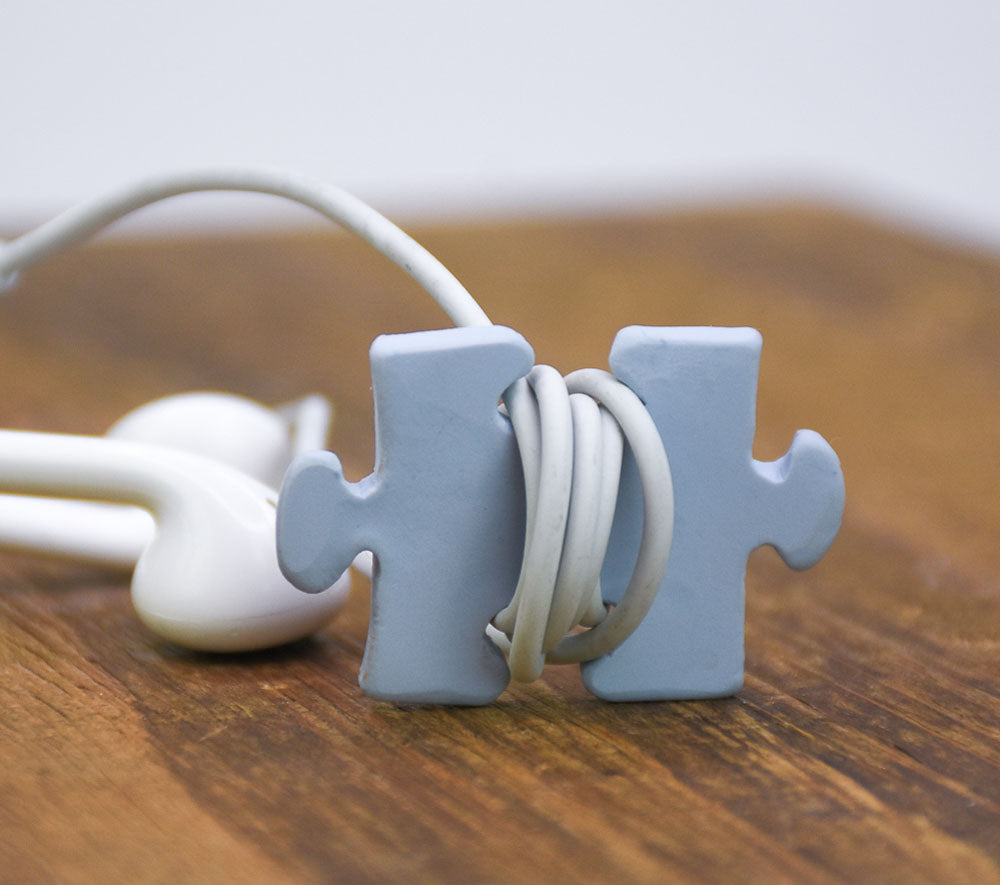
This is a quick and CLEVER gift idea that is also very useful for corralling all those computer and phone cords we all have! You could make a couple for each family member using a different color clay for each member.
Read Less
ADDITIONAL SUPPLIES
  • Xacto Knife
  • Scissors
  • Puzzle piece template printed onto paper and cut out - I downloaded a basic puzzle piece from the internet that was free to copy (or trace a puzzle piece your have)
View full details
Project Instructions

Step 1

Getting Started:

Please make sure your work area is covered and you are not working on an unprotected surface. We recommend working on the Sculpey® Oven
Safe Work Mat, wax paper, metal baking sheet, or disposable foil. Uncured
clay may damage unprotected furniture or finished surfaces.
Be sure to
cover your crafting area appropriately.

Start with clean hands, unwrap and knead clay until soft and smooth, or condition by running clay though a Pasta Machine. We recommend using a designated machine for clay purposes only. When working with multiple colors, clean hands with soap and water or baby wipes (we have found that baby wipes work best) before switching colors. Shape clay, pressing pieces firmly together.  Wash hands
after use.

Baking:

Begin by reheating oven to 275 °F (130 °C). After you are done creating; for best results bake clay on an oven-proof surface such as metal, aluminum foil, an index card or the Sculpey® Oven Safe Work Mat at 275°F (130 °C) for 15 minutes per ¼" (6 mm) of thickness according to package directions. Oven safe glass or ceramic
surfaces are also acceptable for baking; however please note that the baking
times may take longer as the glass or ceramic surfaces take longer to heat up. For
best baking results, use an oven thermometer. DO NOT USE MICROWAVE OVEN. DO NOT EXCEED THE ABOVE TEMPERATURE OR RECOMMENDED BAKING TIME.

Step 2

Print a basic puzzle piece shape that you would like to use for your template from the internet. Cut the shape out with scissors.

Step 3

Sheet conditioned Arctic Blue clay to a sheet about 1/8” thick with the Acrylic Clay Roller.

Position the template on top of the clay.

Step 4

Use an Xacto knife to carefully cut out the piece around the outside of the template.

Step 5

Remove the template.

Step 6

Smooth all cut edges with fingertips where possible. You can also use clay tools to help smooth areas that are hard to reach.

Bake the piece following the baking instructions for Sculpey III®.

Allow to cool completely before handling.