Skip to product information
1 of 1

Sculpey Bake Shop® Clay Covered Pen

Sculpey Bake Shop® Clay Covered Pen

Designed by Amy Koranek
Read More
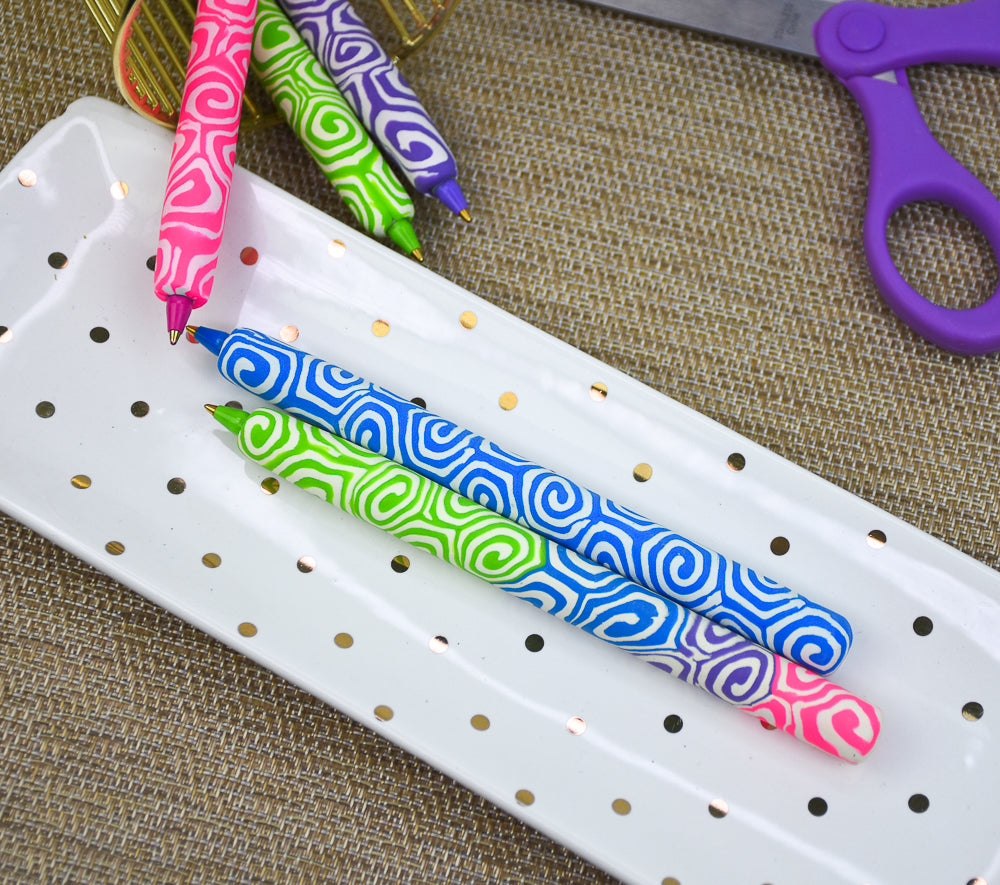
Creating your own custom styled pens is easy! Follow these directions and your desktop will be custom colorful! TIME TO COMPLETION: 30 Minutes to make and 20 minutes to bake (makes 2 pens)
Read Less
ADDITIONAL SUPPLIES

BIC Round Stic or BIC Round Stic Grip ink pens (2)

View full details
Project Instructions

Step 1

Getting Started:

Please make sure your work area is covered and you are not working on an unprotected surface. We recommend working on the Sculpey® Oven
Safe Work Mat, wax paper, metal baking sheet, or disposable foil. Uncured
clay may damage unprotected furniture or finished surfaces.
Be sure to
cover your crafting area appropriately.

Start with clean hands, unwrap and knead clay until soft and smooth, or condition by running clay though a Pasta Machine. We recommend using a designated machine for clay purposes only. When working with multiple colors, clean hands with soap and water or baby wipes (we have found that baby wipes work best) before switching colors. Shape clay, pressing pieces firmly together.  Wash hands
after use.

Baking:

Begin by preheating oven to 275 °F (130 °C). After you are done creating; for best results bake clay on an oven-proof surface such as metal, aluminum foil, an index card or the Sculpey® Oven Safe Work Mat at 275°F (130 °C)
for 15 minutes per ¼" (6 mm) of thickness according to package directions.
Oven safe glass or ceramic surfaces are also acceptable for baking; however
please note that the baking times may take longer as the glass or ceramic
surfaces take longer to heat up. For best baking results, use an oven
thermometer. DO NOT USE MICROWAVE OVEN. DO NOT EXCEED THE ABOVE TEMPERATURE OR RECOMMENDED BAKING TIME

Step 2

Only BIC brand ink pens will work for this project. However, you can use either the BIC Round Stic or the BIC Round Stic Grip.

First remove the caps and discard these.

Next carefully remove the ink stick from the ink barrel as shown. For the “Grip” pen, you will need to replace the gray portion that holds the grippy part in place onto the ink barrel.

Set the ink sticks aside until the end of the project.

Step 3

Divide each 1 ounce bars of White and Blue in half. One half ounce of each color is all that is needed to make 2 pens. Set the remainder of the clay aside

Step 4

Roll each color into a thick rope.

Step 5

Flatten each rope into a rectangle sheet with the Clay Roller keeping each sheet as close in size as possible. The sheets should be no more than 1/8” thick.

Step 6

Layer the White sheet on top of the Blue sheet.

Step 7

Roll the sheets together with the Clay Roller.

Step 8

Fold the duo sheet in half with the White in the middle.

Step 9

Flatten the folded sheet with the Clay Roller.

Step 10

Starting at the folded end of the sheet, roll the clay sheet up around itself jelly roll style.

You’ve now created a Jelly Roll Cane.

Step 11

Roll the cane on the work surface gently to reduce its diameter to around 1/2”.

Step 12

Slice the cane in half with a Clay Blade. Each half will be used to cover a pen barrel.

Step 13

Use a Clay Blade to slice pieces off that are not more than 1/8” thick. For starters, just slice off two slices.

Step 14

Starting at the cloaked end of the barrel, with two slices
that extend beyond the barrel end by 1/16”, cover the entire barrel with cane
slices alternating the pattern so that the slices nest together. The slices
should just barely touch each other. A gap between pieces in this project is
better than overlapping pieces.

Carefully bend the two slices opposite each other on the pen
barrel. The slices should just barely touch each other at their widest points.
They should not overlap. If they overlap, the cane is too big and can be
decreased in diameter by gently rolling it more on the work surface. If they
don’t quite touch each other, you can pinch each slice slightly to make it a
little bigger. The optimal condition is that they barely touch or there is a
slight gap between slices on the barrel.

Step 15

Roll the pen barrel gently on the work surface until it’s smooth and all the little spaces have filled in with clay.

750-16

Roll the pen barrel gently on the work surface until it’s smooth and all the little spaces have filled in with clay.

Step 17

At the closed end of the barrel, fold over excess clay to form a neat end.

Step 18

At the open end of the barrel, make sure the clay is trimmed
neatly away from the opening.

This photo is of the opening end of the BIC Round Stic.

Step 19

Push the ink sticks carefully back into the barrels.This photo is of the opening end of the BIC Round Stic Grip
which is slightly smaller than the other pen style. Make sure the opening does
not have excess clay covering it.

Bake the pen or pens at 275F for 20 minutes. Allow to cool completely before handling.

Push the ink sticks carefully back into the barrels.

Change up the colors to make a whole handful of pens!