Skip to product information
1 of 1

Liquid Sculpey® Tinted Trinket Tray

Liquid Sculpey® Tinted Trinket Tray

Designed by Amy Koranek
Read More
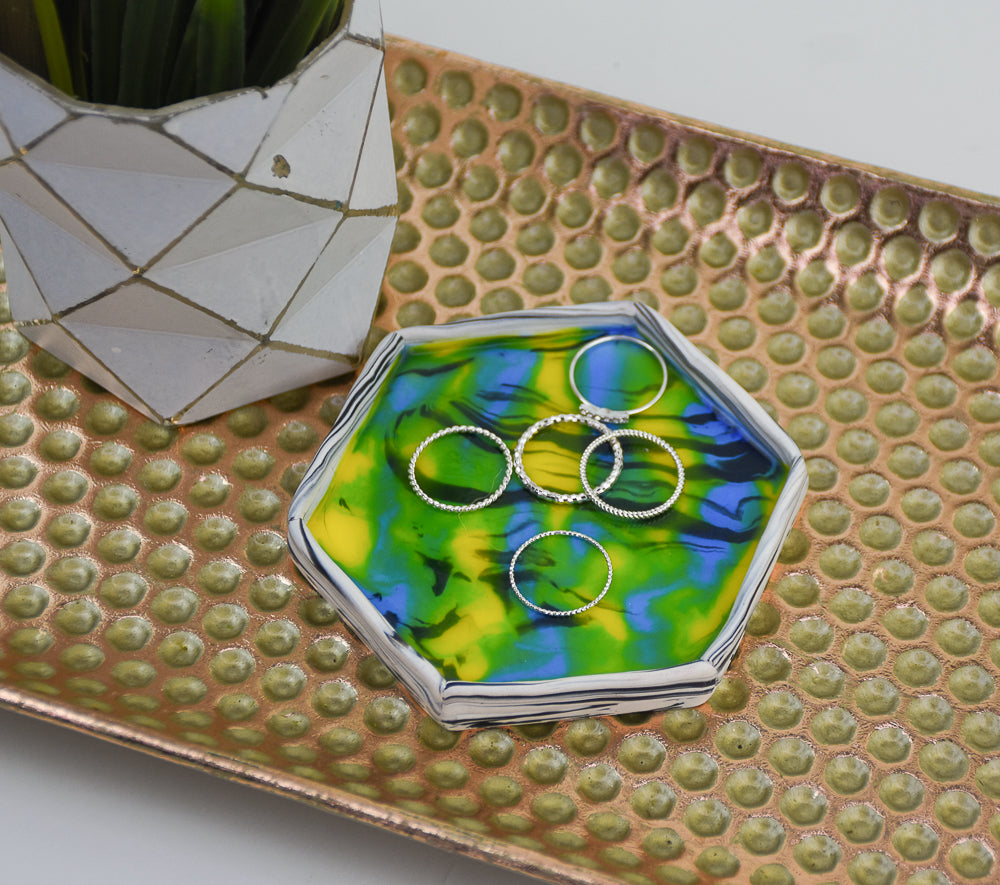
Dynamic combinations of marbled black and white clay create a background for the colorful swirls of tinted Liquid Sculpey® for this exceptional small trinket tray. TIME TO COMPLETION: 60 Minutes to make and bake
Read Less
ADDITIONAL SUPPLIES
  • Paper template of a hexagon about 3.5” across
  • Paper towel
  • Silicone baking liners (2) for tinting Clear Liquid Sculpey - miniature sized for miniature cupcakes
  • Heat gun - optional
View full details
Project Instructions

Step 1

Getting Started with Liquid Sculpey®:

Please make sure your work area is covered and you are not working on an unprotected surface. We recommend working on the Sculpey® Oven Safe Work Mat, wax paper, metal baking sheet, or disposable foil. Uncured Liquid Polymer Clay may damage unprotected furniture or finished surfaces. Be sure to cover your crafting area appropriately.

- Stir Liquid Sculpey® completely. Thin with Sculpey® Liquid Clay Softener as needed

- Wash hands after use (we have found that baby wipes work best)

Baking:

 -It is important to use oven thermometer when you bake the liquids so that you can ensure your oven is at the correct temperature.

-Do not microwave the liquids. They must be baked in a Preheated oven at 275 ºF (130 ºC) for liquid colors and 300 ºF (149 ºC) for Clear – Do not exceed baking temperatures.

-If your piece is less than 1/4” bake for 15 minutes. For thicker pieces that are 1/4” or above bake for 30 minutes.

-If your liquid project has become yellowed or discolored in the oven, when you remake it, tent it by placing either – folding an index card in half and placing your project under it by using aluminum foil over your project.

Step 2

For the base of the tray we will use 3/4 bar White Premo™ and 1/4 bar Black Premo™.

Chop the colors randomly with a Clay Blade.

755-3

Gather the chips into a ball.

Step 4

Roll the ball smooth with hands.

Step 5

Roll and twist the ball into a striped rope.

Step 6

Coil the rope.

Step 7

Roll the coil into a ball.

Step 8

Flatten the ball into a pancake about 3/16”-1/4” thick with the Acrylic Clay Roller.

Step 9

Position the hexagon template on top.

775-10

Use a Clay Blade to cut away excess.

Step 11

Here is the base of the tray.

Step 12

Roll the scraps from Step 10 into a rope.

Step 13

Flatten the rope with the Acrylic Clay Roller.

Cut six sections matching the length of the sides of the flat tray.

Step 14

Attach the sides to the base of the tray and smooth the outside seams and corners.

Smooth the edges of the sides with fingertips.

Step 15

Now we will tint the Clear Liquid Sculpey® (LS) to Yellow and to Blue with the Color Tints.

We only need a small of amount of each color to cover the inside flat bottom of the tray.

Place enough Clear LS in two silicone baking liners to cover the bottoms of the liners. Please note, the liners pictured here are very small - only the size of a miniature cupcake. Add one drop of Yellow Tint to one liner and one drop of Blue Color Tint to the other.

775-16

Stir the tints into the Clear LS completely with tools from the Clay Tool Starter Set.

Clean tool with paper towel.

775-17

Place the clay tray on the baking pan so you can easily lift the clay tray to tilt it in the upcoming steps without disrupting its shape.

Drizzle Clear Yellow across the tray.

Step 18

Drizzle Clear Blue in the empty areas.

775-19

Carefully pick up the baking pan with the tray on it and tilt the pan carefully to help the tinted colors run together slightly and to fill in empty areas.

Step 20

Repeat Step 19 again tilting in the opposite direction to make sure all empty areas are filled in.

Step 21

Lay the baking pan with the clay tray on it on a level surface.

Use tools to move the colors as desired to create more interest in the design but do not mix the colors completely.

Step 22

Bake the clay tray following thebaking instructions for Premo™ Sculpey.

To pump up the shine on the Clear tinted surface, take the baking tray directly from the oven to the heat gun (using hand protection of course). Turn the heat gun on HI and apply heat until the Clear areas shine. As soon as it goes glossy and shiny, remove the extra heat and allow the tray to cool on the baking pan completely before handling.