Skip to product information
1 of 1

Liquid Sculpey® Mod Hoop Earrings

Liquid Sculpey® Mod Hoop Earrings

Designed by Amy Koranek
Read More
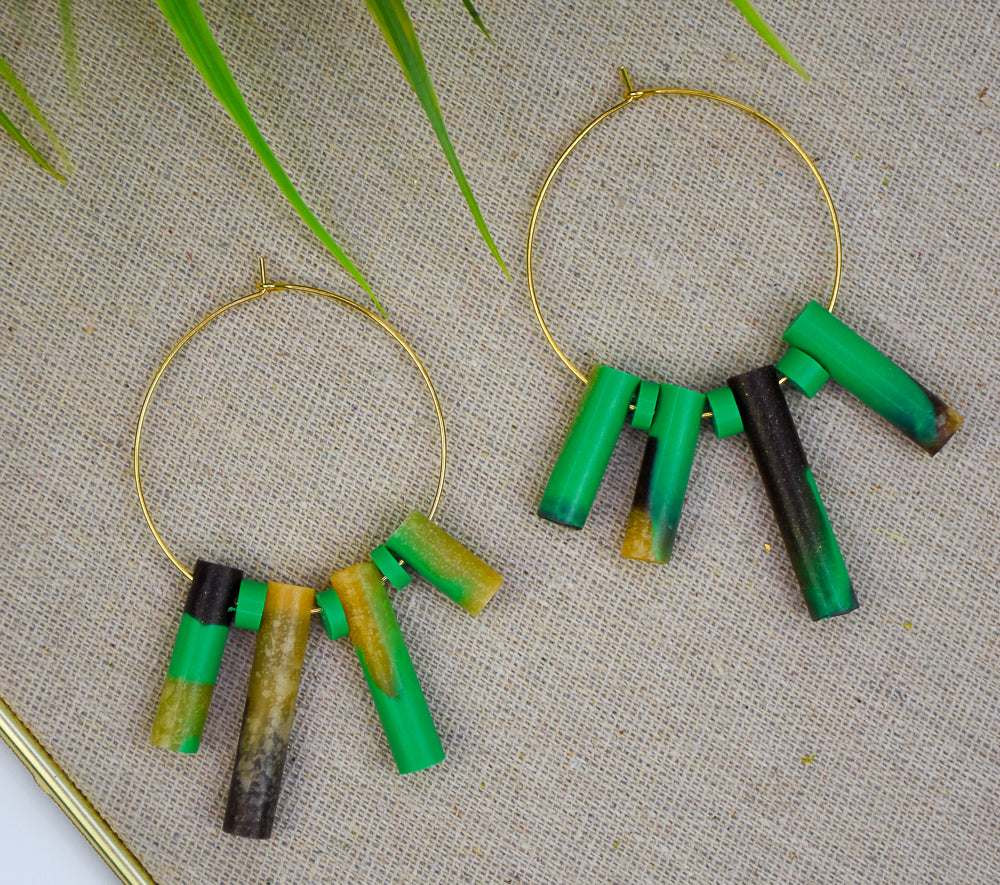
These colors and earring style teams up to create a WOW! pair of earrings that will be sure to catch the compliments! TIME TO COMPLETE: 2 Hours and 30 Minutes to make, bake (4 times), and assemble
Read Less
ADDITIONAL SUPPLIES
  • Paper towel
  • Dremel drill, or pin drill, or spring drill
  • 1.5” Gold tone hoop connectors (2)
  • Flat nose pliers
View full details
Project Instructions

Step 1

Getting Started with Liquid Sculpey®:

Please make sure your work area is covered and you are not working on an unprotected surface. We recommend working on the Sculpey® Oven
Safe Work Mat, wax paper, metal baking sheet, or disposable foil. Uncured
Liquid Polymer Clay may damage unprotected furniture or finished surfaces. Be
sure to cover your crafting area appropriately. - Stir Liquid Sculpey® completely. Thin with Sculpey® Liquid Clay Softener as needed - Wash hands after use (we have found that baby wipes work best)

Baking:

-It is important to use oven thermometer when you bake the liquids so that you can ensure your oven is at the correct temperature.

-Do not microwave the liquids. They must be baked in a Preheated oven at 275 ºF (130 ºC) for liquid colors and 300 ºF (149 ºC) for
Clear – Do not exceed baking temperatures.

-If your piece is less than 1/4” bake for 15 minutes. For thicker pieces that are 1/4” or above bake for 30 minutes.

-If your liquid project has become yellowed or discolored in the oven, when you remake it, tent it by placing either – folding an index card in half and placing your project under it by using aluminum foil over your project.

Here’s a tip for baking perfectly in silicone molds. Dampen a dish towel with water and wring out as much of the water as you can. Fold the damp towel so that the molds can sit level on top of it. The damp towel will slow down the curing process so that the LS will cure evenly throughout and avoid warping.


Step 2

In this tutorial we are going to make tube beads by using the Tube Shape Molds from the 3D Jewelry Mold. We will bake the mold multiple times to get the quantity of tubes that are needed for the design.

Drip a combination of the colors into the tube wells.

When I fill these wells, I find it best to drip some Liquid Sculpey® (LS) in. Then I pinch the well from the bottom to release stubborn air bubbles. Then add more LS, pinch again, then add more. You can layer the colors however you like. The pinching will also help to blend the colors in the tube.

Fill both tube shapes and then bake the mold following the baking instructions for Liquid Sculpey®. Allow to cool completely before handling.

Step 3

To release the baked tube beads, dip the Needle Tool into the Sculpey® Clay Conditioner and Softener.

Step 4

Carefully insert the wet Needle Tool between the baked LS and the wall of the mold being careful not to pierce the mold. Drag the Needle around the molded shape.

Repeat Step 3 and 4 for the second tube.

Step 5

Pinch the bottom of the mold and the tube bead should slide right out because of the Sculpey® Clay Conditioner and Thinner.

Wipe the tubes if they are oily from the Clay Conditioner and thinner with paper towel.

Step 6

Repeat all steps to make a total of 8 tube beads.

Step 7

Next use a Clay Blade to carefully cut the tubes into a variety of lengths.

I intentionally cut 6 pieces that are only about 1/8” thick to turn sideways and use as spacer beads. The remaining lengths will be used longways as hanging tubes.

Step 8

Organize the beads so you can know where to drill the holes. The spacers should be drilled through the center of the flat circle. The tubes will be drilled through side to side close to the top.

Step 9

Here I’ve drilled the beads with my Dremel and have them laid out with the hoops.

Step 10

Thread the beads onto the hoops. If you like, you can bend a 90 degree hook in the end of the tail of the hoop to create a hook for the eye with flat nose pliers.