Skip to product information
1 of 2

Liquid Sculpey® Marbled Mini Notebook

Liquid Sculpey® Marbled Mini Notebook

Designed by Amy Koranek
Read More
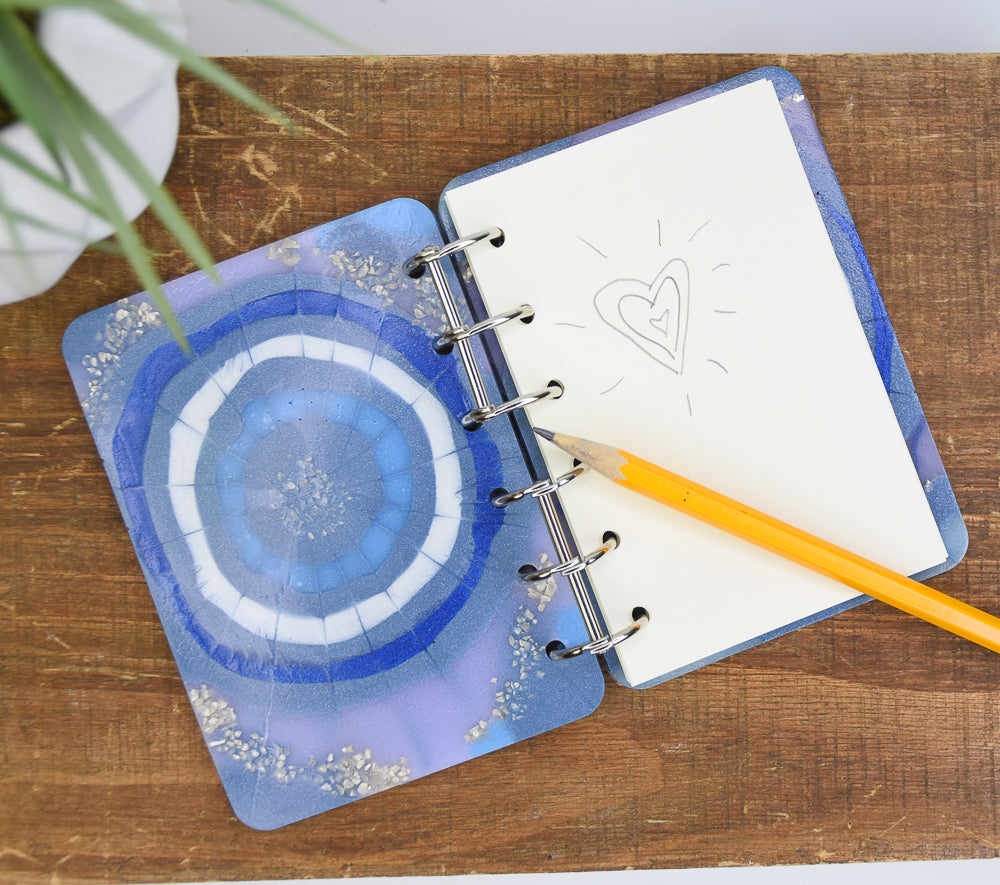
Super charge your notes with this gorgeous and dynamic book cover featuring Liquid Sculpey! Add a bit of bling as well to create even more drama. TIME TO COMPLETE: 2.5 Hours to make, bake (bakes 4 times), and assemble
Read Less
ADDITIONAL SUPPLIES
  • Paper towel
  • Silicone notebook cover mold
  • Ring binder kit
  • Paper insert kit
  • Heat gun
  • Dish cloth
  • Large silver flake glitter
View full details
Project Instructions

Step 1

Getting Started with Liquid Sculpey®:

Please make sure your work area is covered and you are not working on an unprotected surface. We recommend working on the Sculpey® Oven Safe Work Mat, wax paper, metal baking sheet, or disposable foil. Uncured Liquid Polymer Clay may damage unprotected furniture or finished surfaces. Be sure to cover your crafting area appropriately.

- Stir Liquid Sculpey® completely. Thin with Sculpey® Liquid Clay Softener as needed

- Wash hands after use (we have found that baby wipes work best)

Baking:

-It is important to use oven thermometer when you bake the liquids so that you can ensure your oven is at the correct temperature.

-Do not microwave the liquids. They must be baked in a Preheated oven at 275 ºF (130 ºC) for liquid colors and 300 ºF (149 ºC) for Clear – Do not exceed baking temperatures.

-If your piece is less than 1/4” bake
for 15 minutes. For thicker pieces that are 1/4” or above bake for 30 minutes.

-If your liquid project has become
yellowed or discolored in the oven, when you remake it, tent it by placing
either – folding an index card in half and placing your project under it by
using aluminum foil over your project.

Here’s a tip for baking perfectly in silicone molds. Dampen a dish towel with water and wring out as much of the water as you can. Fold the damp towel so that the molds can sit level on top of it. The damp towel will slow down the curing process so that the LS will cure evenly throughout and avoid warping.

Step 2

Lay the silicone mold flat in front of you on a level work surface.

Fill the mold with puddles of Liquid Sculpey® (LS) starting in the center and working your way outward. It’s better to under fill and allow the colors to naturally spread into each other rather than over fill the mold. You can always add more LS as needed. I have intentionally left a few areas empty which lets the LS spread on its own. This pattern is very loose and organic in nature.

Step 3

If you have very wide bands of color, you can add thin lines right on top of those wide bands.

Fill the mold almost up to level with like color on top of like color. Leave a little room unfilled around the top so there’s room to later add a layer of Clear LS in Step 7.

Step 4

Drag the Needle Tool from the center out to move the LS into patterns. You can alternate with some drags that go from outside inward as desired. Clean tools with paper towel.

Step 5

Here’s a tip to make sure the mold bakes completely flat - dampen a dish cloth and wring out as much water as possible. Place the mold on the damp washcloth on top of the baking sheet. The damp cloth will help the mold and LS heat up more slowly which keeps the mold from warping.

Before putting in the oven, add some sprinkles of large flake silver glitter to the design.

Step 6

Bake following the baking instructions for Liquid Sculpey. Allow to cool completely.

Step 7

Cover the entire baked piece with a super thin layer of Clear LS and bake again following the baking instructions for Liquid Sculpey®.

Step 8

If you want a super shiny cover, you can increase the shine by adding more heat with a heat gun. After the mold is baked, remove it from the oven with hand protection and use the heat gun while the molded piece is still hot. Leaving the piece in the mold, turn the heat gun on hi and move the heat across the piece until you see it really shine all over. Once you see the piece turn glossy, turn off the heat and allow the piece to cool in the mold completely.

Then carefully flex the mold to
release the cover.

Step 9

Repeat all steps to make a back cover too.

Here’s the layout for our notebook.

Step10

Assemble the front and back covers with the ring binding.

Step 11

Flip the notebook over and add paper inserts.

Step 12

The notebook is beautiful front…

Step 13

…and back!