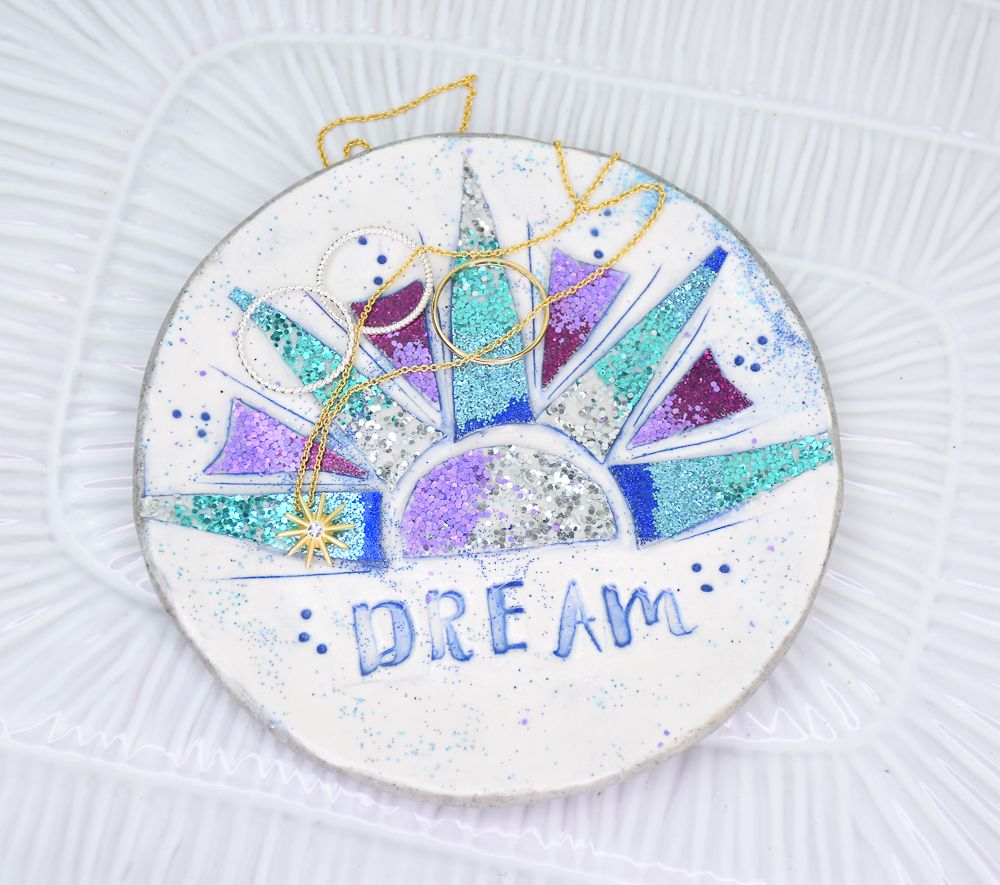
Liquid Sculpey® and Sculpey Premo™ Dream Dish
Liquid Sculpey® and Sculpey Premo™ Dream Dish
Designed by Amy Koranek
Read More
Read Less
Pre-baked sheets of Liquid Sculpey® make excellent decorative elements that can be added to any oven bake clay project. In this tutorial we will explore making glittery Liquid Sculpey® shards, using Liquid Sculpey® as an antiquing medium, and as a glaze.COMPLETION TIME:2 Hours to make and bake - this project will bake twice
ADDITIONAL SUPPLIES
- Glitters in both fine and coarse in blues, purples. and silver
- Small glass dish or saucer form
- Small flat silicone or glass baking forms (2)
- Short ruler or straight edge
- Rubber letter stamps - about 1/2” tall
- Scissors
- Heat gun

Project Instructions
Step 1
- Getting Started:
Start with clean hands, unwrap and knead clay until soft and smooth, or condition by running clay though a Pasta Machine. We recommend using a designated machine for clay purposes only. When working with multiple colors, clean hands with soap and water or baby wipes (we have found that baby wipes work best) before switching colors. Shape clay, pressing pieces firmly together. Wash hands after use.
- Baking (also called Curing):
Getting Started with Liquid Sculpey
Stir Liquid Sculpey® completely. Thin with Sculpey® Liquid Clay Softener as needed - Wash hands after use (we have found that baby wipes work best) .
- Baking:
Step 2
Designer’s Note - Clear Liquid Sculpey has a tendency to separate into a liquid part and a lumpy part when left alone over time. If using Clear LS from the bottle, you can insert your favorite stirring stick into the bottle and really scrape the lumps from off the bottom and the sides and stir until the lumps are re-incorporated into the liquid. Then continue stirring until smooth. This is super important because if the liquid is not stirred until smooth, it will not clear completely during heating. Clear LS can also be decanted into a small silicone, glass, metal, or the Sculpey Silicone Mixing Set Measuring Cup. This makes it easier to stir the liquid completely. Just remember to cover the Clear LS when decanted to keep dirt and lint out of the liquid.We will first make the glittery sheets of Liquid Sculpey® (LS) so they can bake while we prepare the dish.
In a silicone baking tray pour a puddle of Clear LS. Please make sure your Clear LS is stirred really well before proceeding. Spread the Clear LS to the corners of the baking pan. The puddle should not be more than 1/16” thick.
For reference, the silicone sheet I’m using here is about 4”x4” with walled sides. I will use two of these little pans making two sheets of glittery shards.

Step 3
Add bands of glitter to one of the LS puddles in blues: I used dark blue, light blue, aqua, and silver glitters in a variety of fine and coarse.
Step 4
Add glitter to the second puddle in bands of deep purple, light purple, and silver.Bake the glittery LS following the baking instructions for Liquid Sculpey®.
Allow to cool completely before handling.

Step 5
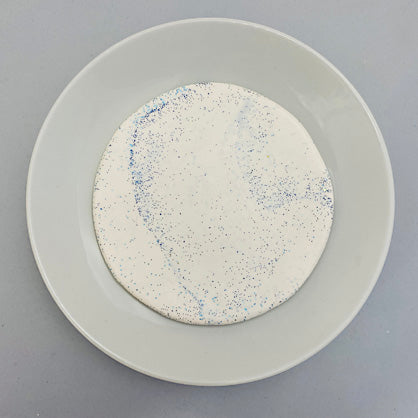
While the LS bakes, we can make the dish.Roll up a ball using 2 ounces of Premo™ Frost White Glitter.
Sprinkle a couple colors of your glitters on the work surface and roll the ball around in the glitter to pick it up.

Step 6
Condition some of the glitter into the clay and leaving some on the surface creating a swirled ball.
Step 7
Flatten the ball into a pancake with the Clay Roller.
Step 8
Lay the pancake into the bottom of the ceramic dish or saucer form. Make sure it lays down snugly without trapping air bubbles.
Step 9
Use heavy fingertip pressure to push excess clay out to the edges. I like to push the clay until it makes a very thin edge which I think looks nice for the finished product.Use heavy fingertip pressure to really smooth the dish and sides.

Step 10
Lay a straight edge or ruler across the clay and line up your letters across the straight edge to make sure there will be enough room in the clay to accommodate them.My letters look like they are too wide but I will make them fit nicely by accounting for the empty spaces between the letters in the next step.

Step 11
I always start with the center letter, in this case the letter “E” and work out from there.Push the center letter into the clay embossing it into place.

Step 12
Working out from the center letter, emboss the rest of the word. Pay attention to how much excess space is around each letter if you are using mounted rubber stamps.You can usually snug the letters closer together than would appear by the size of the wood block.

Step 13
Peel the baked LS sheets from the baking trays.Here is the baked blues sheet.

Step 14
The baked purples sheet.
Step 15
Use scissors to cut shards out of the sheets of baked LS for the design.Since I’ve been on a personal mission to do projects in LS that mimic glass and ceramic, I like to adopt names that go along with this theme. That’s why I call these pieces “shards”.
I used scissors to cut out a half round, four large thin triangles, and four smaller thin triangles.
I also trimmed curved edges on the short end of each triangle to make them look less sharp and fit around the half circle better.
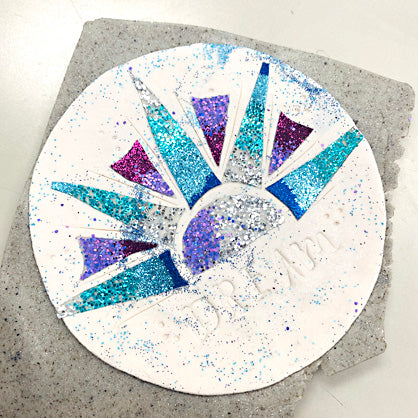
Position the shards on the plate above the word.
Use scissors to trim the pieces until you have exactly what you want.
When you are happy with the design, press them to make good contact with the raw Premo™ clay.
NOTE: I never throw the excess shards away. I save them because you just never know when you will want to add a bit of sparkle to the background of a project.

Step 16
Add more details as you like with your favorite detail tools. I like to make recessed dots with the 2 mm Ball Tool and score details with the Needle Tool.
Step 17
Here’s a look at my finished plate ready to go into the oven.Bake following the baking instructions for Sculpey Premo™.

Step 18
Allow the piece to cool completely before handling.Then use the tip of the Knife Tool to coax it loose from the form.

Step 19
Now it’s time to back your dish. Sheet a block of Gray Granite Premo™ so that it is large enough to cover the bottom of your dish. The thickness will not be an issue as long as it’s at least 1/16” thick because it will be just an extra layer to the rest of the dish.Turn the dish upside down and burnish the Gray Granite into place with the Clay Roller.
Push air bubbles out the edges.

Step 20
Flip the dish right side up and make sure there is good contact between the edges of the clays all the way around.
Step 21
Use the Clay Blade to trim the excess clay from the back right around the edge.
Step 22
Pinch the raw Gray clay up to meet the edge of the White clay front.
Step 23
Trim any excess Gray clay that may have come over the front edge. After trimming, smooth the cut edge with your fingertips.
Step 24
If you are very careful, you can go ahead and rub Navy Metallic LS into all the details before the final baking. Squirt small amounts of Navy Metallic LS in the texture details.Burnish the Navy LS into the recessed areas and wipe off excess with paper towel.
Sorry I don’t have a photo here so please refer to the finished piece so you can see how the addition of the Navy LS really helps highlight the details.
Bake the dish once more to cure the back and the Navy LS following the baking instructions for Sculpey Premo™. Allow to cool completely before handling.

Step 25
For the final detail, add a thin layer of Clear LS over the entire front to add a glaze-like shine.Squirt a small amount of Clear LS onto the dish. Spread the Clear LS all over the top side of the dish and all the details. This layer of Clear LS should even go over the shard design to create a ceramic glaze-like finish. Make sure you can still see the colors and the details through the LS.
If you cannot see the colors through the LS, then the LS is too thick and you need to squeegee some off with your fingertips.
Clean hands and tools with paper towel.

Step 26
I like to clear this layer with a heat gun.Turn the heat gun on the HI setting and hold it 4” over the surface of the clay and keep it moving.
First, you will notice the Clear LS will turn to a fog. This means the LS is “set” and won’t move. After “set” you can move the heat closer to the project and watch for the foggy LS to start to clear and then shine. As soon as all parts are clear and shiny, turn off the heat.


