Skip to product information
1 of 1

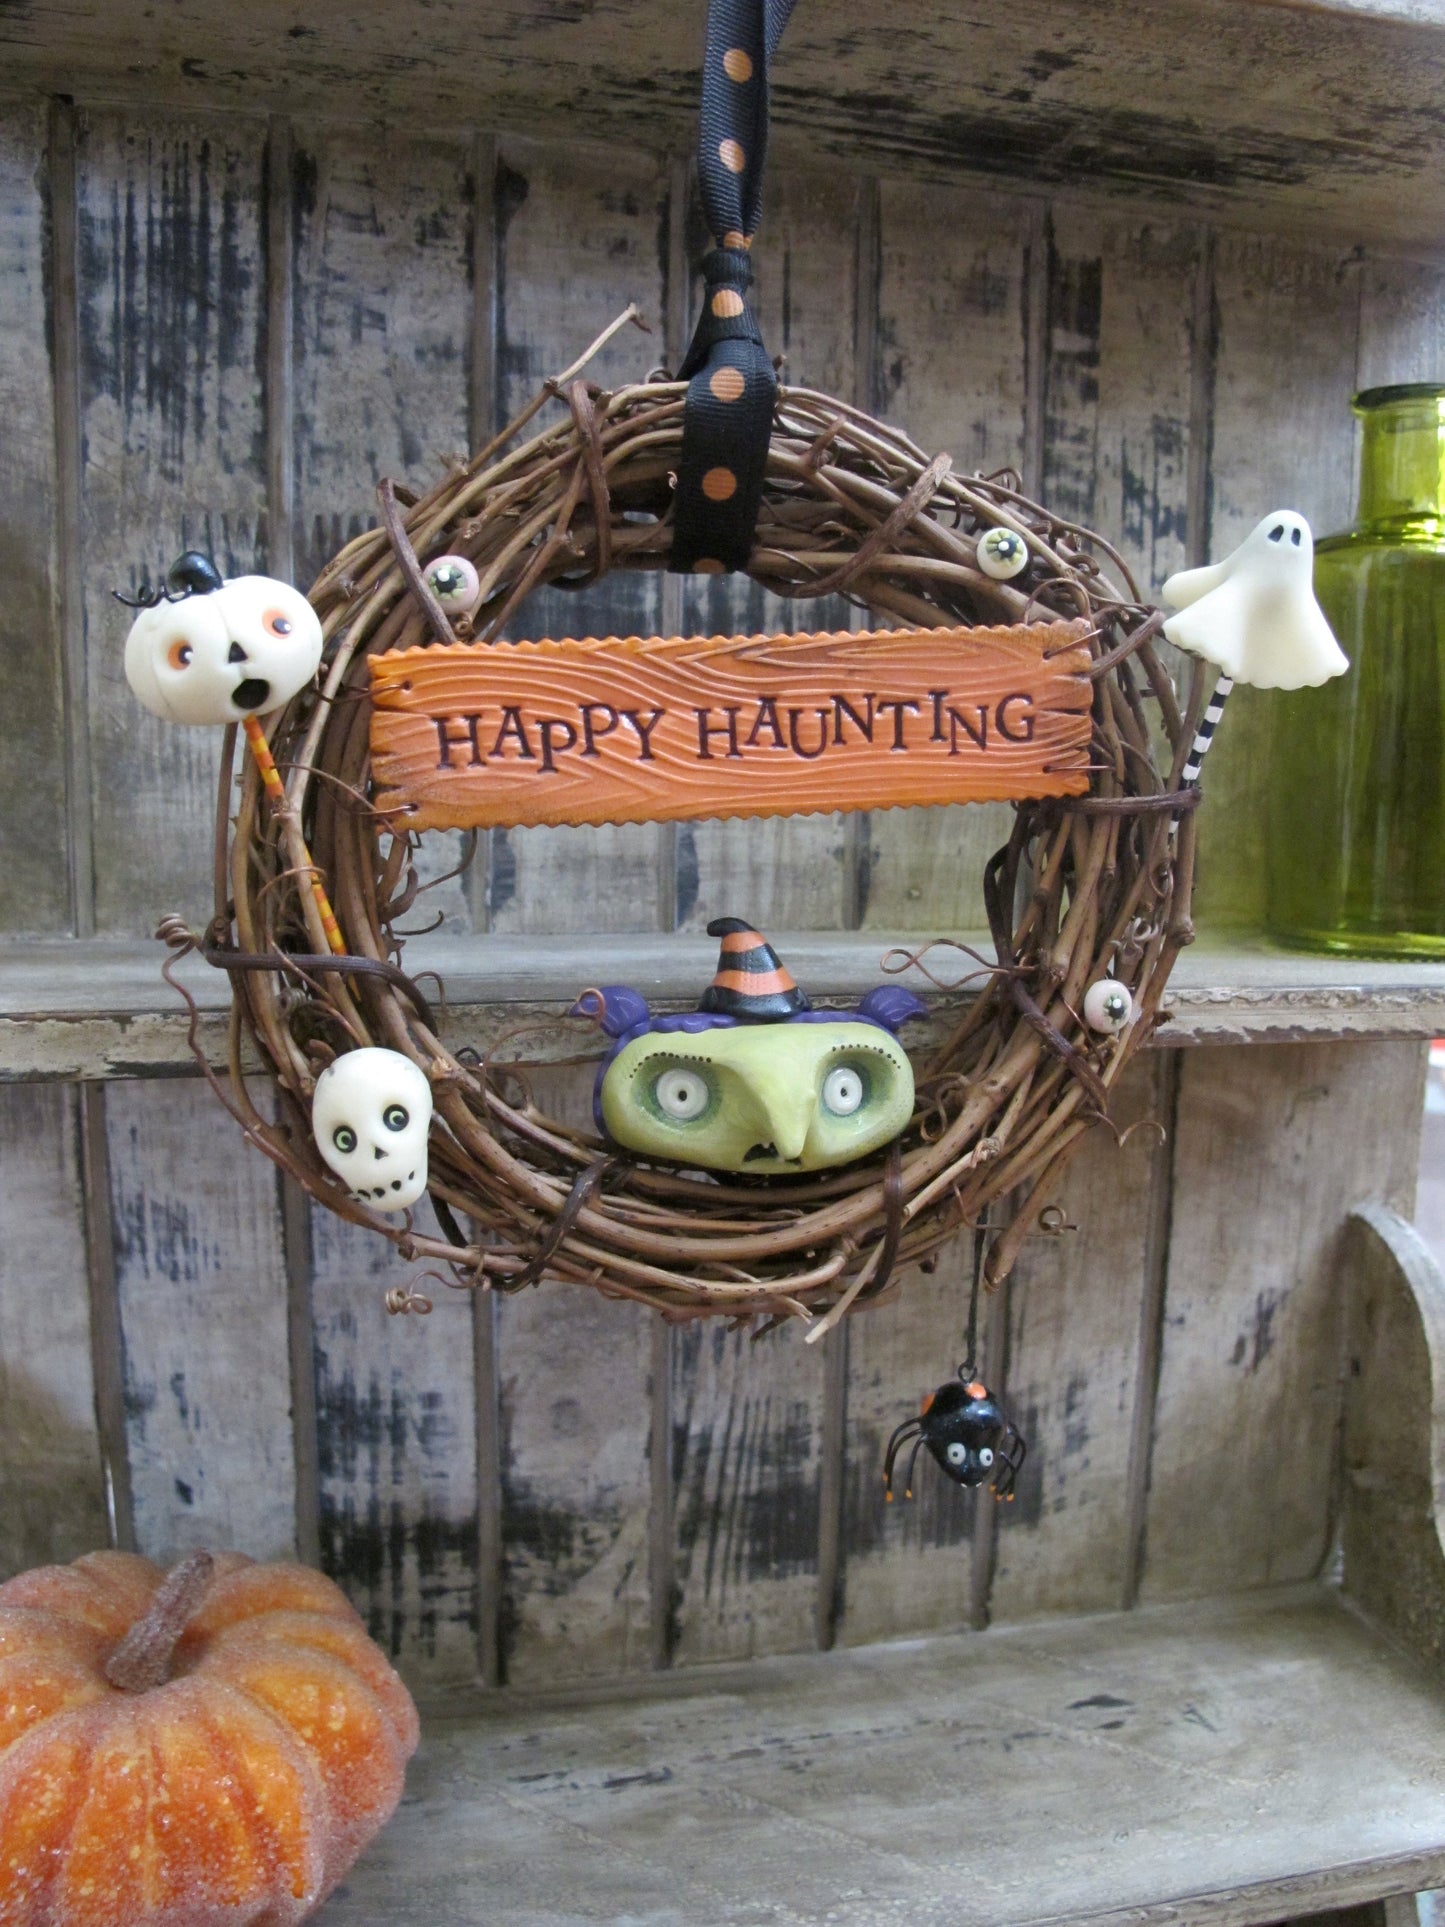
Sculpey Soufflé Happy Haunting Door Wreath

Sculpey Soufflé Happy Haunting Door Wreath

Read More
Swirly Designs by Lianne and Paul Stoddard www.swirlydesigns.com Celebrate October with this “Happy Haunting” Halloween spooky little wreath. And some have glow in the dark pieces!
Read Less
ADDITIONAL SUPPLIES

• Jewelry wire cutter s and pilers
• Scissors
• PAINTS: black, white dark green, light orange and a dark orange acrylic paint
• Paintbrush
• Ceramic tile
• Toothpicks
• Glue gun or strong glue
• 5 or 6” round grapevine wreath
• Halloween ribbon
• Brown and black 20 gauge wire
• Brown wax twine
• Alphabet stamps
• Wood grain stamp
• Black eye pins
• Ultra fine black sharpie marker
• Ballpoint pen
• 3-D white paint
• 1 ¾ and 2 ¼ scalloped circle cuttters|• Jewelry wire cutter s and pilers
• Scissors
• PAINTS: black, white dark green, light orange and a dark orange acrylic paint
• Paintbrush
• Ceramic tile
• Toothpicks
• Glue gun or strong glue
• 5 or 6” round grapevine wreath
• Halloween ribbon
• Brown and black 20 gauge wire
• Brown wax twine
• Alphabet stamps
• Wood grain stamp
• Black eye pins
• Ultra fine black sharpie marker
• Ballpoint pen
• 3-D white paint
• 1 ¾ and 2 ¼ scalloped circle cuttters
View full details
Project Instructions
Do not use unbaked clay on unprotected furniture or finished surfaces. Start with clean hands and work surface area. Good work surfaces include wax paper, metal baking sheet, or disposable foil. Knead clay until soft and smooth. For best results, clean your hands in between colors. Shape clay, pressing pieces together firmly. Bake on a metal surface at 275 °F (130 °C) for 15 minutes per 1/4” (6 mm) thickness. For best baking results, use an oven thermometer. DO NOT USE MICROWAVE OVEN. DO NOT EXCEED THE ABOVE TEMPERATURE OR RECOMMENDED BAKING TIME. Wash hands after use. Baking should be completed by an adult and adult supervision is recommended for children using sharp tools or cutting blades.
Glass or crystal rhinestones are able to bake in the oven. Just place on your beads and press them into the clay to make sure the clay comes up around them a little to hold them into place. Plastic rhinestones are NOT able to bake in the oven. Before baking push them into place where you want to form a well. Then gently lift them back out. After baking, glue them into place OR you can simply glue them onto the surface of the clay after baking. Another option is HotFix rhinestones. These have an adhesive on the back that will fuse with the clay while baking. These are safe to bake in the oven.
Skull Bead•Shape a 3/4" ball of White clay into an egg shape.•Use your fingers to gently pinch one narrow end of the egg shape.•Use the medium Ball Tool to impress eye sockets. As you push the ball tool into the clay pull down slightly so that it makes the eyes sockets bulge out into cheekbones.•Make a triangular shaped divot for the nose with the triangle tip on the other end of the medium ball tool. Then score little lines for teeth.•Place the crystals into the eye sockets.•Use the Acrylic Roller to roll out a thin sheet of Candy Pink. Use the Knife Tool to cut out two little pink triangle shapes. Place those on top of the skull. Then pinch off a small amount Candy Pink to make a tiny ball for the knot in the middle of the bow.•Poke a hole through the bead from head to chin with the Needle Tool. Place on the baking sheet.
Flower Beads•Roll out a log of each color- Candy Pink, Violet, and Granny Smith about 3/16" thick. Use the Super Slicer to cut 10 pieces from each color about 1/4" in length (you will need 5 pieces per flower).•Roll out a log of White about 1/8" thick. Use the Super Slicer to cut 6 pieces (one for each flower) about 1/4" in length.•Form the flowers by standing up each piece of White on its end. Then surround each piece of White with 5 slices from each color. Gently press the logs together to make sure everything is stuck together. Use the Needle Tool to poke a hole through side to side. Place the flowers on the baking sheet.
Marbled Beads•Make two logs each of Black and White about 1/4" thick and 2" long. Stack the logs as shown.•Roll and twist the logs together until the rope is about 4" long.•Fold the rope in half and then in half again. Repeat steps 2 and 3 again.•Roll the final rope until it is 1/4" in diameter. Use the Super Slicer to cut off 1/4" piece. Roll into balls for beads. Pierce holes with the Needle Tool and place on the baking sheet.
Bake everything according to the above direction. After all the beads are baked and cooled, string beads on the stretchy string like the finished photo. Tie a knot and trim the ends. You may secure the knot with super glue if desired.