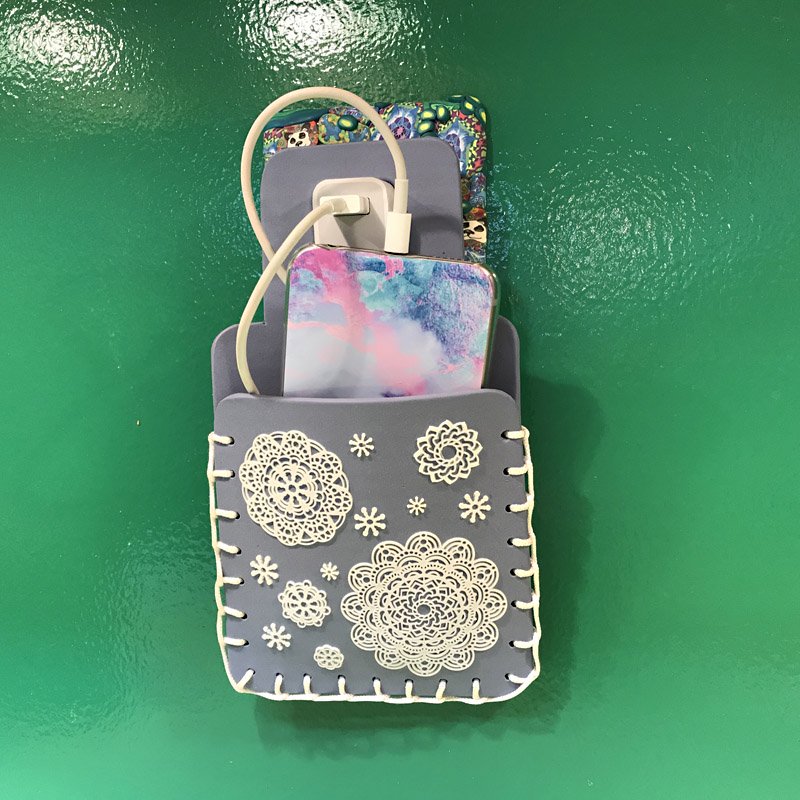
Soufflé Cell Phone Charger Pocket
Soufflé Cell Phone Charger Pocket
Read More
Keep your charging cord organized and your phone safe by hanging it at the wall socket in this little pocket. Choose the color of your choice. Soufflé is the perfect clay because it is so strong and flexible.
Design by Amy Koranek
This project uses the new Sculpey® Silicone Mandala Mold!
Read Less
ADDITIONAL SUPPLIES
Wax paper or patty paper - something you can see through

Project Instructions
- Getting Started:
Start with clean hands, unwrap and knead clay until soft and smooth, or condition by running clay though a Pasta Machine. We recommend using a designated machine for clay purposes only. When working with multiple colors, clean hands with soap and water or baby wipes (we have found that baby wipes work best) before switching colors. Shape clay, pressing pieces firmly together. Wash hands after use.
- Baking:
First you’ll need to make a template of your phone. You can just trace your phone and then cut out the shape. I left little fold up tabs on my template so that when I place my phone between the layers of clay later, the extra paper will fold up and keep the clay from laying directly on my phone. Sheet Bluestone through the pasta machine on the third thickest setting. Make sure there is enough clay to make 1/2” borders all the way around your phone size. Above the phone, leave at least 1” between the top of the phone and the bottom of the shape for the charger brick. I used my charger brick as the template for the hole and left 1/8” extra space all the way around the brick

Make a front panel that is as wide as the back panel. But make it shorter than the back panel so that your phone is visible when inserted into the pocket. I made my front panel square in shape by simply using the width of my back panel as the height as well. If you like rounded corners like mine, trace a template of one of the corners on your phone and use that to trim all your corners.

Make a set of Mandala shapes using the White LS in the silicone mold following the instructions on the mold packaging. I made a few additional small mandalas to help fill up the space. Bake the liquid pieces in the mold following the baking instructions. When they are completely cool, place the shapes randomly on the front panel.

Place the translucent paper over the mandalas. Use the roller to make sure the mandalas set level on the clay. Gentle pressure is all you need to help the mandalas stick to the Soufflé.

Layer the paper template of your phone on top of the back panel. I placed my screen down on the paper and layered the front panel over the cover side of my phone. Gently layer the decorated front panel over your phone. Gently curve the edges of the front panel to make sure it’s going to work well with the back panel.

Use the 2mm ball tool to mark corner holes and a hole between each of the corners. Go all the way through both panels with the ball tool to make sure the holes line up.

Remove the top panel and set it beside the back panel. Use the 2mm ball tool to mark holes in between the first set of holes on both panels.

Take some time and make sure the holes are all neat by poking the 2mm ball all the way through each one from the front and also from the back. Also make sure that the size of the hole will easily accommodate the cord that you have chosen

Bake both panels following the baking instructions. When they are completely cool, layer the top panel over the bottom panel.

Cut a length of cord at least twice as long as the measure around the outside edges of your pocket. Thread the cord through the first hole and leave a tail long enough to go all the way across the width of the pocket

Use a blanket stitch to sew the panels together. Come up through “A” and back down through “B” leaving a standing loop on top. Bring the long end of the sewing cord up through the loop. Tighten the loop catching the cord inside the loop. Repeat the process by going back down through “C”, leaving the loop loose enough to thread the sewing cord through it and then tighten the loop down

Continue until the whole pocket is blanket stitched all the way around.

When you have sewn the front and the back together, tie the end of the cord to the tail that we left at the beginning in a knot. Trim the ends.

Your pocket is ready to keep your phone and cord organized when you need a charger.


