
Sculpey Soufflé Screen Printed Ornament
Sculpey Soufflé Screen Printed Ornament
Read More
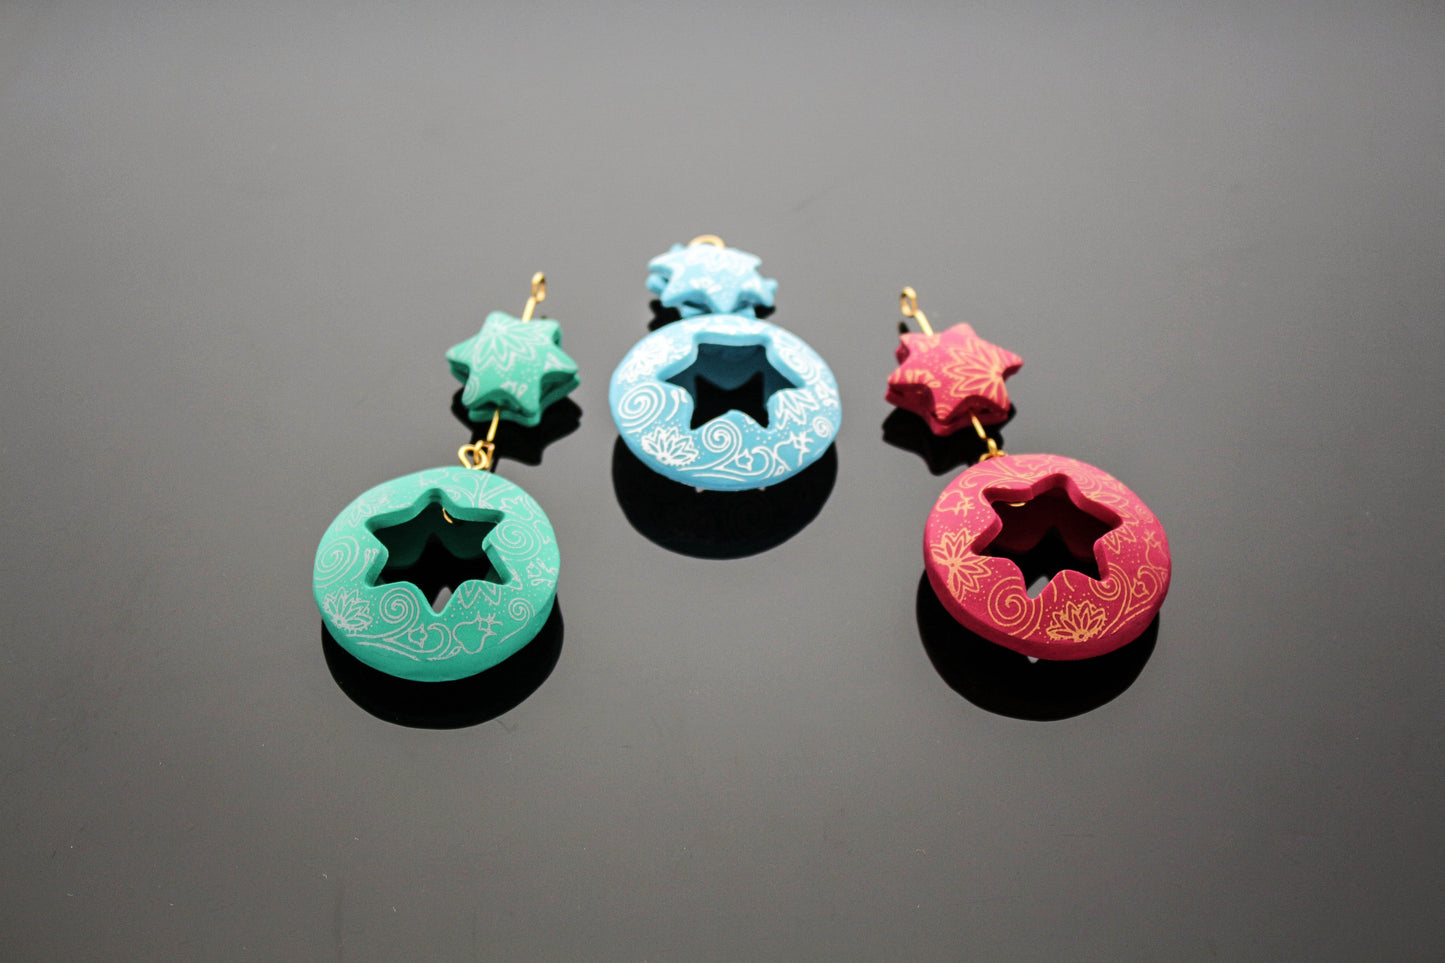
Create an elegant silk screened Christmas ornament for the holidays! Perfect for your tree or as a gift wrap decoration for a special someone. Looks great on a wreath.
Designed by Anke Humpert
Read Less
ADDITIONAL SUPPLIES
1 star shaped cutter (about 2 - 3 cm / 0.79 inch 1.18 inch- in diameter)
A soft toothbrush
A little dish with water
Paper towels
Wire (I used a gold plated wire gauge 18 or 19) and round nosed jewelry
Pliers
Smooth even work surface, like a tile or a sheet of glass|1 star shaped cutter (about 2 - 3 cm / 0.79 inch 1.18 inch- in diameter)
A soft toothbrush
A little dish with water
Paper towels
Wire (I used a gold plated wire gauge 18 or 19) and round nosed jewelry
Pliers
Smooth even work surface, like a tile or a sheet of glass
Project Instructions
Getting StartedPolymer clay may stain. CLAY MAY DAMAGE UNPROTECTED FURNITURE OR FINISHED SURFACES. DO NOT USE polymer clay on unprotected surfaces. We recommend working on the Sculpey clay mat, wax paper, metal baking sheet, or disposable foil. Start with clean hands and work surface area. Knead clay until soft and smooth. For best results, clean your hands in between colors. Shape clay, pressing pieces together firmly. Bake on oven-proof glass or metal surface at 275°F (130 °C) for 30 minutes per ¼" (6 mm) thickness. For best baking results, use an oven thermometer. DO NOT USE MICROWAVE OVEN. DO NOT EXCEED THE ABOVE TEMPERATURE OR RECOMMENDED BAKING TIME. Wash hands after use. Baking should be completed by an adult. Begin by preheating oven to 275 °F (130 °C). Test temperature with oven thermometer for perfectly cured clay. For best results, condition all clay by working small amounts in your hand until smooth and soft.
After conditioning your clay roll it out at the thickest setting of your Clay ConditioningMachine. Divide it in two sheets that are large enough to accommodate one of the the round silk screen patterns.

Gather the following supplies: the Sculpey Silk Screen Set for this, a little bowl ofwater, the golden acrylic paint that comes in the silkscreen set, a soft tooth brushand paper towels. Place one of the round silk screens on top of the clay, shiny sidedown.

Make a thin line with the Gold acrylic paint and pull it with the squiggle over yourscreen. All of the openings of the screen should be covered with the Gold paint. Ifyou have some places where you did not get enough paint, add some more paint inthose places and pull over them again until everything is evenly covered. Pull thescreen off the clay and place it in your bowl with water, so the paint will be easilyremoved! I like to use a soft tooth brush for that and brush the screen very gently onthe non shiny side with it. Then put it on a piece of kitchen paper to let it dry. Beforepulling the next print your screen needs to be completely dry!

Follow the same procedure for the second piece of clay. Let the print dry before you go on to the next step. I like to let it sit for at least half an hour! I like to use that time toclean my screen and put the screen printing equipment back in its place.

Use the circle cutter that matches the size of your round printed pieces and cut outboth printed circles.

Use the star shaped cutter and cut out a star in the middle of the round printed claypieces. The cut out pieces will be used, too, so save them.

Place the two circle pieces on the biggest dome of the hollow bead maker (printedside up) and gently tap the pieces so the will stick to the metal. Do the same withthe stars on the next smaller size of the hollow bead maker. Bake your pieces as directed above.

Allow pieces to cool thoroughly. Gently release the pieces from the hollow bead maker.

Now prepare two pieces of wire: one 3-4 cm/ 1- 1.5 inch and one 5-7 cm / 2 – 2.36inch in length. Use the round nose pliers to make a simple round loop at each side ofboth wires.

Form a long thin snake and a little ball of clay from the rest of the Bordeaux clay.Prepare all the components for the next step. The long piece of wire, the clay balland the 2 stars will be put together. The snake the short piece of wire and the circlepieces will be the second piece.

To assemble the circle pieces put the snake around the rim of one of the circlepieces and trim the piece of that overlaps.

Place the wire on one side of the ring and save it with a small ball of clay. Place thesecond circle piece on top of the other. Match the star holes so the will be in the same direction. If necessary rotate them until they are exactly on top of each other.

Press the two pieces carefully together so the clay ring will be squeezed out of theinside and connect the two half domes. There is a little gap between the two piecesthat needs to be filled with the clay, that is pushed out when the two pieces arepressed together.

Use your fingers to smooth the rim of the two pieces. Sometimes you need a littlemore clay to fill it up or you might have to much. Use your blade to trim that off. Becareful not to cover the half domes or any of the printed area of your ornament.

Now we will assemble to star piece of the ornament. Cut the ball in 2 halves andpress these pieces with the cut side into the curved side of your stars. Press the longwire piece straight in the middle and press both halves of the starts together. If youhave a lot of clay it also might be pressed out. Trim it so the starts have a cleanedge.

Turn the wire pieces so the loops are not in the same direction (in a 90° angle toeach other!) That makes it easier to connect the pieces. Bake the pieces as directed above. When the pieces have cooled connect the wire pieces with the loops.

You can make this Christmas ornament in all kinds of colors. Use an acrylic paint thatgoes well with the clay color. Add the finished ornaments with a ribbon to your giftsor hang them on your tree or a decoration at your door.

From the designer, Anke Humpert - I wish everyone a wonderful, peaceful Christmas time!