
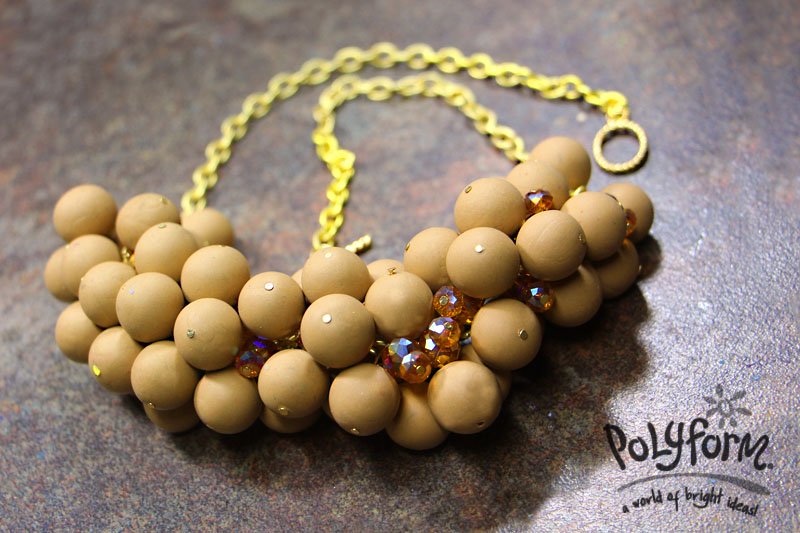
Sculpey Soufflé Latte Ball Necklace
Sculpey Soufflé Latte Ball Necklace
Read More
By syndee holt
A perfect necklace to wear to tea or wear with your jeans!
If someone had told me that I would need to roll over 50 round balls the same perfect size, I would have laughed at them and said, "No way!". But, when I used the Sculpey bead roller – no problem!
Read Less
ADDITIONAL SUPPLIES
Crystal beads in warm gold colors (about 30 ea in 2 sizes), gold head pins (about 50), gold chain (I selected a sturdy chain with links that were all the same size) and closure, jewelry wire cutters, round nose pliers, chain nose pliers. Optional: Beading mat|Crystal beads in warm gold colors (about 30 ea in 2 sizes), gold head pins (about 50), gold chain (I selected a sturdy chain with links that were all the same size) and closure, jewelry wire cutters, round nose pliers, chain nose pliers. Optional: Beading mat
Project Instructions
Getting StartedPolymer clay may stain. CLAY MAY DAMAGE UNPROTECTED FURNITURE OR FINISHED SURFACES. DO NOT USE polymer clay on unprotected surfaces. We recommend working on the Sculpey clay mat, wax paper, metal baking sheet, or disposable foil. Start with clean hands and work surface area. Knead clay until soft and smooth. For best results, clean your hands in between colors. Shape clay, pressing pieces together firmly. Bake on oven-proof glass or metal surface at 275°F (130 °C) for 30 minutes per ¼" (6 mm) thickness. For best baking results, use an oven thermometer. DO NOT USE MICROWAVE OVEN. DO NOT EXCEED THE ABOVE TEMPERATURE OR RECOMMENDED BAKING TIME. Wash hands after use. Baking should be completed by an adult.Begin by preheating oven to 275 °F (130 °C). Test temperature with oven thermometer for perfectly cured clay. For best results, condition all clay by running it through the Clay Conditioning Machine for several passes on the widest setting. Fold the clay in half after each pass and insert the fold side into the rollers first.
Assemble the Sculpey bead roller using the smallest tube and the 13mm clay measuring cup.

Roll a small piece of the Latte clay through the Sculpey Clay Conditioning Machine a couple of times to condition it and reset the machine to the third largest setting. Roll the sheet of clay through the machine. Using the third from the largest circle cutter, cut out a piece of this sheet and roll into a ball to see if it fits in the measuring cup. Every brand of pasta machine is slightly different, so you may need to adjust the thickness of the clay sheet and/or the size of the cutter to get the proper fit. Once you have the proper fit, cut as many circles of clay as you can from the bar of clay. (it’s about 33 or so).

Roll each circle of clay into a ball, keeping your hands cupped so that the ball is round. Place the ball into the bead roller, put the top portion of the bead roller on and roll with a very light touch for a couple of seconds to perfectly finish the bead. Set the bead aside (I use a small cardboard box lid for this purpose to act as my bead corral)
Once you have completed all the balls, thread the first ball on to the Sculpey Bead Baking Rack pin by lightly twisting the pin through the ball. Do NOT push the pin through the ball! These pins are VERY SHARP and will easily twist through the clay without distorting it. Gently remove the ball and twist it onto a second pin, threading it close to the end of the pin.

Continue to drill each ball with the original pin and then move it to the second pin until you have 4-5 balls on the pin. Position the filled pin on the rack as shown. NOTE: I put the baking rack on a sheet of cardboard that will fit in my oven. Also make sure that the balls don’t touch the metal rack or it will cause a small shiny spot on the bead.

Once you have all the balls threaded on the bead baking rack, bake the beads in the preheated oven according to the directions above. Allow the beads to cool slightly before removing them from the pins.
While the beads are baking, you can start putting the crystal beads on the head pins. Thread the beads on as shown and clip the wire to about ½ inch length.

Grasp the end of the wire with the round nose pliers so the tip just barely shows and roll the pliers TOWARDS you to create a loose loop. Don’t close the loop! Set aside and repeat to create at least a dozen of these.


Once the beads have baked and cooled, remove them from the pins and repeat steps 8 and 9 above.

If you haven’t rolled the beads from the second package of clay, do so now so that they can bake while you put the first batch of finished beads on the chain!
Lay the chain out and mark the center of the chain. Grasp the wire with the chain nose pliers and link it through the chain. Chose the wire with the pliers. I put 2 Latte balls on EACH chain link and added a crystal assembly to every other link. As the chain starts getting full, I found it easier to start with the crystal piece first and then add the Latte balls. Add a couple of sets of beads to links and then repeat on the other side of the center. (If the necklace gets off center, just add or remove links from the end of the chain!)


Once you have the first set of beads all linked to the chain, repeat these steps with the second set of Latte beads that have baked and cooled until the beaded portion is the length you wish. You may want to end with 2 beads on each loop and then one bead on the final loop to taper the ends. Add the necklace closure.
Getting StartedPolymer clay may stain. CLAY MAY DAMAGE UNPROTECTED FURNITURE OR FINISHED SURFACES. DO NOT USE polymer clay on unprotected surfaces. We recommend working on the Sculpey clay mat, wax paper, metal baking sheet, or disposable foil. Start with clean hands and work surface area. Knead clay until soft and smooth. For best results, clean your hands in between colors. Shape clay, pressing pieces together firmly. Bake on oven-proof glass or metal surface at 275°F (130 °C) for 30 minutes per ¼" (6 mm) thickness. For best baking results, use an oven thermometer. DO NOT USE MICROWAVE OVEN. DO NOT EXCEED THE ABOVE TEMPERATURE OR RECOMMENDED BAKING TIME. Wash hands after use. Baking should be completed by an adult.Begin by preheating oven to 275 °F (130 °C). Test temperature with oven thermometer for perfectly cured clay. For best results, condition all clay by running it through the Clay Conditioning Machine for several passes on the widest setting. Fold the clay in half after each pass and insert the fold side into the rollers first.
Assemble the Sculpey bead roller using the smallest tube and the 13mm clay measuring cup.
Roll a small piece of the Latte clay through the Sculpey Clay Conditioning Machine a couple of times to condition it and reset the machine to the third largest setting. Roll the sheet of clay through the machine. Using the third from the largest circle cutter, cut out a piece of this sheet and roll into a ball to see if it fits in the measuring cup. Every brand of pasta machine is slightly different, so you may need to adjust the thickness of the clay sheet and/or the size of the cutter to get the proper fit. Once you have the proper fit, cut as many circles of clay as you can from the bar of clay. (it’s about 33 or so).
Roll each circle of clay into a ball, keeping your hands cupped so that the ball is round. Place the ball into the bead roller, put the top portion of the bead roller on and roll with a very light touch for a couple of seconds to perfectly finish the bead. Set the bead aside (I use a small cardboard box lid for this purpose to act as my bead corral)
Once you have completed all the balls, thread the first ball on to the Sculpey Bead Baking Rack pin by lightly twisting the pin through the ball. Do NOT push the pin through the ball! These pins are VERY SHARP and will easily twist through the clay without distorting it. Gently remove the ball and twist it onto a second pin, threading it close to the end of the pin.
Continue to drill each ball with the original pin and then move it to the second pin until you have 4-5 balls on the pin. Position the filled pin on the rack as shown. NOTE: I put the baking rack on a sheet of cardboard that will fit in my oven. Also make sure that the balls don’t touch the metal rack or it will cause a small shiny spot on the bead.
Once you have all the balls threaded on the bead baking rack, bake the beads in the preheated oven according to the directions above. Allow the beads to cool slightly before removing them from the pins.
While the beads are baking, you can start putting the crystal beads on the head pins. Thread the beads on as shown and clip the wire to about ½ inch length.
Grasp the end of the wire with the round nose pliers so the tip just barely shows and roll the pliers TOWARDS you to create a loose loop. Don’t close the loop! Set aside and repeat to create at least a dozen of these.
Once the beads have baked and cooled, remove them from the pins and repeat steps 8 and 9 above.
If you haven’t rolled the beads from the second package of clay, do so now so that they can bake while you put the first batch of finished beads on the chain!
Lay the chain out and mark the center of the chain. Grasp the wire with the chain nose pliers and link it through the chain. Chose the wire with the pliers. I put 2 Latte balls on EACH chain link and added a crystal assembly to every other link. As the chain starts getting full, I found it easier to start with the crystal piece first and then add the Latte balls. Add a couple of sets of beads to links and then repeat on the other side of the center. (If the necklace gets off center, just add or remove links from the end of the chain!)
Once you have the first set of beads all linked to the chain, repeat these steps with the second set of Latte beads that have baked and cooled until the beaded portion is the length you wish. You may want to end with 2 beads on each loop and then one bead on the final loop to taper the ends. Add the necklace closure.