Sculpey Soufflé Bring on the Bling!
Sculpey Soufflé Bring on the Bling!
Read More
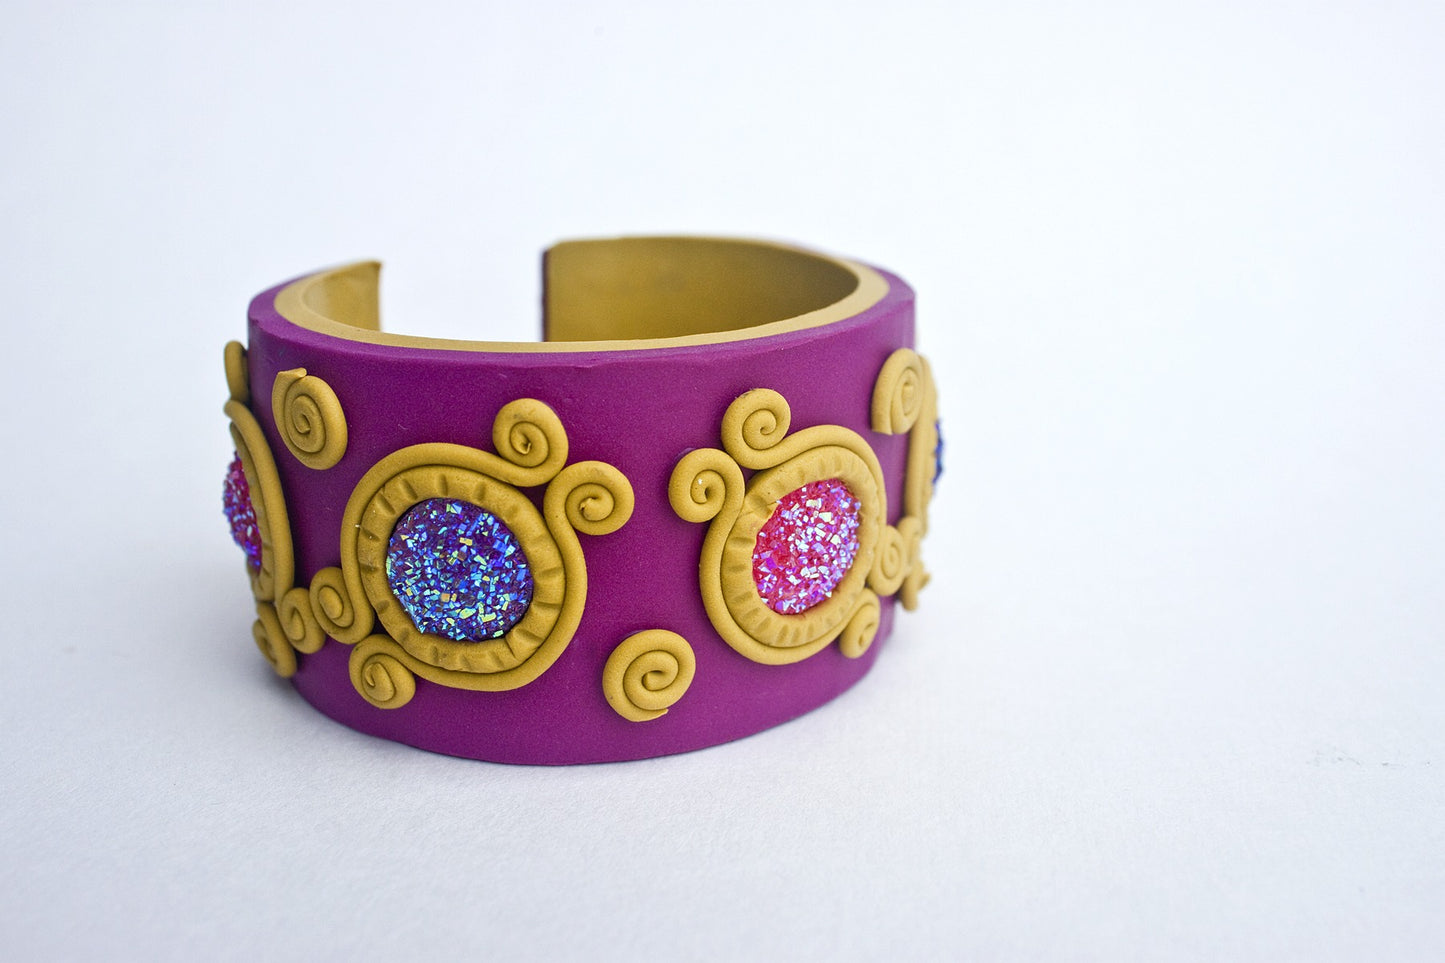
This cuff bracelet can go from casual to elegant and will always be a show-stopper! The Key Lime color becomes an elegant and colorful substitute for gold findings on the bracelet.
Read Less
ADDITIONAL SUPPLIES
5 acrylic jewels about ¾ inch in diameter (NOTE: please heat test your jewels by placing on a sheet of paper into a preheated to 275 degrees for at least 20 minutes. I have found that even jewels created by the same manufacturer will not all are bakeable.)|5 acrylic jewels about ¾ inch in diameter (NOTE: please heat test your jewels by placing on a sheet of paper into a preheated to 275 degrees for at least 20 minutes. I have found that even jewels created by the same manufacturer will not all are bakeable.)

Project Instructions
Getting Started Polymer clay may stain. CLAY MAY DAMAGE UNPROTECTED FURNITURE OR FINISHED SURFACES. DO NOT USE polymer clay on unprotected surfaces. We recommend working on the Sculpey clay mat, wax paper, metal baking sheet, or disposable foil. Start with clean hands and work surface area. Knead clay until soft and smooth. For best results, clean your hands in between colors. Shape clay, pressing pieces together firmly. Bake on oven-proof glass or metal surface at 275°F (130 °C) for 30 minutes per ¼" (6 mm) thickness. For best baking results, use an oven thermometer. DO NOT USE MICROWAVE OVEN. DO NOT EXCEED THE ABOVE TEMPERATURE OR RECOMMENDED BAKING TIME. Wash hands after use. Baking should be completed by an adult.Begin by preheating oven to 275 °F (130 °C). Test temperature with oven thermometer for perfectly cured clay. For best results, condition all clay by running it through the Clay Conditioning Machine for several passes on the widest setting. Fold the clay in half after each pass and insert the fold side into the rollers first.
Cut the a package of the Key Lime into slices just about twice as wide as the #1 setting on your Sculpey Clay Conditioning Machine. Roll the first piece through the Sculpey Clay Conditioning Machine set on #1 and then join the next piece to it and roll it through. We are aiming for a longer narrow (about 2-1/2 inches) sheet of clay. Add a third piece and roll through a couple of times to thoroughly condition the clay. Place this long, narrow sheet (should be at least 7 inches long) on a sheet of clean paper. Place the ends of the 2 bracelet blanks towards one end of the sheet of clay.

Gently roll the blanks across the sheet of clay (the clay should stick to the blanks) until you reach the opposite end of the blanks. Trim the sheet of clay to the ends of the blanks.
Slowly slide the Super Slicer blade along one edge of the blanks to trim the clay to the edge of the blank. Repeat on the other side. The sheet of clay should now cover both blanks with no excess clay on the edges or the inside of the blanks.

Repeat steps 1-3 with the Turnip clay, adding it to the top of the existing Key Lime layer. Bake this two layer bracelet on a sheet of plain paper in a preheated oven according to the directions above. Allow to cool. (NOTE: after the bracelet is baked and cooled, the blanks may pop off the clay – don't panic! Just remove the blanks and proceed. The bracelet will retain its shape on the second baking.)
Extrude (or hand roll) a short piece of Key Lime clay about 1/8 inch diameter and wrap around one of the jewels so that the edges overlap. Use the Super Slicer to cut through both layers and remove the excess clay. Join the two ends of the clay around the jewel to create a bezel effect.


Use the tip of the Etch and Pearl to add texture detail to the outside of the Key Lime bezel. (NOTE – this help hide our seam too!) Repeat for the 4 other jewels. Starting at the center of the bracelet, use the Sculpey Bake and Bond to adhere the position of each jewel on the baked and cooled bracelet.

Extrude some smaller diameter lengths of clay about 4 inches in length. (Note: I used the die with the multiple holes). Coil one end of the length about three wraps of the coil and then repeat at the other end of the coil. Position this around the mounted gem on the bracelet. Repeat on the other side. When you have the both coils in place around the gem, gently lift each coil and add a small dot of the Sculpey Bake and Bond to secure the coils. Repeat for each gem.

If you wish, use the remaining extruded clay to create some small coils to decorate between the gems. Bake the completed bracelet again in a preheated oven as described above. Once the second baking is completed and the bracelet is cooled, pop the clay off the bracelet blanks if they haven't popped off already and you are DONE!

