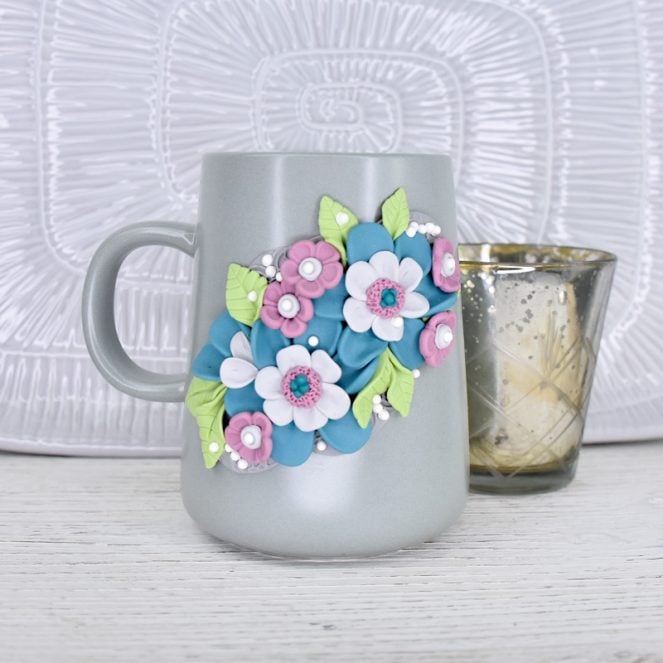
Sculpey Soufflé™ and Lace Garden Mug
Sculpey Soufflé™ and Lace Garden Mug
Designed by Amy Koranek
Read More
Read Less
This flower mug is super easy to make using the flower mold! Your coffee or tea break just got a whole lot prettier!
ADDITIONAL SUPPLIES
• Mug in coordinating color
• Silicone glue or super glue gel

Project Instructions
- Getting Started:
Start with clean hands, unwrap and knead clay until soft and smooth, or condition by running clay though a Pasta Machine. We recommend using a designated machine for clay purposes only. When working with multiple colors, clean hands with soap and water or baby wipes (we have found that baby wipes work best) before switching colors. Shape clay, pressing pieces firmly together. Wash hands after use.
- Baking:
To start, I tinted all of my colors with Soufflé Concrete mixing 1/4 bar of each color with 1/4 bar of Concrete. I mixed Pistachio with Concrete 1:1; White with Concrete 1:1; Sea Glass with Concrete 1:1; and Guava with Concrete 1:1. This gave me a sophisticated and coordinating color palette that went well with my mug. Next, I wanted a doily background on the mug to attach my flowers to. I pressed a thin layer of tinted White/Concrete into the Sculpey® Mandala mold to create a doily. I placed a large mandala in the center and cut the next largest mandala in half and placed the halves on either side. This can be done with a texture sheet as well. The background won’t show much when the mug is finished but serves to hold all your individual flower pieces together.

Press Sea Glass/Concrete into the large flat petal. Carefully release the unbaked clay from the mold and repeat making six large flat petals. Because the petals are unbaked, you can shape them any way you’d like at this point.

I used the rubber tip of my Style & Detail tool to set the petals into place on the doily. The rubber tip makes it easy to pick up the petals and also to give them a little natural shape when pushing them into place.

Next I pushed White/Concrete into the small flat petal and repeated to make six of these.

Again, I used the rubber tip to place the small flat petals over the larger petals.

Make a center for the flower with a ball of Guava/Concrete. Press it into the center of the flower with the medium ball tool

Set little pearls of Sea Glass/Concrete into the center.

Repeat with a second overlapping large flower. Texture the Guava/Concrete centers with the tip of an Etch ‘n Pearl.

Make leaves from Pistachio/Concrete by pressing the clay into the leaf shapes of the mold. Gently release the leaf shape from the mold by flexing it. Pick the leaf up by folding it around the tip of an Etch ‘n Pearl. Tuck the leaf into place under a large petal.

Add more large and small molded leaves as desired underneath the flowers to create a flowing edge.

Fill the individual flower mold shape with Guava/Concrete. Place these in your garden and use the large Etch ‘n Pearl to add a White/Concrete pearl in the center

Add more molded elements as shown or as your heart desires. For the finishing touch, I added tiny pearls in pure White Soufflé for a real pop. Bake the mug following the baking instructions for Soufflé. When the mug is completely cool, carefully pop the floral design off of the mug and glue it on permanently with silicone glue or super glue gel. Allow the glue to dry completely in a position so that the clay piece will not slide off. Your beautiful mug is completely functional. However, you should always hand wash it to preserve your artistry.


