Skip to product information
1 of 1

Liquid Sculpey® Heishi Bead Bracelet

Liquid Sculpey® Heishi Bead Bracelet

Designed by Amy Koranek
Read More
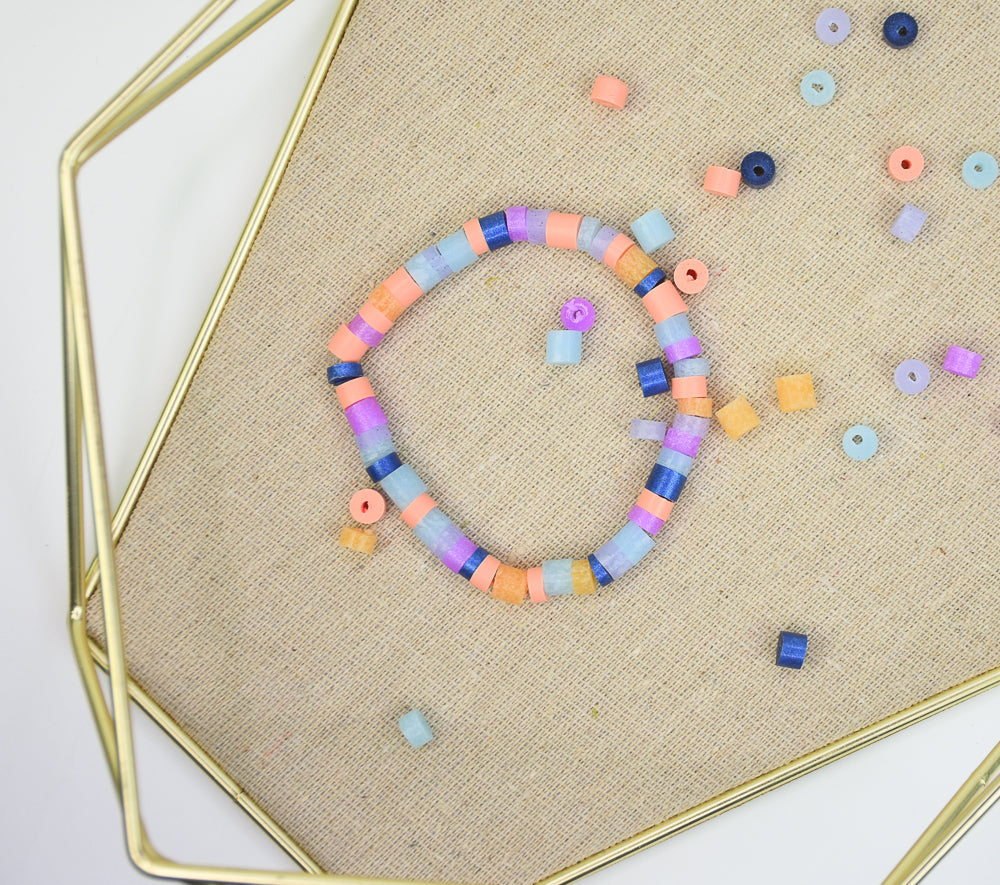
Trendy pastels are spotlighted in this clever version of heishi beads, featuring a variety of Liquid Sculpey gorgeous translucent and metallic colors. TIME TO COMPLETION: 2 Hours 30 Minutes to make, bake (4 times), and assemble NOTE: You can work on this project while working on your other clay projects by placing filled mold into oven with your other projects.
Read Less
ADDITIONAL SUPPLIES
  • Paper towel
  • 18” Stretchy bead floss
  • Beading needle
  • Scissors
View full details
Project Instructions

Step 1

Getting Started with Liquid Sculpey®:

Please make sure your work area is covered and you are not working on an unprotected surface. We recommend working on the Sculpey® Oven Safe Work Mat, wax paper, metal baking sheet, or disposable foil. Uncured Liquid Polymer Clay may damage unprotected furniture or finished surfaces. Be sure to cover your crafting area appropriately.

- Stir Liquid Sculpey® completely. Thin with Sculpey® Liquid Clay Softener as needed

- Wash hands after use (we have found that baby wipes work best)

Baking:

-It is important to use oven thermometer when you bake the liquids so that you can ensure your oven is at the correct temperature.

-Do not microwave the liquids. They must be baked in a Preheated oven at 275 ºF (130 ºC) for liquid colors and 300 ºF (149 ºC) for Clear – Do not exceed baking temperatures.

-If your piece is less than 1/4” bake for 15 minutes. For thicker pieces that are 1/4” or above bake for 30 minutes.

-If your liquid project has become yellowed or discolored in the oven, when you remake it, tent it by placing either – folding an index card in half and placing your project under it by using aluminum foil over your project.

Step 2

We are going to make heishi beads by using the Tube Shape Molds from the 3D Jewelry Mold in this tutorial. We will bake the mold multiple times to get the quantity of tubes that are needed for our heishi beads.

 Drip the colors into the tube wells. When I fill these wells, I find
it best to drip some Liquid Sculpey® (LS) into the cylinder tube shape. Then I
pinch the well from the bottom to release stubborn air bubbles. Then add more
LS, pinch again, then add more.  

Fill both tube shapes with Light Orange Liquid Sculpey (LS) and then bake the mold following the baking instructions for Liquid Sculpey®. Allow to cool completely before handling.

Step 3

To release the baked tube beads: Dip the Needle Tool into the Sculpey® Clay Conditioner and Softener. Carefully insert the wet Needle Tool between the baked LS and the wall of the mold being careful not to pierce the mold. Drag the Needle around the molded shape.

Step 4

Pinch the bottom of the mold and the tube bead should slide right out because of the Sculpey® Clay Conditioner and Softener.

Wipe the tubes if they are oily from the Clay Conditioner and Softener with paper towel.

Step 5

Repeat all steps in the colors of your choice to make a total of 8 tube beads.

Step 6

Next use a Clay Blade to carefully cut the tubes in half. This will make them easier to drill.

Step 7

Drill each half tube lengthwise with a drill tool.

Step 8

Cut the drilled tubes into heishi beads with a Clay Blade. You can make the thicknesses of the beads vary so they look more natural.

Step 9

Here’s my pile of beautiful heishi beads.

Step 10

String the beads onto a double strand of stretchy bead floss randomly. Standard size
women’s bracelet is 7”, but you can adjust the length for your own comfort.

Step 11

Tie an overhand knot and trim the tails.