Skip to product information
1 of 1

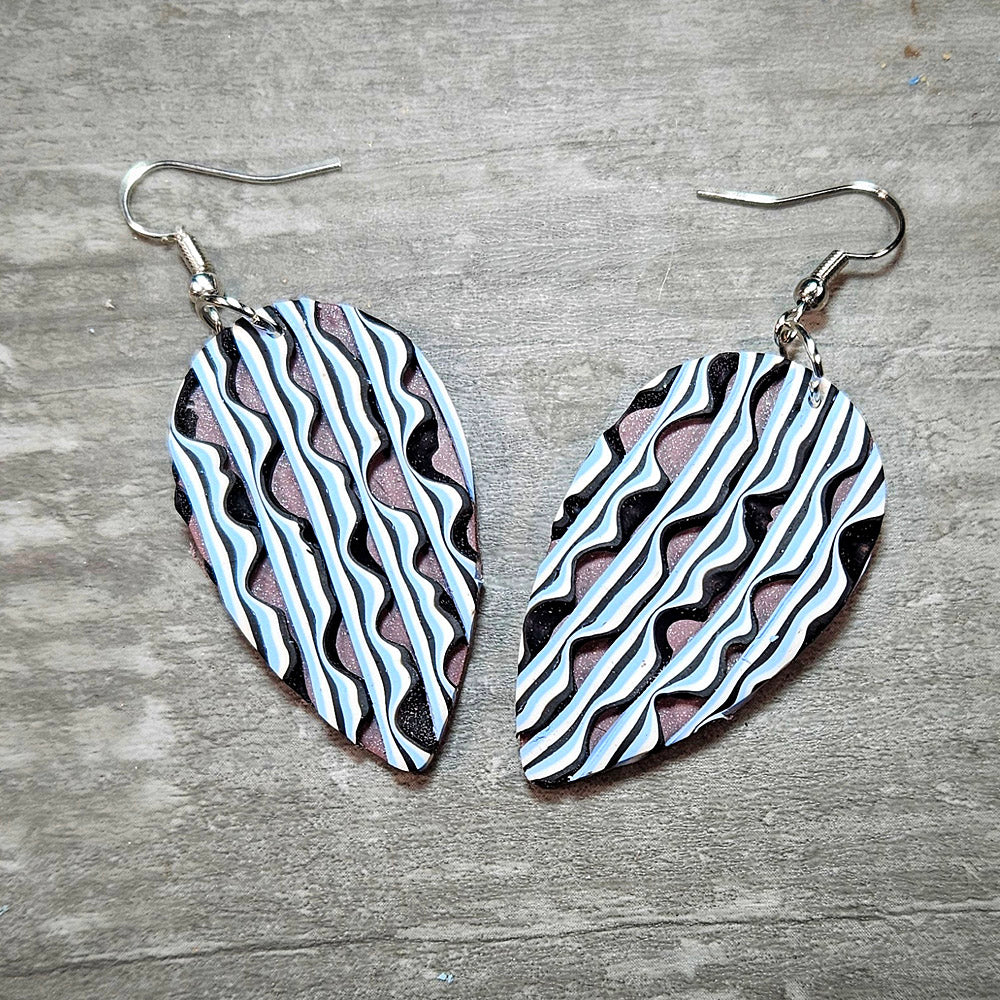
Quick Vertical Mokume Gane Earrings

Quick Vertical Mokume Gane Earrings

Designed by syndee holt
Read More
Colorful stripes get a flowing treatment with this form of "sideways mokume gane". This is a great way to use up small amounts of your clay colors. My background features a version of Pantone Color of the Year, Mocha. TIME TO COMPLETION: about 50 minutes including baking/curing
Read Less
ADDITIONAL SUPPLIES
  • Ear wires (2)
  • Jump rings (2)
View full details
Project Instructions

Step 1

Getting Started:

Please make sure your work area is covered and you are not working on an unprotected surface. We recommend working on the Sculpey® Oven-Safe Work Mat, wax paper, metal baking sheet, or disposable foil. Uncured clay may damage unprotected furniture or finished surfaces. Be sure to cover your crafting area appropriately.

Start with clean hands, unwrap and knead clay until soft and smooth, or condition by running clay though a Pasta Machine. We recommend using a designated machine for clay purposes only. When working with multiple colors, clean hands with soap and water or baby wipes (we have found that baby wipes work best) before switching colors. Shape clay, pressing pieces firmly together. Wash hands after use.

Baking (also called Curing):

Begin by preheating oven to 275 °F (130 °C). After you are done creating; for best results bake/cure clay on an oven-proof surface such metal, aluminum foil, an index card or the Sculpey® Clay Mat at 275°F (130 °C) for 30 minutes per 1/4" (6
mm) thickness according to package directions. Oven safe glass or ceramic
surfaces are also acceptable for baking/curing; however please note that the
baking/curing times may take longer as the glass or ceramic surfaces take
longer to heat up. For best baking results, use an oven thermometer. DO NOT USE
MICROWAVE OVEN. DO NOT EXCEED THE ABOVE TEMPERATURE OR RECOMMENDED BAKING TIME.

Step 2

Sheet out a small amount of each color on a middle setting on your pasta machine (my machine is 0-7 and I'm using 2). Use the 1.5 inch square cutter to cut out a square of each color. They will be stacked as shown..

Step 3

If you wish to make the same background color, I'm using my January New Color Tuesday mix for the Pantone Color of the Year, Mocha. I used a pearlized version with 1 part Pomegranate, 1 part Pearl and 2 parts Green. (A great way to use up your holiday clay color scraps!) You can add more Pearl to the mix if you wish!

Step 4

Stack the colors with the White in the middle, gently press together and run through the clay conditioning machine on the third widest setting (#2 on my machine). Cut in half as shown.

Step 5

Stack the two pieces together as shown and run through the clay conditioning machine on the widest setting (#0 on my machine).

Step 6

Use the medium and small Dual End Detail Tools to press random pattern in the top Black layer. I try to make sure that there are almost no blank spaces for this technique!

Step 7

Instead of slicing horizontally across my stacked clay to make my mokume gane, THIS time I'm slicing VERTICALLY through the textured stack as shown.

Step 8

Once I have several slices I can start laying them out on my prepared background - in this case my Mocha Pearl mix sheeted out on a middle (#3) setting. You can use either side of the slices if you wish and they do NOT need to be in any order.

Step 9

Once you have your pieces laid out, gently press them to the background using a clean sheet of paper and a LIGHT roll with your acrylic roller. (I find the paper helps keep the strips in place).

Step 10

Here are two of my teardrop shapes. I've made two sets of these and here is the size difference between my cutters. Bake/cure the earrings as directed in Step 1 above. NOTE: I add my holes after baking with a hand drill. If you prefer, use a needle tool to create your assembly holes before baking.

Step 11

Once my earrings were baked/cured and cooled, I used my hand drill to create the holes and here is my layout for the earrings and the completed earrings.

Step 12

Here is a look at some of my other pieces I've created with this technique-all created with scrap colors!