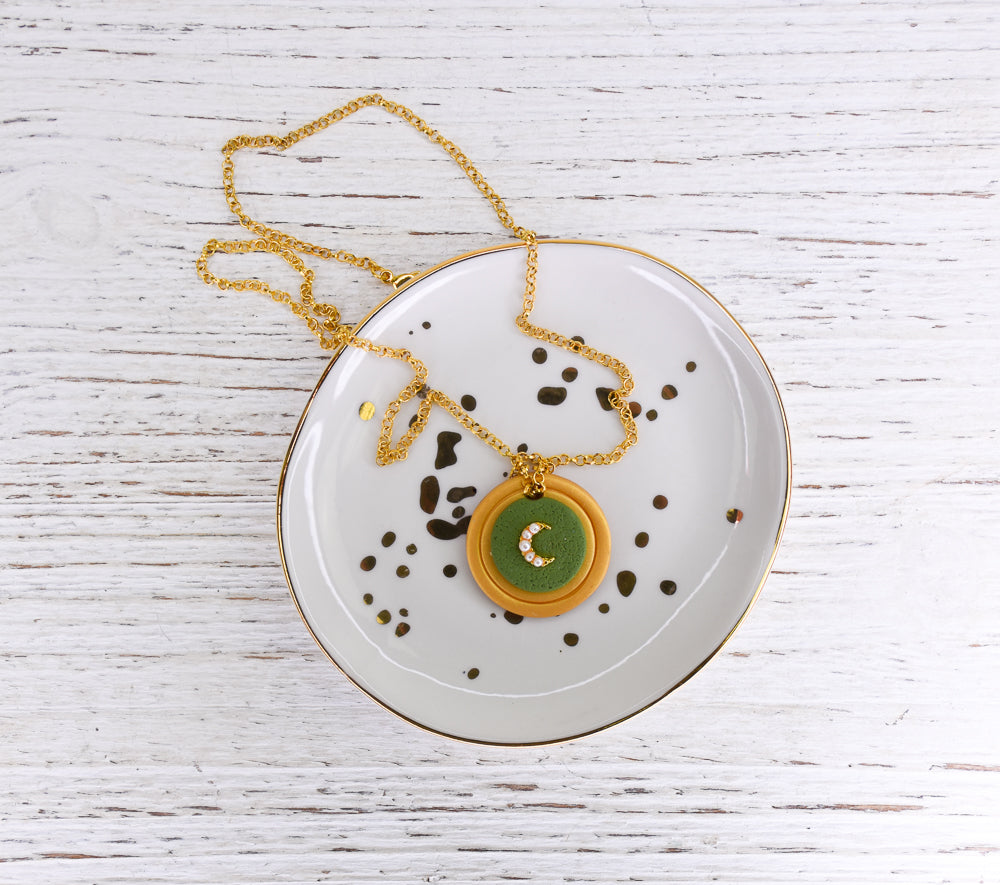
Sculpey Premo™ Moon Coin Pendant
Sculpey Premo™ Moon Coin Pendant
Designed by Cindi McGee
Read More
Create your own moon coin pendant in just a few simple steps. The shimmer of 18K Gold Premo! brings just the amount of glamour, especially when paired with a pearly moon charm.
Time to create this project:
Approximately 90 minutes
Artists Note: The measurements of clay may vary dependent upon your desired size of the finished project.
Read Less
Artists Note: The measurements of clay may vary dependent upon your desired size of the finished project.
ADDITIONAL SUPPLIES
- Small moon charm
- Round clay cutters in 3 graduated sizes (size depends upon the size of your moon charm)
- Plastic wrap
- Course sponge (or other texture as desired)
- Gold chain and closure

Project Instructions
Step 1
- Getting Started:
Start with clean hands, unwrap and knead clay until soft and smooth, or condition by running clay though a Pasta Machine. We recommend using a designated machine for clay purposes only. When working with multiple colors, clean hands with soap and water or baby wipes (we have found that baby wipes work best) before switching colors. Shape clay, pressing pieces firmly together. Wash hands after use.
- Baking (also called Curing):
Step 2
Roll 18K Gold Premo! to about 1/8” thickness. Place plastic wrap over clay sheet and use largest of the 3 round cutters to cut a disc. (Plastic wrap creates rounded, smooth edges.)
Step 3
Place plastic wrap back over the clay disc. Center middle sized cutter and press gently just to create an indented ring in the disc.
Step 4
Roll Olive Premo! to about 1/8” thickness. Place course sponge over clay sheet and press to transfer the texture to the clay.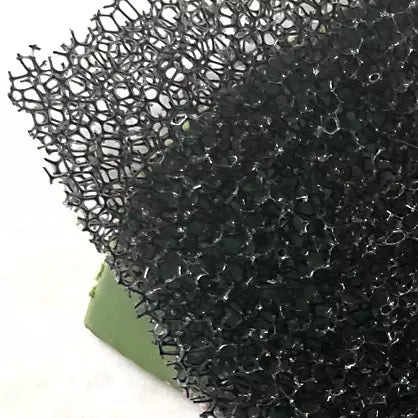
Step 5
Place plastic wrap over textured clay sheet and use smallest round cutter to cut disc. Place it, centered, on the gold disc.
Step 6
Apply a touch of Clay Adhesive to the back of the moon charm and gently press into center of textured olive disc. Use the Etch n’ Pearl tool to make a hole at the top large enough for the chain you have chosen. Bake according to above instructions. Let cool.
Step 7
Fold chain in half and carefully push through the hole, then bring the ends through the loop. Add closure. (Alternately, you can put a large jump ring through the pendant hole and thread chain through the jump ring.)