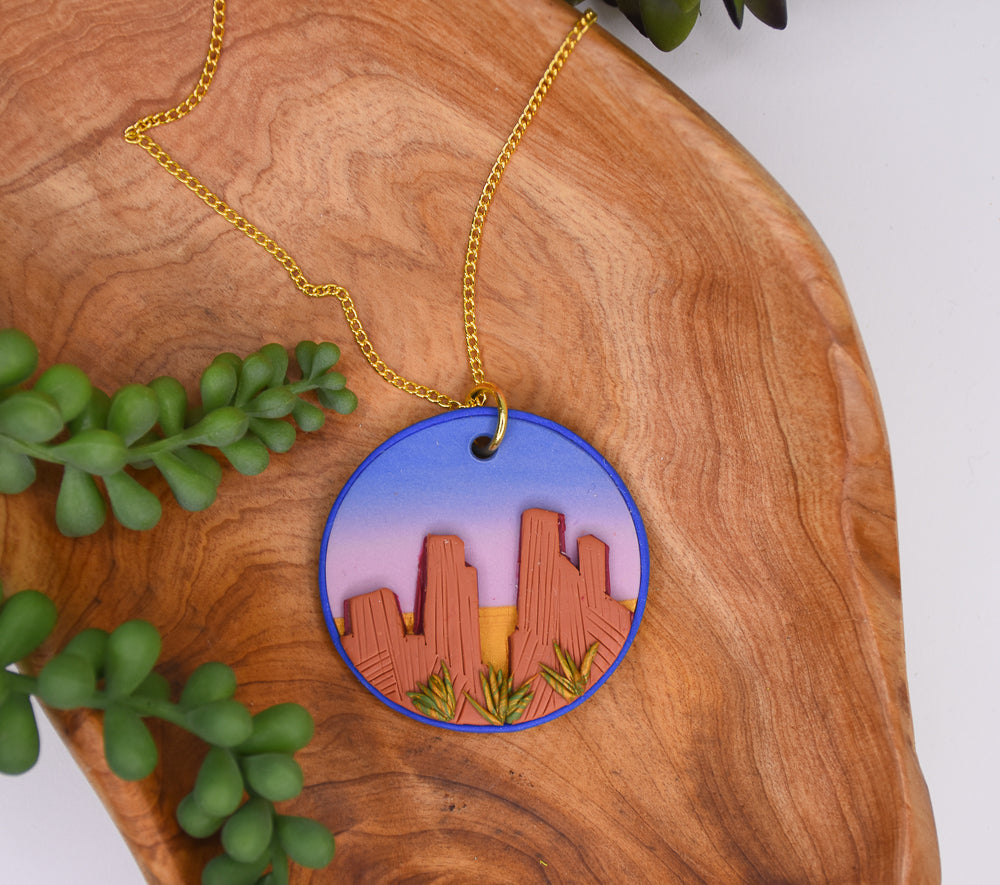
Sculpey Soufflé™ Canyon Pendant
Sculpey Soufflé™ Canyon Pendant
Designed by Amy Koranek
Read More
Create a serene view of a canyon or mountain scape with these cool colors. You could even re-create your favorite memory based on personal travels from photos.COMPLETION TIME:
60 Minutes to make, bake, and assemble
Read Less
ADDITIONAL SUPPLIES
- 8 mm Gold tone jump ring
- Gold tone chain with clasp
- Flat nose pliers

Project Instructions
- Getting Started:
Start with clean hands, unwrap and knead clay until soft and smooth, or condition by running clay though a Pasta Machine. We recommend using a designated machine for clay purposes only. When working with multiple colors, clean hands with soap and water or baby wipes (we have found that baby wipes work best) before switching colors. Shape clay, pressing pieces firmly together. Wash hands after use.
- Baking (also called Curing):
First, we will make the gradient background for the sky. We really don’t need very much, so use a strip of Lilac Mist 1” X 3” and a strip of Cornflower 3/4” x 3” sheeted through the pasta machine on the thickest setting. Slightly overlap the edges of the strips and press them together.

Fold matching like colors to like colors and press the fold through the pasta machine first. Continue folding and pressing to create the blend using the thickest setting on the pasta machine.

Repeat Step 3 making the blend as you like. The blend doesn’t need to be perfect, just make it pretty.
Orient the sheet on your work surface with the dark at the top.
Make sure you have a large enough sheet to accommodate the size pendant that you want. My pendant will be 2” in diameter. If your sheet isn’t quite large enough you can easily stretch it by rolling over it with the Clay Roller.
Make sure you have a large enough sheet to accommodate the size pendant that you want. My pendant will be 2” in diameter. If your sheet isn’t quite large enough you can easily stretch it by rolling over it with the Clay Roller.

Make a very narrow strip of Premo™ Gold as thin as possible. Press it onto the bottom of the light sky and use the Roller to really embed it into the background.

I did a quick search for canyon shapes on the internet. I started with a thin Premo™ Terra Cotta sheet - #4 on the pasta machine - and used the Clay Blade to carve out some basic shapes with very straight cuts.
Please take a look at the Step 10 photo. You can see that I angled the canyon walls with my blade quite a bit so they looked more like a canyon and less like skyscrapers. That would be most easily done now before we mount the clay to the next layer.
Please take a look at the Step 10 photo. You can see that I angled the canyon walls with my blade quite a bit so they looked more like a canyon and less like skyscrapers. That would be most easily done now before we mount the clay to the next layer.

Sheet Soufflé™ Cabernet to the 4th thickest setting.
Mount your canyon pieces to the Cabernet sheet.
Mount your canyon pieces to the Cabernet sheet.

Trim away the excess Cabernet with the Clay Blade leaving just enough to create some shadows.

Carefully place the canyon walls on top of the background.

Audition the look of your piece through the 2” cutter before using the cutter to cut out the shape.

Sheet Cornflower to the 4th thickest setting and cut out a 2” circle. Gently roll the circle to stretch it in all directions so it will be slightly larger than the canyon piece.

Mount the canyon piece to the Cornflower circle. Score lines in the Terra Cotta to mimic the look of the canyon textures. This will also help make the bond to the Cornflower background more solid.

Twist a tiny rope of Premo™ Spanish Olive and Premo™ Gold together.

Cut off super skinny tapered bits from the twist to create some scrub brush for the foreground of the canyon.
Before applying the scrub brush, bend the edge of the Cornflower circle around the edge of the canyon scene to create a delicate rim. Trim the Cornflower rim as needed.
Before applying the scrub brush, bend the edge of the Cornflower circle around the edge of the canyon scene to create a delicate rim. Trim the Cornflower rim as needed.

Add little scrub brush to the foreground. Use the Needle Tool to help position them without distorting their delicate shape.

Add a large hole to the pendant using the Blunt Point. Go through the hole front to back and back to front to make it nice and neat.

Bake/cure following the baking instructions for Sculpey Soufflé™ and allow to cool completely before handling.
Here’s the layout for the necklace.
Here’s the layout for the necklace.

Connect the jump ring to the pendant and the chain using flat nose pliers.


