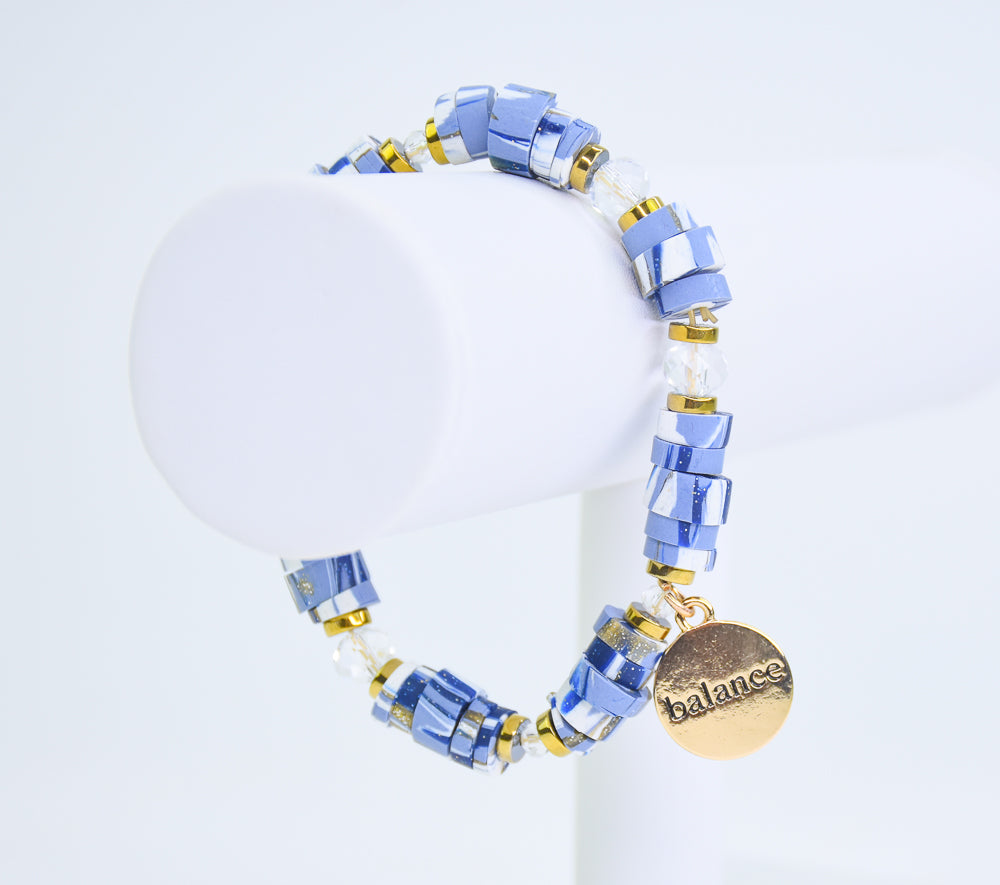
Sculpey Premo™ + Sculpey Souffle™ Heishi Bead Bracelet
Sculpey Premo™ + Sculpey Souffle™ Heishi Bead Bracelet
Designed by Amy Koranek
Read More
This is the third bracelet project in a three-part series to create a stacked bracelet look. You can make the other bracelets in the stack by going to the tutorials for Veined Beads Bracelet and Wrap Bracelets.
COMPLETION TIME:
60 Minutes to make, bake, and assemble
Note: Clays listed below are 1 oz bars from the Sculpey Premo™ + Sculpey Souffle™ clay kit
Read Less
Note: Clays listed below are 1 oz bars from the Sculpey Premo™ + Sculpey Souffle™ clay kit
ADDITIONAL SUPPLIES
- 12 Gauge wire about 4” long
- 6 mm Gold tone jump ring
- Assorted glass faceted lentil beads (8)
- Gold tone word charm
- 12” Stretchy string
- Scissors
- Flat nose pliers

Project Instructions
- Getting Started:
Start with clean hands, unwrap and knead clay until soft and smooth, or condition by running clay though a Pasta Machine. We recommend using a designated machine for clay purposes only. When working with multiple colors, clean hands with soap and water or baby wipes (we have found that baby wipes work best) before switching colors. Shape clay, pressing pieces firmly together. Wash hands after use.
- Baking (also called Curing):
To create the Heishi beads I’m using scraps from the Wrap Bracelets in Bluestone. Also 1/4 bar Yellow Gold Glitter, 1/4 bar Galaxy Glitter, and 1/4 bar Igloo.

Chop the colors up all at once into coarse bits with the Clay Blade. Scramble the colors as you chop so that they get mixed up well.

Bundle the bits together into a ball.

Compress the ball with your hands to work out spaces and air pockets.

Divide the ball into four equal pieces with the Clay Blade.

Roll each ball into a fat little log. Use the wire to poke all the way through the little log stringing the log onto the wire.

Roll the clay on the wire making a tube bead 1/4” thick.

Carefully slide the raw tube bead off the wire. Carefully slice the wonky ends off. The end pieces can be recombined onto the next chunk of clay to make more beads.
Repeat Steps 7-9 to make three more tube beads except make the diameter of each one slightly different so that the tube beads are all different diameters.
Bake the tube beads following the baking instructions for Soufflé™.
Repeat Steps 7-9 to make three more tube beads except make the diameter of each one slightly different so that the tube beads are all different diameters.
Bake the tube beads following the baking instructions for Soufflé™.

Allow the tube beads to cool completely and then carefully slice them into Heishi beads with the Clay Blade. Even though the tubes are already baked, you can easily slice them with a Clay Blade.

Here is my collection of Heishi beads that I sliced from the tube beads.

String the Heishi beads in groups divided by the glass lentil beads on stretchy bead cord.

Tie the bead cord off using an overhand knot.

The charm can be attached with a 6 mm jump ring.

Use flat nose pliers to open and close the jump ring and attach the charm as shown.

- Choosing a selection results in a full page refresh.
- Opens in a new window.

