Skip to product information
1 of 1

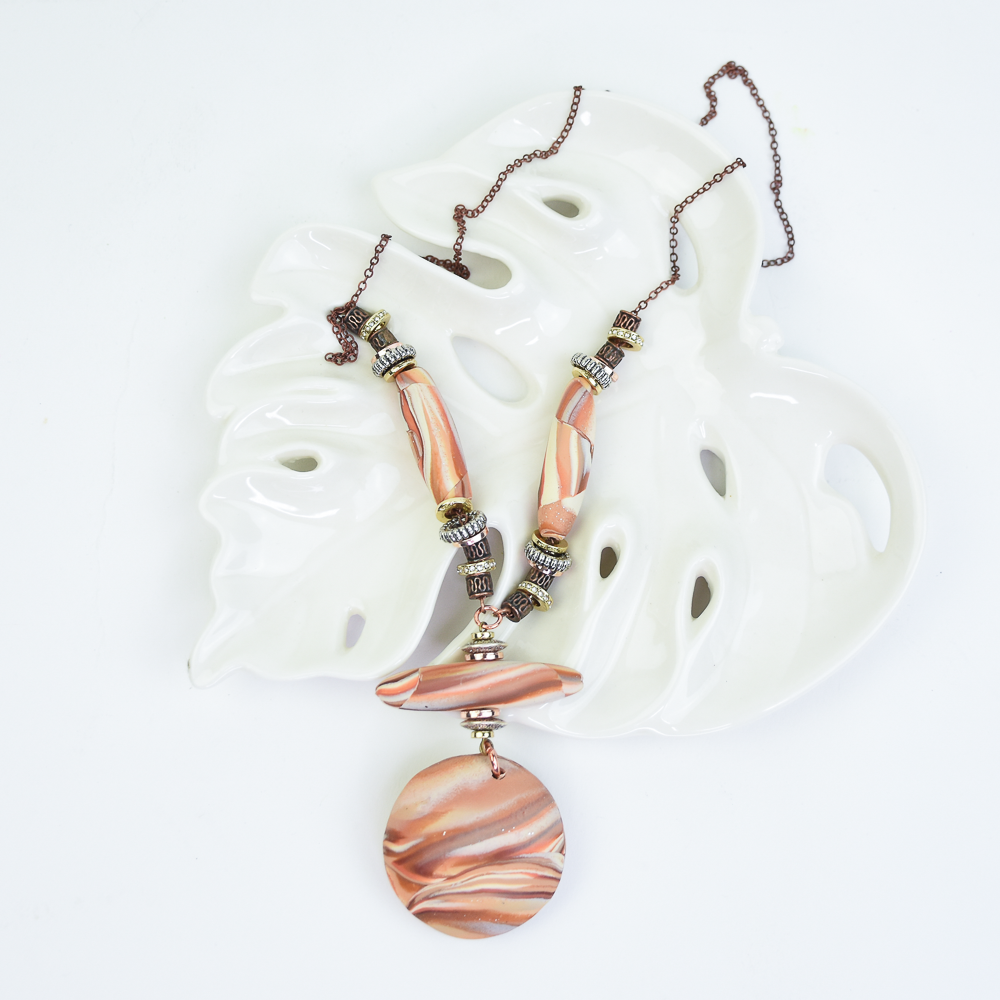
Sculpey Premo™ & Sculpey Soufflé™ - Hollow & Tube Bead Necklace

Sculpey Premo™ & Sculpey Soufflé™ - Hollow & Tube Bead Necklace

Read More
Take your clay marbling technique to another level with this gorgeous project that combines colors and shapes. COMPLETION TIME: 105 Minutes to make, bake (twice), and assemble Created by Amy Koranek
Read Less
ADDITIONAL SUPPLIES
  • 26” Rose Gold tone very fine chain - the chain should be thin enough to string the various beads directly onto it
  • Wire cutters
  • 1” or 2” Eye pin
  • Flat round donut spacer beads in mixed metal colors in various sizes (12)
  • Lentil shaped spacer beads in mixed metal colors (2)
  • 4 mm Jump rings (2)
  • 6 mm Jump rings (2)
  • Metal barrel shaped beads (8)
  • Round flat textured spacer beads in mixed metal colors (4)
  • Round flat crystal edged spacer beads in metal colors (4)
  • Round nose pliers
  • Flat nose pliers
  • Dremel drill or pin drill or spring drill
View full details
Project Instructions

Step 1

Getting Started:

Please make sure your work area is covered and you are not working on an unprotected surface. We recommend working on the Sculpey® Oven-Safe Work Mat, wax paper, metal baking sheet, or disposable foil. Uncured clay may damage unprotected furniture or finished surfaces. Be sure to cover your crafting area appropriately.

Start with clean hands, unwrap and knead clay until soft and smooth, or condition by running clay though a Pasta Machine. We recommend using a designated machine for clay purposes only. When working with multiple colors, clean hands with soap and water or baby wipes (we have found that baby wipes work best) before switching colors. Shape clay, pressing pieces firmly together. Wash hands after use.

Baking (also called
Curing):

Begin by preheating oven to 275 °F (130 °C). After you are done creating; for best results bake/cure clay on an oven-proof surface such metal, aluminum foil, an index card or the Sculpey® Clay Mat at 275°F (130 °C) for 30 minutes per 1/4" (6
mm) thickness according to package directions. Oven safe glass or ceramic
surfaces are also acceptable for baking/curing; however please note that the
baking/curing times may take longer as the glass or ceramic surfaces take
longer to heat up. For best baking results, use an oven thermometer. DO NOT USE
MICROWAVE OVEN. DO NOT EXCEED THE ABOVE TEMPERATURE OR RECOMMENDED BAKING TIME.

Step 2

To start we will use the colors in these proportions:

1/4 bar Tan,

1/8 bar Terra Cotta,

1/8 bar Ivory,

1/8 bar Rose Gold Glitter,

1/16 bar Burnt Umber, and

1/16 bar Raw Sienna.

Make ropes in equal length from these amounts of clay.


Make
ropes in equal length from these amounts of clay.

Step 3

In the next steps I’m going to walk you through marbling the colors together to
achieve a marbled pattern that is very random and sophisticated. You can marble
as much or as little as you like by either continuing the steps, or stopping
short when you reach a degree of marbling that you prefer.


Bundle
the ropes together as shown so that each color shows.

Step 4

Roll the bundle on the work surface to press all colors together into one thick rope.

Step 5

Roll and twist the rope.

Step 6

Fold the rope in half twice on itself.

Step 7

Roll and twist the rope to thin it.

Step 8

Fold the rope in half twice on itself.

Step 9

Roll and twist the rope to thin it again.

Step 10

Coil the rope.

Step 11

Roll the coil into a ball.

Step 12

Cut the ball in half with a Clay Blade.

Step 13

Set one half aside.

Roll one half flat with a Clay Roller.

Step 14

Square the sheet by pulling out corners.

Step 15

Fold each corner to the middle.

Step 16

Roll the folded sheet with the Clay Roller to flatten to about 1/8” thick.

Step 17

Cut out two 1-1/2” circles using Circle Cutters.

Step 18

Carefully press the circles to the third largest dome on the Hollow Bead Maker.

Step 19

From the 1/2 that was set aside in Step 13, roll another square shaped sheet not more than 1/8” thick.

Step 20

Cut out three triangles using the Clay Blade. The triangles should be about 2-1/2” long and 1-1/4” wide.

Step 21

Starting with the narrow end of the triangle, wrap it around the Medium Etch ‘n’ Pearl Tool.

I’m using very fine chain in my final design which is smaller than the diameter of
the Medium Etch ‘n’ Pearl. If your chain is heavier, you may want to roll your
beads on the Large Etch ‘n’ Pearl Tool instead to create a larger hole.

Step 22

Keep wrapping until the triangle is completely wrapped.

Step 23

Carefully roll the clay to smooth it on the work surface while it is on the Etch ‘n’
Pearl. This is a great way to make hollow tube beads with the hole already in
them.

Step 24

Carefully remove the tube bead from the Etch ‘n’ Pearl.

Repeat to make three beads as shown. I made one slightly longer for my focal bead.

Trim the hole ends neatly as needed with a Clay Blade.

Bake the three tube beads and the hollow bead on the Hollow Bead Maker following the baking instructions for Sculpey Premo™.

Allow to cool completely before handling.

Step 25

Use sandpaper from the Bead Making Kit to smooth the rims of the two hollow beads completely flat.

Step 26

Test the two hollow sides pressing the flat edges together to make sure they fit
together really neatly. Sand more as needed to make a tight fit.

Step 27

Turn the Hollow Bead Maker upside down to provide a well for your hollow bead to be cradled in. Place a very thin smear of Oven Bake Clay Adhesive on the flat edge of one half of the hollow bead. Carefully match the other half of the hollow
bead edge to edge sandwiching the Oven Bake Clay Adhesive between the halves.
Carefully place the hollow bead in the hollow bead maker so it is cradled
during baking. Bake again following the baking instructions for Sculpey Premo™.
Allow to cool completely before handling.

Step 28

Here is the layout for our clay elements. I’m placing the slightly larger bead just
above the hollow bead.

Step 29

Drill a hole through the top edge of the hollow bead with a Dremel drill, pin drill, or
spring drill.

Step 30

Drill a hole vertically through the larger of the tube beads.

This will be the layout for the tube bead with the vertical hole and the bead
elements that go with it. They will be assembled with an eye pin to turn them
into a connector for the hollow bead.

Step 31

Assemble the flat beads and tube bead as shown on an eye pin.

Step 32

Trim the eye pin to a 3/8” tail with wire cutters. Curl the trimmed tail into another
eye with round nose pliers.

Step 33

Use a 6 mm jump ring to attach the hollow bead to the bottom of the tube bead
connector.

String the other beads onto the chain as shown.

Connect 4 mm jump rings to the ends of the chain using flat nose pliers.

Connect another 6 mm jump ring to the 4 mm jump rings on the ends of the chain and to the eye at the top of the tube bead connector to finish.