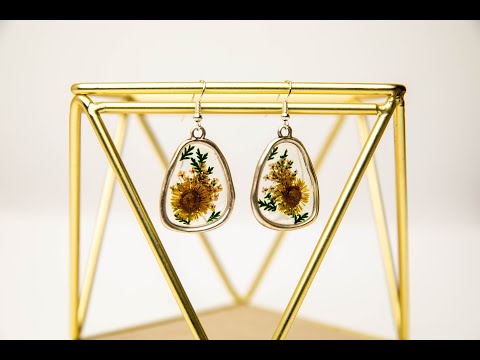
Liquid Sculpey® Birth Flower Earrings

Liquid Sculpey® Birth Flower Earrings

Designed by Amy Koranek
Read More
How fun to create earrings with your birth month flower in a mini version! Actually, you could just use your favorite dried flowers as well! TIME TO COMPLETE: 60 Minutes to make, bake, and assemble
Read Less
ADDITIONAL SUPPLIES
  • Paper towel
  • Large open silver tone bezels (2) with connector eyes
  • Flat dried flowers and greenery to coordinate with the birth month
  • Glass or polished silicone baking surface
  • Small sharp scissors
  • Tweezers
  • Silver tone ear wires (2)
  • Optional - 4 mm silver tone jump rings (2)
  • Flat nose pliers
View full details
Project Instructions

Step 1

Getting Started with Liquid Sculpey®:

Please make sure your work area is covered and you are not working on an unprotected surface. We recommend working on the Sculpey® Oven Safe Work Mat, wax paper, metal baking sheet, or disposable foil. Uncured Liquid Polymer Clay may damage unprotected furniture or finished surfaces. Be sure to cover your crafting area appropriately. - Stir Liquid Sculpey® completely. Thin with Sculpey® Liquid Clay Softener as needed - Wash hands after use (we have found that baby wipes work best)

Baking (also called Curing):

 -It is important to use oven thermometer when you bake the liquids so that you can ensure your oven is at the correct temperature.

-Do not microwave the liquids. They must be baked in a Preheated oven at 275 ºF (130 ºC) for liquid colors and 300 ºF (149 ºC) for Clear – Do not exceed baking temperatures.

-If your piece is less than 1/4” bake for 15 minutes. For thicker pieces that are 1/4” or above bake for 30 minutes.

-If your liquid project has become yellowed or discolored in the oven, when you remake it, tent it by placing either – folding an index card in half and placing your project under it by using aluminum foil over your project.

Step 2

Lay open bezels on a glass or silicone baking surface with the front sides facing
upward. My glass surface just happens to have a grid on it - this is not
necessary. The purpose of the glass or silicone baking surface is so that the
baked Liquid Sculpey® (LS) can easily be peeled away from it; and, the slick
surface will make the LS shiny.

Squeeze a puddle of very well stirred Clear LS into the center of each bezel. It does should not fill the bezel at this point.

Lay
pieces of dried greenery in the puddle.

Step 3

Add a couple of drops of Clear LS on top of the greenery, still not filling the
bezel, and lay a coordinating layer of flowers down, like baby’s breath, as
shown here.

Step 4

Add a couple more drops of Clear LS on top of the baby’s breath. Add the main flower to the design. Make sure all flowers are sinking into the LS with tweezers. Add
more drops of LS as needed.

Step 5

Here’s how the design should look before baking. Just a thin layer of LS covering all
the flowers. A little LS will probably leak out under the bezels and we will
trim this away after baking.

Step 6

Bake the bezels on the glass (or polished silicone) baking surface following the
baking instructions for Liquid Sculpey®. Allow to cool completely before
carefully removing them from the glass.

Step 7

Trim the excess baked LS carefully around the outside edges with small sharp
scissors. Make sure to trim away from the eye of the bezel if it is filled.

Step 8

Repeat trimming for second bezel.

Step 9

Here is the layout to assemble the earrings.

Step 10

Connect the ear wires directly to the bezels with flat nose pliers. If your bezels have
connecting eyes that are perpendicular to the bezel frames, you can add a jump
ring in between to orient the earrings as desired.