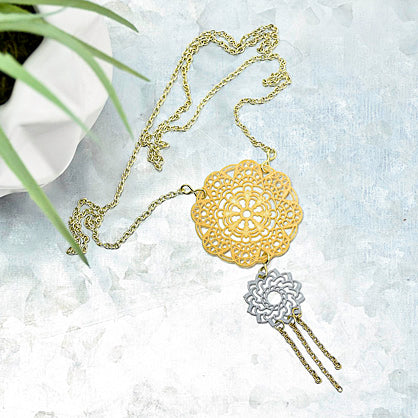
Liquid Sculpey® Double Mandala Necklace
Liquid Sculpey® Double Mandala Necklace
Designed by Amy Koranek
Read More
Read Less
Liquid Sculpey® metallic colors team up with create a classic color combination for this go-to pendant.
TIME TO COMPLETION:45 minutes including assembly
ADDITIONAL SUPPLIES
- 4 mm Bright gold tone jump rings (3)
- Bright gold tone double connectors (3)
- 24” Bright gold tone chain with clasp
- 5” Bright gold tone chain - divided
- Wire cutters
- Flat nose pliers

Project Instructions
- Getting Started:
- Baking:
Fill the large sized Mandala in the Silicone Mold with Gold Liquid Sculpey® (LS). Squirt some LS in the center of the mold and either spread it into the details with your fingertip or with the squeegee. When the shape is filled, pull the squeegee at a 45 degree angle across the mold removing excess liquid. If possible drag the excess LS from the squeegee back into the open bottle.
Either bake just the Gold mandala in the mold or you can very carefully fill one of the smaller shapes with Silver LS.
Bake the mandalas following the baking instructions for LS.
When the mold is completely cool, carefully remove the pieces. Clean the mold under running water and dry completely
Either bake just the Gold mandala in the mold or you can very carefully fill one of the smaller shapes with Silver LS.
Bake the mandalas following the baking instructions for LS.
When the mold is completely cool, carefully remove the pieces. Clean the mold under running water and dry completely

Connect the large Gold mandala to the smaller Silver mandala with a double connector. Place double connectors to the top of the Gold mandala as shown.

Cut the extra chain to two 1.25” pieces and one 1.5” piece. Attach the chains with the longer one in the center along the bottom edge of the Silver mandala with jump rings. Attach the necklace chain with the clasp to the connectors at the top of the Gold mandala.


