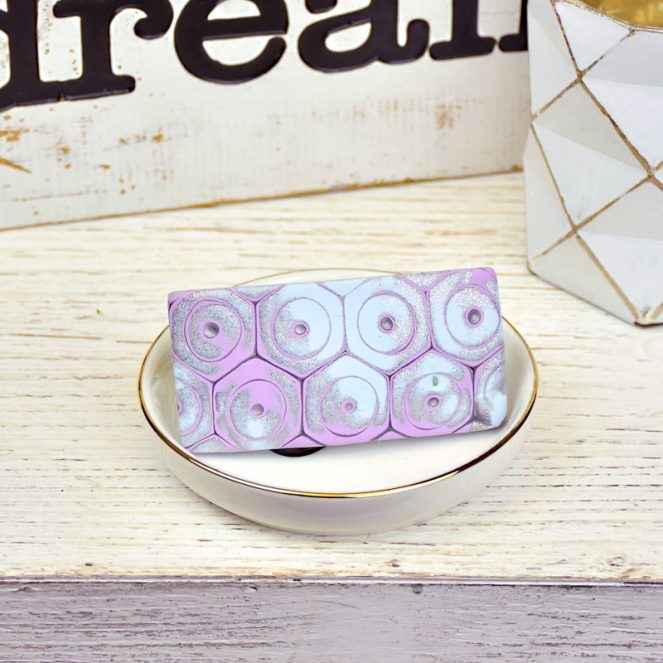
Sculpey Premo™ Hexagon Mokume Gane Hair Barrette
Sculpey Premo™ Hexagon Mokume Gane Hair Barrette
Read More
Read Less
Hair accessories are very popular and now you can make your own!
TIME TO COMPLETE:75 minutes to make and bake
ADDITIONAL SUPPLIES
• Barrette finding
• Silicone glue or super glue gel

Project Instructions
- Getting Started:
Start with clean hands, unwrap and knead clay until soft and smooth, or condition by running clay though a Pasta Machine. We recommend using a designated machine for clay purposes only. When working with multiple colors, clean hands with soap and water or baby wipes (we have found that baby wipes work best) before switching colors. Shape clay, pressing pieces firmly together. Wash hands after use.
- Baking:
Sheet 1 ounce of each color through the pasta machine on the thickest setting. Make each sheet is approximately the same size and shape.

Stack the colors up as shown.

Roll over the stack of colors with the Acrylic Clay Roller to flatten it.

Press the stack of colors through the pasta machine on the thickest setting.

Cut the thinned sheet into four equal sections and pile them up as shown. Roll over them with the Acrylic Clay Roller to thin slightly and to seal all the layers together. Roll so that the slab is not more than 1/4” thick.

Flip the stack of colors over so the Silver is on the top. For the Mokume Gane technique it’s nice to have a dark color on top because the top color will define the details of the pattern after the top layers are sliced away. Make sure this slab of stripes is large enough to make the size of barrette that you want

Press the Small Hexagon cutter through the slab as deeply as possible. However, for this project, you do not have to cut all the way through the slab.

Use the circle shape to cut a deep circle into the center of each hexagon. Again, make these cuts deep but you do not have to cut all the way through.

Press the Medium Style ‘n Detail ball tool into each center making a neat divot.

Roll the clay with the Acrylic Clay Roller to heal the cuts back together and make the divots more shallow.

Use the flexible blade to shave away the top layer of clay.

Keep shaving away the top layers to reveal the cool pattern that emerges.

Shave away all the raised surfaces until you are happy with the design and the pattern of colors in the design.

Trim the edges to make the size of barrette that you would like to have.

Smooth all the edges with your fingertips.

If your barrette finding is curved, gently drape the clay piece over the barrette so the clay follows the same curve. Carefully transfer both the barrette and the clay to a baking pan and bake following the baking instructions for Premo. When the clay is completely cool, permanently glue the barrette to the clay piece using silicone glue or super glue gel. Allow the glue to dry completely.


