Skip to product information
1 of 1

Sculpey III® Spooky Ghosts

Sculpey III® Spooky Ghosts

Designed by Amy Koranek
Read More
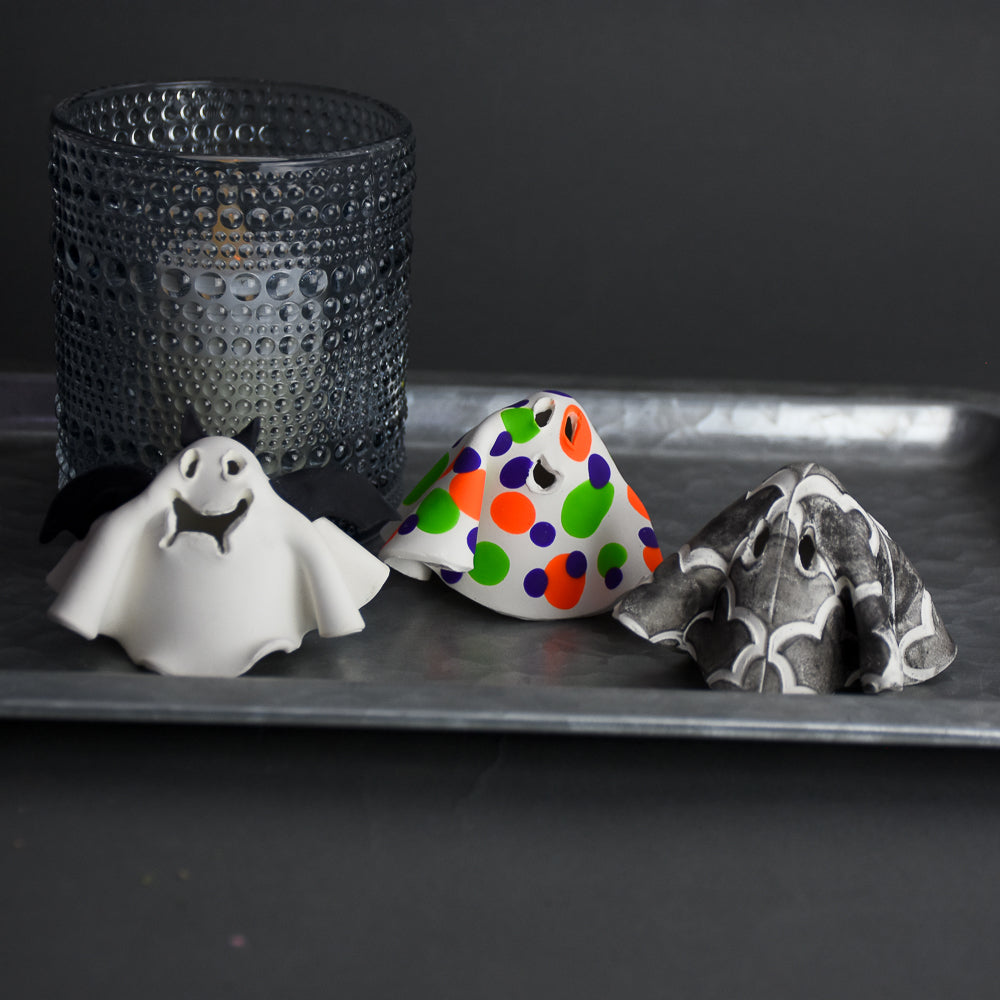
You will have a blast creating these adorable little ghosts! Or have your friends over and have a "ghost party" as you all create your own ghost(s). TIME TO COMPLETION: 90 Minutes to make and bake (three times) Note: is for creating all 3 ghosts.
Read Less
ADDITIONAL SUPPLIES
  • 3-3/4” Circle cutter
  • Scissors
  • Black mica powder
  • Shot glass
  • Marble
  • Battery operated tea lights
View full details
Project Instructions

Step 1

Getting Started:

Please make sure your work area is covered and you are not working on an unprotected surface. We recommend working on the Sculpey® Oven
Safe Work Mat, wax paper, metal baking sheet, or disposable foil. Uncured
clay may damage unprotected furniture or finished surfaces.
Be sure to
cover your crafting area appropriately.

Start with clean hands, unwrap and knead clay until soft and smooth, or condition by running clay though a Pasta Machine. We recommend using a designated machine for clay purposes only. When working with multiple colors, clean hands with soap and water or baby wipes (we have found that baby wipes work best) before switching colors. Shape clay, pressing pieces firmly together.  Wash hands
after use.

Baking:

Begin by preheating oven to 275 °F (130 °C). After you are done creating; for best results bake clay on an oven-proof surface such as metal, aluminum foil, an index card or the Sculpey® Oven Safe Work Mat at 275°F (130 °C) for 15 minutes per ¼" (6 mm) of thickness according to package directions. Oven safe glass or ceramic
surfaces are also acceptable for baking; however please note that the baking
times may take longer as the glass or ceramic surfaces take longer to heat up. For
best baking results, use an oven thermometer. DO NOT USE MICROWAVE OVEN. DO NOT EXCEED THE ABOVE TEMPERATURE OR RECOMMENDED BAKING TIME.

Step 2

For the baking prop, I used a shot glass and a marble. A shot glass is the perfect
size to accommodate the battery-operated tea light later.

Step 3

Turn the shot glass upside down and place the marble on top. The marble is to keep
the top of the little ghosty rounded.

Step 4

Sheet White clay to 1/8” thick sheet with the Acrylic Clay Roller or a pasta machine on the thickest setting. Cut out a 3-3/4” circle.

I cut my texture sheets apart with scissors to make sure I am only getting the
texture that I want for my design. Place one corner of the texture sheet in the
center of the circle.

Press hard with fingertip pressure as deeply as the texture will allow. You can also
use the Roller to put pressure on the texture sheet.

Step 5

Texture each quadrant of the circle making sure to line up the pattern so it repeats.
For the two quadrants at the top of the circle, I turned the pattern upside
down to mirror the bottom patterns.

Step 6

Poke two eye holes through the “sheet” with the Blunt Point Tool. Use the tool to
stretch the eye holes into ovals.

Step 7

Use the tip of your finger to spread black mica powder all over the raised surfaces
of the sheet.

Step 8

Drape the little ghost sheet over the marble and the shot glass. Use your fingertips to create pleats in the sheet. Try to make the bottom of the sheet even so that the ghost can stand up on the edges of the sheet after baking.

Bake following the baking instructions for Sculpey III®.

Step 9

Allow to cool completely before lifting the ghost off of the support. Center over a
battery operated tea light for display.

Step 10

For the spotted ghost, start with another 3-3/4” circle of White as in Step 4
above. Make a little rope of Granny Smith and pinch off pieces smashing them
flat to the sheet. Roll over them to smooth them level.

Step 11

Repeat Step 10 with Just Orange spots and roll over to smooth.

Step 12

Finally add smaller Purple spots and roll over them too.

Step 13

Use the Blunt Point tool to make eye holes and a lopsided mouth.

Step 14

Drape over the shot glass/marble form. Shape the sheet with your fingertips to make
pleats and drapes. Bake following the baking instructions for Sculpey III®.
Allow to cool completely before standing over a battery-operated tea light.

Step 15

For the Batty Ghost you will need another large White circle. Also sheet Black to
1/8” thick. Cut out a 1-1/4” circle and cut it in half with the Clay Blade.

Step 16

Use the edge of the 3/4” circle cutter to remove part of the middle of the straight
edge from the two half rounds.

Step 17

Use the same size cutter to remove the tips of the half rounds to make bat wings.

Step 18

For this guy I used the Blunt Point Tool to poke in eye holes and a smile. Then I
dragged some little fang marks down from the bottom edge of the smile.

Drape the White circle over the shot glass marble form and pleat the sheet.

Then add the Black bat wings and pinch the White pleats around the wings to hold them in place.

Add a couple little Black ear shapes to the top - these are just triangles.

Bake on the shot glass/marble following the baking instructions for Sculpey III® and allow to cool completely before handling.

Step 19

Place over a battery-operated tea light for display.

Step 20

Here’s a group shot of the little guys all together…. Boo!