Skip to product information
1 of 1

Liquid Sculpey® Tiled Trinket Tray

Liquid Sculpey® Tiled Trinket Tray

Designed by Amy Koranek
Read More
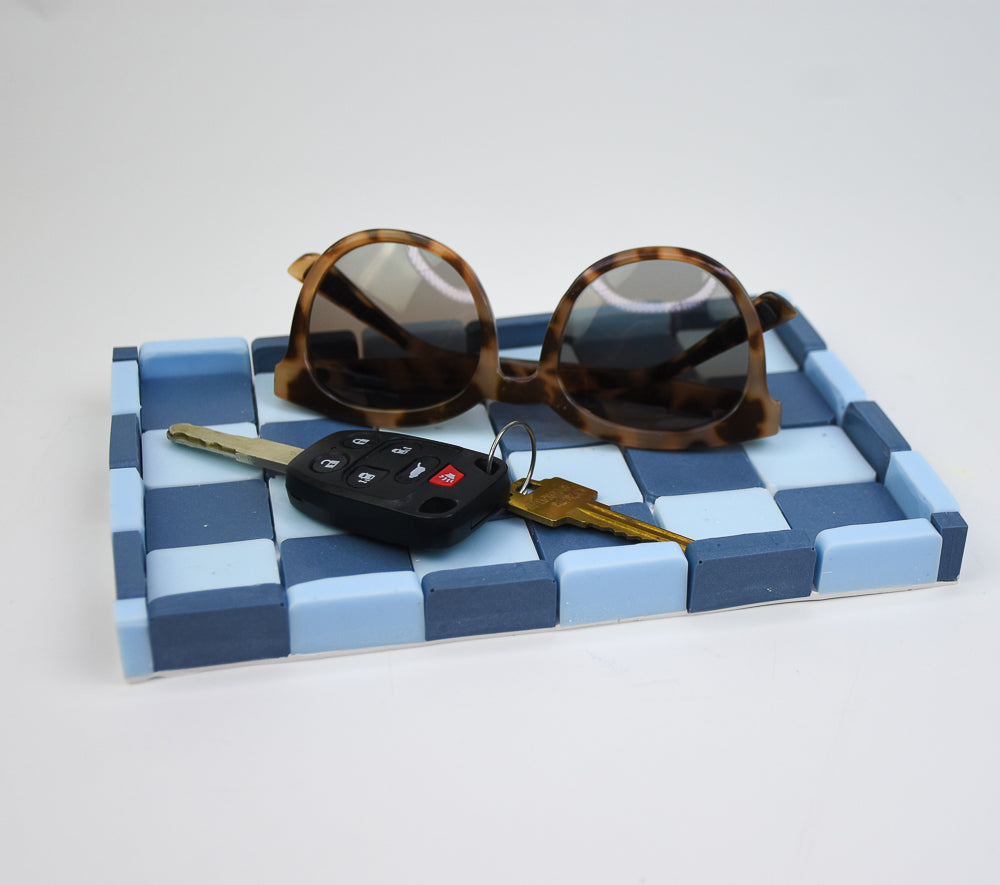
Team the dusty blues of Liquid Sculpey up with a tile mold to create this cool little key tray! TIME TO COMPLETE: 2 Hours to make and bake (twice)
Read Less
ADDITIONAL SUPPLIES
  • Paper towel
  • Silicone baking tray with 1.25”X1.25” square wells
  • Small sharp scissors
View full details
Project Instructions

Step 1

Getting Started with Liquid Sculpey:

Please make sure your work area is covered and you are not working on an unprotected surface. We recommend working on the Sculpey® Oven
Safe Work Mat, wax paper, metal baking sheet, or disposable foil. Uncured
Liquid Polymer Clay may damage unprotected furniture or finished surfaces. Be
sure to cover your crafting area appropriately. - Stir Liquid Sculpey®
completely. Thin with Sculpey® Liquid Clay Softener as needed - Wash hands
after use (we have found that baby wipes work best)

Baking:

-It is important to use oven thermometer when you bake the liquids so that you can ensure your oven is at the correct temperature.

-Do not microwave the liquids. They must be baked in a Preheated oven at 275 ºF (130 ºC) for liquid colors and 300 ºF (149 ºC) for Clear – Do not exceed baking temperatures.

-If your piece is less than 1/4” bake for 15 minutes. For thicker pieces that are 1/4” or above bake for 30 minutes.

-If your liquid project has become yellowed or discolored in the oven, when you remake it, tent it by placing either – folding an index card in half and placing your project under it by using aluminum foil over your project.

Here’s a tip for baking perfectly in silicone molds. Dampen a dish towel with water and wring out as much of the water as you can. Fold the damp towel so that the molds can sit level on top of it. The damp towel will slow down the curing process so that the LS will cure evenly throughout and avoid warping.


Step 2

The size of my finished tray is approximately 9” long X 5” wide. You can adjust these instructions to accommodate the size tray you wish to create.

I’m also making extra tiles so that if there are any with bubbles or imperfections I can have extras to choose from.

Fill as many wells with Blue Gray Metallic Liquid Sculpey (LS) as you wish. I need at least 18 of each color, so I’m making extras as I stated previously.  

Tap the mold vigorously on the work surface to release air bubbles.

Step 3

In the Silicone Mixing Cup, pour in 30 ml of Translucent Turquoise LS.

Step 4

Add 5 ml of White LS or 2 of the measuring scoops from the Silicone Mixing Set.

Step 5

Stir until completely mixed. Clean tool with paper towel.

Step 6

Add Translucent Turquoise to at least 18 wells in the mold. The mold wells should be filled to equal depth for each tile.

Tap the mold vigorously on the work surface to release air bubbles.

Bake following the baking instructions for Liquid Sculpey®.

Step 7

Allow to cool completely before flexing the mold to release the baked pieces.

If there are little bits of extra baked LS on the back edges of the pieces, this can easily be trimmed away with small sharp scissors.

Step 8

Sheet 2 bars of Premo™ White through a pasta machine on the thickest setting or hand roll to 1/8” thick with an Acrylic Clay Roller. This sheet should be at least 1/4” larger than your finished tray size in all directions.

I’m going to assemble my tray on top of a glass baking tile that happens to have a grid on it. This is not necessary but it is helpful for keeping tiles straight.

It is important to assemble your tray now on the baking surface that will go into the oven. Once assembled you will not want to move the tray again, so construct it in place on a baking surface.

In this photo, I’m using the side of my Clay Blade to make sure the pieces are all in line. I’m also using the edge of the Clay Blade to gauge the thickness of the spaces between each row and each column of tiles.

Step 9

Lay out all the tiles in checkerboard fashion in a 6 X 4 grid.

Put some pressure on each tile so that they make an impression in the White clay base.

Carefully remove a row of tiles at a time. The bottom row has been removed, and placed directly under it’s position.

Place a puddle of White LS where each tile will go.

Repeat for all rows.

Step 10

Replace all tiles in the pattern on top of a little puddle of White LS. The White LS acts as the perfect adhesion between the baked tiles and the raw White Premo™.

Leave a border of the White Premo™ all the way around.

Step 11

Cut tiles in half with a Clay Blade to create the border pieces.

Step 12

The border pieces can be held to the White base with a bit of White LS.

You will also need 1/4 slivers cut for the corners - 2 of each color.

Step 13

Trim the excess White Premo™ all the way around the edges.

Bake following the baking instructions for Sculpey Premo™.

Step 14

Allow to cool completely before carefully releasing it from the baking surface with the Clay Blade.