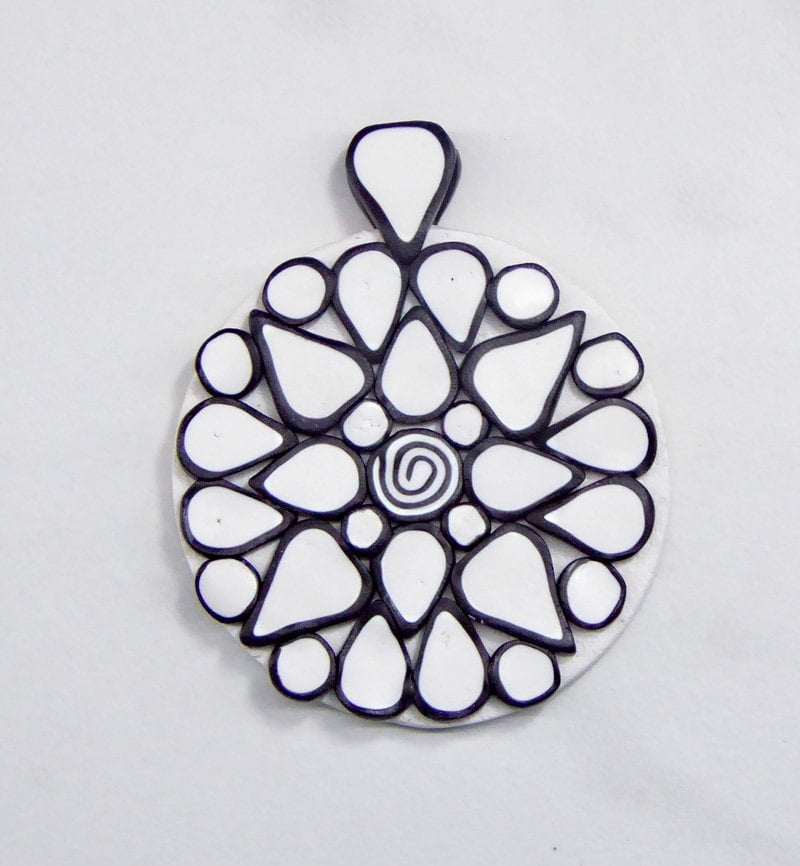
Premo Simple Cane Mandala Pendant
Premo Simple Cane Mandala Pendant
Read More
This is a symmetric mandala design composed of simple cane slices. Start off simple and add complexity by adding more colors!
Designed by: Krithika Parthan
NOTE: Souffle Igloo and Poppy Seed can be substituted for the Premo - or select your own colors!
Read Less
NOTE: Souffle Igloo and Poppy Seed can be substituted for the Premo - or select your own colors!
ADDITIONAL SUPPLIES
• Ceramic tile• ½ size Letter stamps L, V, E and Heart shape
• Acrylic Paints: white, dark red
• Paint brushes
• Wire cutters
• Pliers
• Clasp
• Jump Rings
• Eyelets
• Chain

Project Instructions
- Getting Started:
Start with clean hands, unwrap and knead clay until soft and smooth, or condition by running clay though a Pasta Machine. We recommend using a designated machine for clay purposes only. When working with multiple colors, clean hands with soap and water or baby wipes (we have found that baby wipes work best) before switching colors. Shape clay, pressing pieces firmly together. Wash hands after use.
- Baking:
Start by making some simple canes: a bullseye cane and a spiral.For the bullseye, condition about an ounce of white clay and roll it into a log that’s 3” long. This will be the inner color. Condition an ounce of black clay and roll out a sheet at the second thickest setting on your clay machine. Trim it to a sheet that’s the same height as the bullseye. Cut one clean edge, wrap it around the white log and let the clay overlap. Using the overlap mark, cut away excess black clay. Smooth out the joint.

For the spiral cane, condition half an ounce of black and white clay. Roll this out on the third thickest setting on the clay conditioning machine. Create two rectangles about 3” by 4”. Lay one sheet on top of the other and roll it out again through the thickest setting: this will give nice thin lines. Lay this sheet on your work surface with the inner color towards you, here it’s white. Starting at one short end, roll up the clay sheet to create a spiral. Bevel the edge and smooth.


The next step is reducing these canes. Reducing symmetric canes like these can be done by rolling them out on the surface with firm, even pressure. I like to use a piece of plexiglass for this, but that’s not necessary.For this project, you need to reduce the bullseye cane to a variety of sizes in circle and teardrop shape. I suggest at least three sizes. Cut each sized log into two sections. Pinch one of them to form a teardrop shape. You can simply press the cane against your work surface with your hand.Reduce the spiral to two different sizes. You can make some teardrop shapes sections if you like.

We will let the canes rest before slicing them to reduce distortion. While they are resting, make your base.Use the remaining quarter package of white clay to make a sheet on the thickest setting of your clay conditioning machine. I like to texture both sides by placing the sheet between sandpaper sheets and going over it with a hand roller.Cut out circles of clay. You should get at least two circles of 1 ¾”. You can prebake your base if you like.

To start assembling the design, take several slices off your canes. Use a stiff sharp blade and cut while looking down on the cane. For round cane, roll the cane as you cut to maintain the shape as best as you can.
Mark the center of your clay base. If the base is baked, apply some Bake n' Bond before applying the cane slices. Start with a round spiral or bullseye slice in the center. Add a layer of slices around this. Fill in the gaps with more spiral or bullseye slices.


Keep going till you reach the edge. To make a simple bail, cut two teardrop cane slices. Place one on the front on the edge so some part of the cane is off the edge. Place the other slice on the back in a matching position. Pinch the top of the two slices together. If you want a larger gap for your stringing material a bamboo skewer or knitting needle threaded through the gap before baking will make the gap the size you wish.


Bake the pendant as directed in Step 1. Your mandala pendant is ready!


